SPIRAL CABLE INSTALLATION

-
PLACE FRONT WHEELS FACING STRAIGHT AHEAD
-
Check that the front wheels are facing straight ahead.
-
-
INSTALL SPIRAL CABLE SUB-ASSEMBLY
-
As shown in illustration, bind the 2 wire harnesses with the 2 wire harness clamps.
-
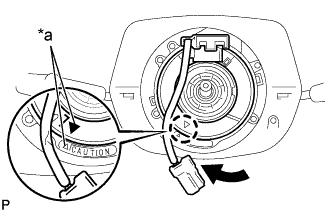
Put new vinyl tape 2 or 3 times around the place shown in the diagram.
-
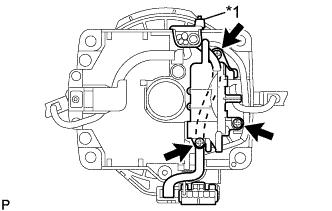
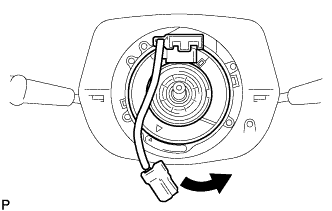
Text in Illustration *1 Cord Clamp As shown in illustration, locate the wire harness of spiral cable sub-assembly along the back side of turn signal switch assembly.
-
Connect the connector to the spiral cable sub-assembly.
-
Install the headlamp dimmer switch to the turn signal switch assembly with the 3 screws.
-
wire harness with a new cord clamp.
-
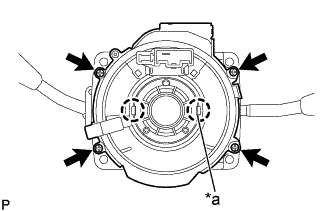
Text in Illustration *a Project Part Combine the hole part of cancel cam with the project part of spiral cable sub-assembly, then install with the 4 screws.
Note
When replacing the spiral cable sub-assembly with new one, remove the lock pin before installing the steering wheel assembly.
-
-
INSTALL TURN SIGNAL SWITCH ASSEMBLY
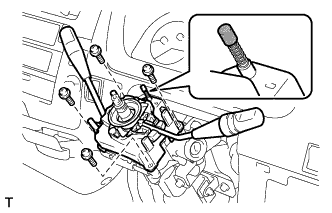
-
Install the turn signal switch assembly with 4 screws.
Note
In the model without SRS airbag, lightly coat the horn contact with the grease.
-
Connect the connectors and wire harness clamps.
-
-
CENTER SPIRAL CABLE
-
Check that the ignition switch is OFF.
-
Check that the battery negative terminal is disconnected.
Note
Do not start the operation for 90 seconds after removing the terminal.
-
Turn the cable counterclockwise by hand until it becomes harder to turn.
Tech Tips
The cable will rotate about 3.5 turns to either left or right of the center.
-
Text in Illustration *a Matchmarks Then rotate the cable clockwise about 3.5 turns to align the marks.
-
-
INSTALL STEERING WHEEL ASSEMBLY
-
Align the matchmarks on the steering wheel assembly with the one on the steering main shaft.
-
Install the steering wheel set nut.
- Torque:
- 50 N*m { 510 kgf*cm, 37 ft.*lbf }
-
-
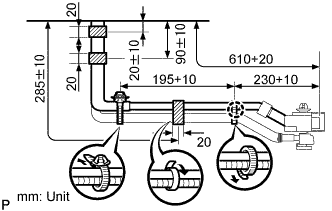
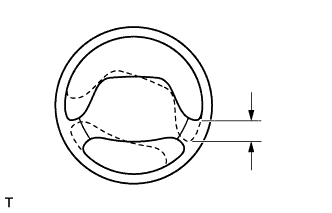
INSPECT STEERING WHEEL CENTER POINT
-
INSTALL HORN BUTTON ASSEMBLY
-
INSPECT HORN BUTTON ASSEMBLY
-
Stop the vehicle and face the tires straight ahead.
-
Move the steering wheel gently up and down with your hand, check the steering wheel free play.
Maximum free play 40mm (1.57 in.)
-
-
INSPECT SRS WARNING LIGHT