PTC HEATER ASSEMBLY REMOVAL

-
DRAIN ENGINE COOLANT (for 1KD-FTV)
CAUTION:
To avoid the danger of being burned, do not remove the radiator cap while the engine and radiator are still hot. Thermal expansion will cause hot engine coolant and steam to blow out from the radiator.
-
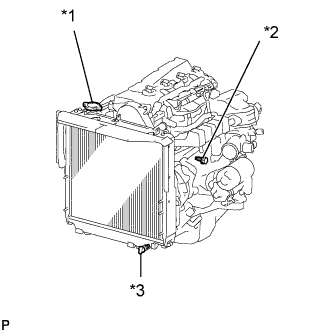
Text in Illustration *1 Radiator Cap *2 Engine Drain Plug *3 Radiator Drain Plug Loosen the radiator drain plug (on the radiator).
-
Remove the radiator cap.
-
Loosen the engine drain plug (on the oil cooler cover), and drain the coolant.
-
Drain the coolant from the reservoir tank.
-
Tighten the engine drain plug.
- Torque:
- 8.0 N*m { 82 kgf*cm, 71 in.*lbf }
-
-
DRAIN ENGINE COOLANT (for 2KD-FTV)
CAUTION:
To avoid the danger of being burned, do not remove the radiator cap while the engine and radiator are still hot, as fluid and steam can be blown out under pressure.
-
Remove the radiator cap.
-
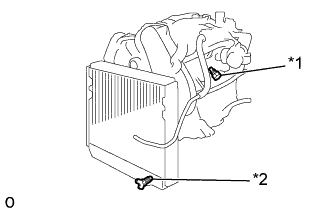
Text in Illustration *1 Engine Drain Plug *2 Radiator Drain Plug Loosen the radiator drain plug (on the right side of the radiator lower tank) and engine drain plug (on the oil cooler cover), and drain the coolant.
-
Close the drain plugs.
-
-
DISCONNECT CABLE FROM NEGATIVE BATTERY TERMINAL
-
REMOVE RADIATOR GRILLE
-
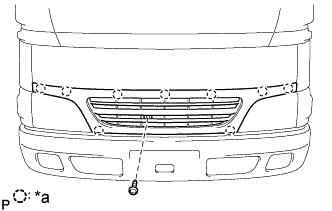
Text in Illustration *a Clip Remove the screw and 9 clips and radiator grille.
-
-
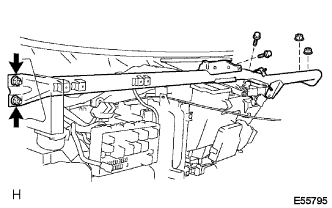
DISCONNECT HEATER WATER HOSE INLET B
-
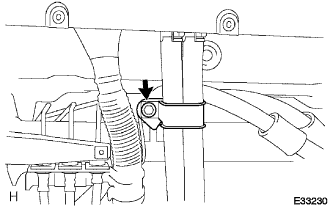
Remove the bolt and remove the heater bracket.
-
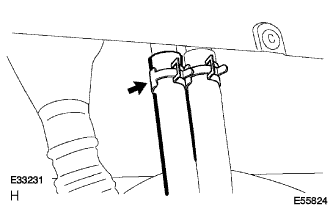
Slide the clip and disconnect the heater water inlet hose.
-
-
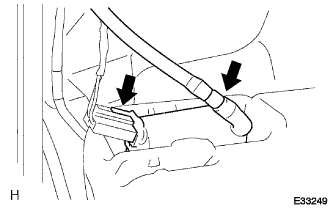
DISCONNECT HEATER WATER HOSE OUTLET B
-
Slide the clip and disconnect the heater water inlet hose.
-
-
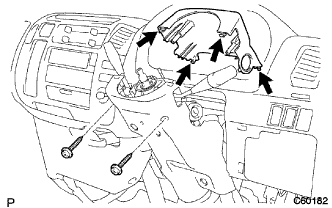
REMOVE INSTRUMENT PANEL SUB-ASSEMBLY
-
Remove the 2 clips.
-
Remove the 2 nuts<F> and 7 bolts<A><B>.
-
Disconnect the connectors and remove the instrument panel sub-assembly.
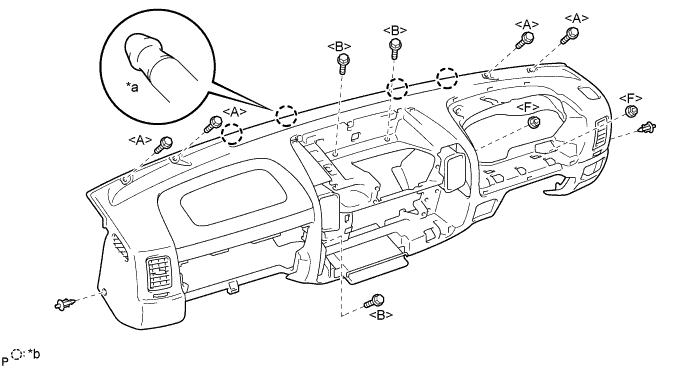
Text in Illustration *a Pin *b 4 Pins
-
-
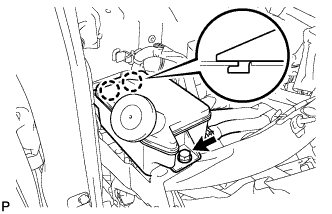
REMOVE BRAKE MASTER CYLINDER RESERVOIR SUB-ASSEMBLY
-
Remove the bolt and disconnect the brake master cylinder reservoir.
-
-
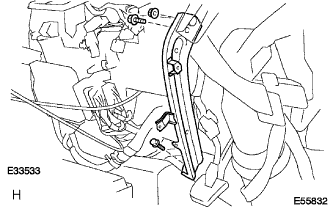
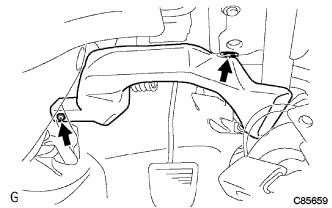
REMOVE INSTRUMENT PANEL NO. 1 BRACE SUB-ASSEMBLY
-
Remove the 2 bolts, nut and remove the instrument panel brace.
-
-
REMOVE FRONT DOOR SCUFF PLATE RH
-
REMOVE STEERING COLUMN UPPER COVER
-
Remove the 2 screws and steering column cover UPR.
-
-
REMOVE STEERING COLUMN LOWER COVER
-
Remove the clip, 2 screws and steering column cover LWR.
-
-
REMOVE NO. 2 AIR DUCT (for LHD)
-
Remove the 2 clips and remove the air duct (for Cold Area Specification Vehicles).
-
Remove the clip and remove the air duct (except Cold Area Specification Vehicles).
-
-
REMOVE NO. 1 AIR DUCT
-
Remove the 2 clips and the air duct.
-
-
SEPARATE STEERING COLUMN ASSEMBLY
-
Remove the 2 bolts and clamp bracket.
-
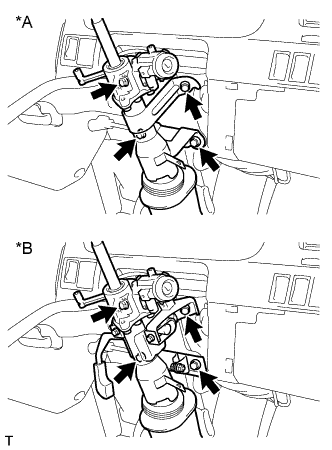
Text in Illustration *A Non-Tilt Column Assembly *B Tilt Column Assembly Remove the 4 steering column assembly set bolts and steering column assembly.
-
-
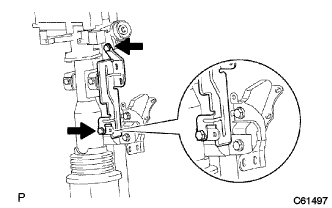
SEPARATE STEERING COLUMN LOWER TUBE ASSEMBLY
-
Remove the 4 bolts and separate steering column tube.
-
-
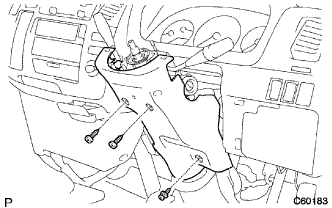
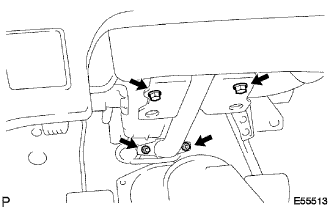
REMOVE INSTRUMENT PANEL REINFORCEMENT
-
Remove the 2 bolts, 4 nuts and remove the instrument panel reinforcement.
-
-
REMOVE WINDSHIELD WASHER JAR ASSEMBLY
-
Remove the 2 bolts and the windshield washer jar.
-
Disconnect the hose and connector from the washer pump.
-
-
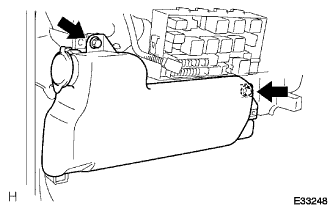
REMOVE NO. 1 AIR DUCT SUB-ASSEMBLY
-
Remove the 3 bolts and disconnect the relay block.
-
Remove the screw and disconnect the relay block.
-
Remove the bolt.
-
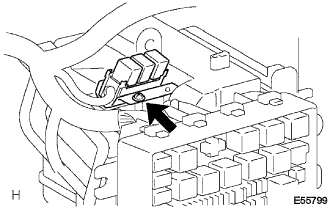
Disconnect the blower resistor connector.
-
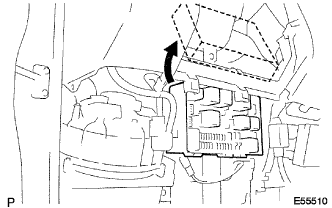
Disconnect the relay block.
-
Remove the 2 bolts, 4 screws and the air duct.
-
-
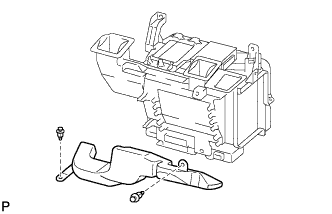
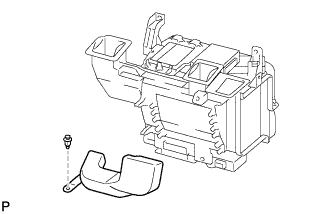
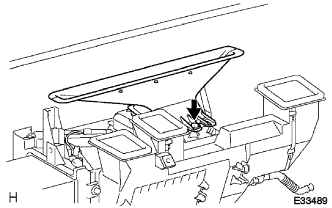
REMOVE LOWER DEFROSTER NOZZLE ASSEMBLY
-
Remove the screw and remove the lower defroster nozzle.
-
-
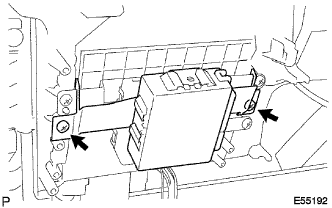
SEPARATE SKID CONTROL ECU ASSEMBLY
-
Remove the 2 screws and separate the skid control ECU.
-
-
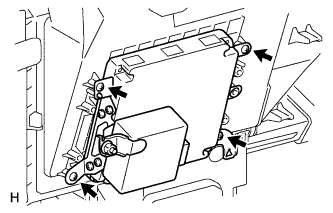
SEPARATE ECM (for 1KD-FTV, 2KD-FTV)
-
Remove the 4 screws and separate the ECM.
-
-
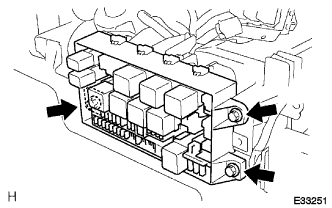
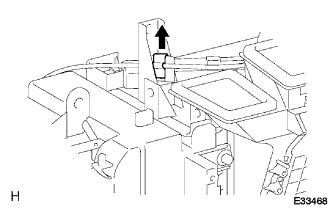
REMOVE HEATER RADIATOR ASSEMBLY
-
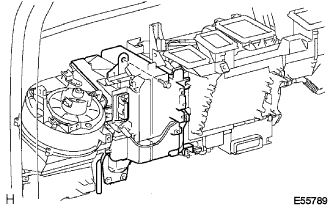
Disengage the 2 claws and disconnect the connector.
-
Disconnect the outer cable from the clamp.
-
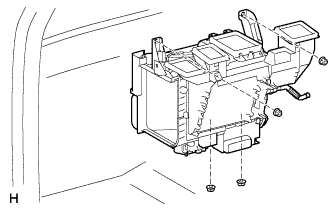
Remove the 4 nuts and the heater radiator.
-
-
REMOVE HEATER CONTROL CABLE SUB-ASSEMBLY
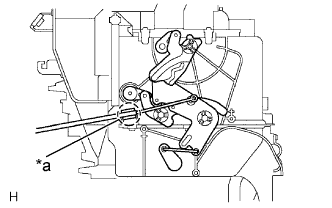
Text in Illustration *a Clamp
-
Disconnect the outer cable from the clamp.
-
Remove the inner cable.
-
-
REMOVE AIR MIX DAMPER CONTROL CABLE SUB-ASSEMBLY

Text in Illustration *a Clamp
-
Disconnect the outer cable from the clamp.
-
Remove the inner cable.
-
-
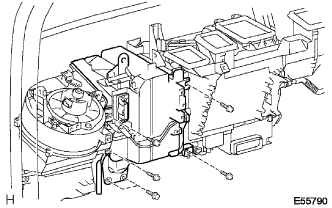
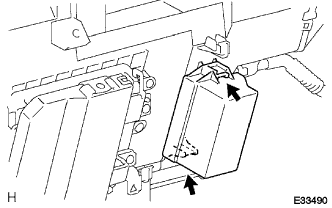
REMOVE PTC HEATER ASSEMBLY
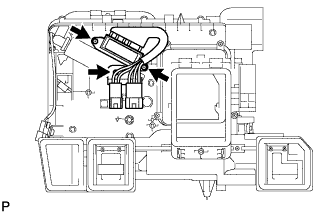
-
Remove the 3 screws and remove the PTC heater.
-