PARKING BRAKE ASSEMBLY REASSEMBLY

-
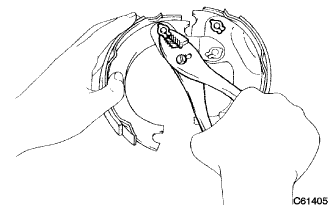
INSTALL PARKING BRAKE SHOE LEVER SUB-ASSEMBLY
-
Using pliers, install the parking brake shoe lever and 2 new C-washers.
-
-
INSTALL PARKING BRAKE SHOE ADJUSTER SUB-ASSEMBLY RH OR CENTER
-
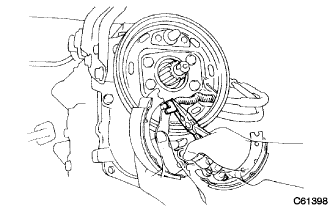
INSTALL PARKING BRAKE SHOE
-
Apply a light coat of high temperature grease to the contacting part of the backing plate and brake shoe.
-
Using pliers, connect the parking brake cable to the parking brake shoe lever.
-
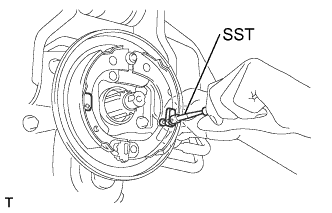
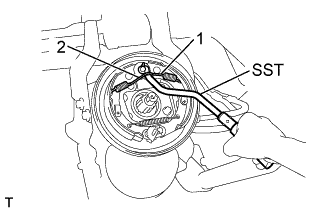
Using SST, install the shoe hold-down springs and pins.
- SST
- 09718-00011
-
-
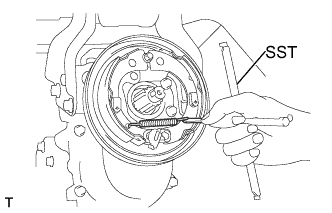
INSTALL PARKING BRAKE SHOE RETURN TENSION SPRING
-
Using SST, install the shoe return tension spring.
- SST
- 09703-30011
-
-
INSTALL PARKING BRAKE SHOE RETURN TENSION SPRING
-
Installation the plate washer.
-
Using SST, install the right side return spring, then install the left side return spring.
- SST
- 09718-20010
-
-
CHECK PARKING BRAKE INSTALLATION
-
INSTALL PARKING BRAKE DRUM SUB-ASSEMBLY
-
Install the brake drum, new O-ring and new nut.
-
Using a socket wrench (32mm), tight the nut.
- Torque:
- 127 N*m { 1300 kgf*cm, 94 ft.*lbf }
-
-
ADJUST PARKING BRAKE SHOE CLEARANCE
-
Turn the shoe adjuster counterclockwise until the brake shoes are fully expanded.
-
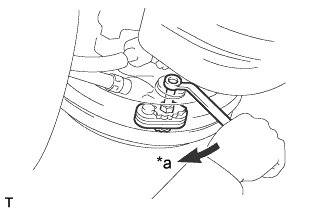
Text in Illustration *a Contracted Turn the shoe adjuster clockwise 1 notch.
-
With the parking brake pulled its full distance, check that the drum is locked.
-
Release the parking brake lever and ensure that the parking brake is not dragging.
Tech Tips
If it is dragging, turn the shoe adjuster clockwise another notch.
-
-
INSPECT AND ADJUST PARKING BRAKE LEVER TRAVEL
-
TIGHTEN OUTPUT SHAFT NUT
-
Using a chisel and a hammer, stake the nut.
-
-
INSTALL PROPELLER SHAFT ASSEMBLY REAR
-
for 2 Joint Type Click here
-
for 3 Joint Type Click here
-