TORSION BAR SPRING REMOVAL

-
REMOVE FRONT WHEEL
-
REMOVE ENGINE SIDE COVER SUB-ASSEMBLY LH
-
Single cab:
Remove the 4 bolts and engine side cover sub-assembly LH.
-
Except Single cab:
Remove the 3 bolts and engine side cover sub-assembly LH.
-
-
REMOVE TORSION BAR SPRING LH
-
Reused torsion bar spring LH:
-
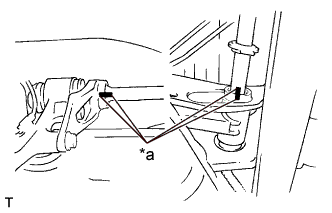
Slide the torsion bar dust cover LH in the anchor arm side, and make matchmarks to the torsion bar spring LH, anchor arm sub-assembly LH and front suspension torque arm LH.
Text in Illustration *a Matchmark
-
-
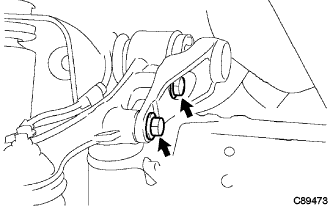
Fix anchor arm adjust nut, remove the anchor arm lock nut.
-
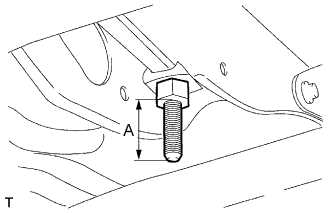
Measure the dimension A of the anchor arm adjusting hexagon bolt.
-
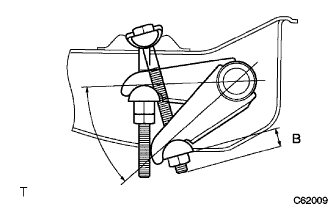
Loosen the anchor arm adjust nut until torsion bar spring LH becomes free.
-
Measure the dimension B of the anchor arm adjusting hexagon bolt.
-
Remove the anchor arm adjust nut, anchor arm adjuster seat LH, anchor arm adjusting hexagon bolt and anchor arm swivel.
-
Remove the anchor arm and torsion bar spring LH.
-
Remove the torsion bar dust cover LH from the torsion bar spring LH.
-
-
REMOVE FRONT SUSPENSION TORQUE ARM LH
-
Remove the 2 bolts and torque arm.
-
-
INSPECT TORSION BAR SPRING LH
-
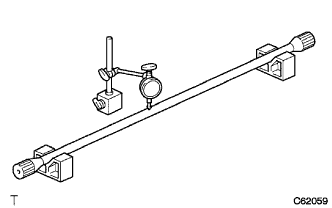
Using a dial indicator, check the shaft runout.
Minimum runout 1.5 mm (0.059 in.)
-