MANUAL TRANSMISSION ASSEMBLY REMOVAL

-
SEPARATE BATTERY NEGATIVE TERMINAL
-
REMOVE ENGINE UNDER COVER SUB-ASSEMBLY NO.2
-
REMOVE EXHAUST FRONT PIPE ASSEMBLY NO.2
-
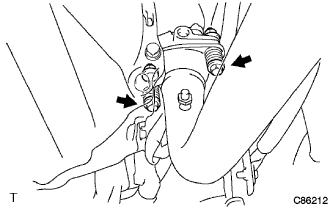
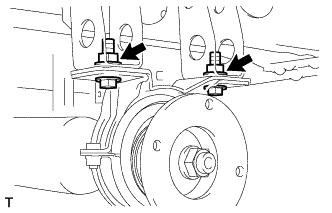
Remove the 2 bolts and the 2 springs.
-
Remove the 2 bolts and 2 nuts.
-
Disconnect the 2 muffler mounts and remove the exhaust front pipe assembly No. 2.
-
-
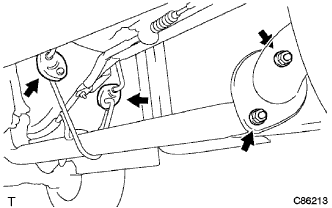
REMOVE PROPELLER SHAFT ASSEMBLY REAR (2 JOINT TYPE PROPELLER SHAFT)
Text in Illustration *a Matchmark
-
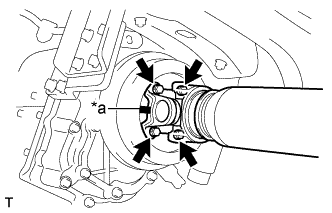
Place matchmarks on the propeller shaft flange and parking brake drum or flange.
-
Remove the 4 nuts, 4 bolts and washers.
-
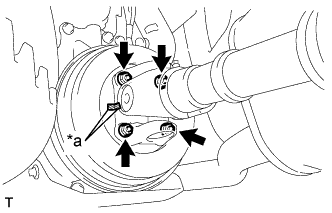
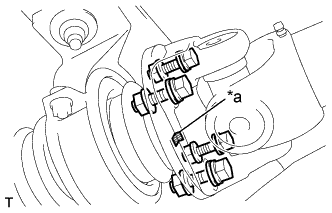
Text in Illustration *a Matchmark Place matchmarks on the propeller shaft flange and differential flange.
-
Remove the 4 nuts, 4 bolts and 4 washers.
-
-
REMOVE INTERMEDIATE SHAFT (3 JOINT TYPE PROPELLER SHAFT)
-
Place matchmarks on the propeller shaft flange and intermediate shaft.
Text in Illustration *a Matchmark -
Remove the 4 nuts, bolts and washers.
-
Text in Illustration *a Matchmark Place matchmarks on the propeller shaft and parking brake drum.
-
Remove the 4 nuts and washers.
-
Remove the 2 bolts and 2 nuts.
-
-
REMOVE PROPELLER SHAFT ASSEMBLY REAR (3 JOINT TYPE PROPELLER SHAFT)
Text in Illustration *a Matchmark
-
Place matchmarks on the propeller shaft flange and differential.
-
Remove the 4 nuts, 4 bolts and washers.
-
-
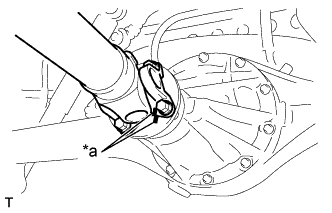
REMOVE PARKING BRAKE DRUM SUB-ASSEMBLY

-
Pull the parking brake lever full distance.
-
Using a SST and a hammer, loosen the staked part of the nut.
- SST
- 09930-00010
-
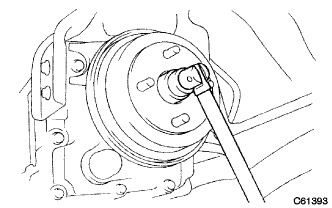
Using socket wrench 32 mm, remove the nut.
-
Remove the drum.
Tech Tips
If the brake drum cannot be removed easily, turn the shoe adjuster clockwise until the drum turns freely.
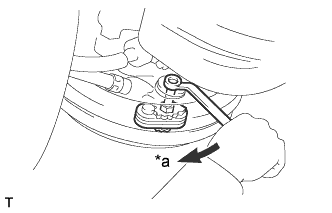
Text in Illustration *a Turn
-
-
SEPARATE PARKING BRAKE PLATE SUB-ASSEMBLY
-
Remove the 4 bolts, separate the parking brake plate sub-assembly from the transmission assembly.
-
-
SEPARATE WIRE HARNESS
-
Separate the back-up lamp and speed sensor wire harness.
-
-
SEPARATE FLOOR SHIFT CABLE TRANSMISSION CONTROL SHIFT
-
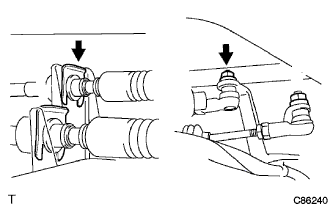
Remove the nut.
-
Using needle-nose pliers, remove the clip and disconnect the shift cable.
-
-
SEPARATE FLOOR SHIFT CABLE TRANSMISSION CONTROL SELECT
-

Remove the nut.
-
Using needle-nose pliers, remove the clip and disconnect the select cable.
-
-
REMOVE STARTER ASSEMBLY
-
Separate the starter connector.
-
Remove the nut and the starter assembly.
-
-
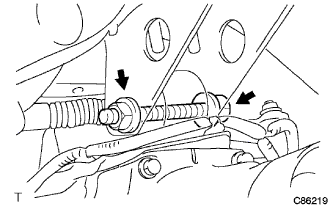
SEPARATE CLUTCH RELEASE CYLINDER ASSEMBLY
-
Remove the 2 bolts and separate the clutch release cylinder assembly.
-
-
SUPPORT MANUAL TRANSMISSION ASSEMBLY
-
Using a transmission jack, support the transmission assembly.
-
-
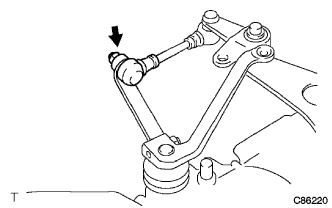
SEPARATE ENGINE MOUNTING INSULATOR ASSEMBLY REAR
-
Remove the bolt, nut and separate the engine mounting insulator rear from the engine mounting bracket.
-
-
REMOVE MANUAL TRANSMISSION ASSEMBLY (5L ENGINE MODELS)
-
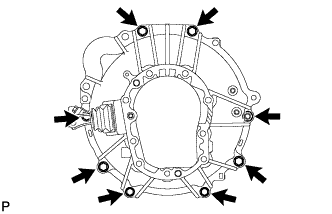
Remove the 8 bolts and the transmission assembly.
-
-
REMOVE MANUAL TRANSMISSION ASSEMBLY (2KD-FTV ENGINE MODELS)
-
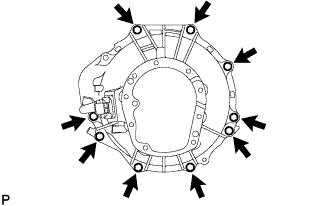
Remove the 9 bolts and the transmission assembly.
-
-
REMOVE ENGINE MOUNTING INSULATOR ASSEMBLY REAR
-
Remove the nut and disconnect the shift cable link.
-
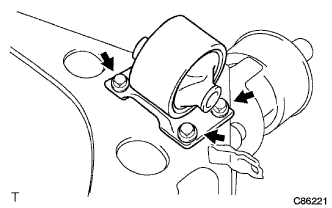
Remove the 4 bolts, engine mounting insulator rear and the shifting control assembly.
-