TURBOCHARGER DISASSEMBLY

-
INSPECT BEARING HOUSING SUB-ASSEMBLY
-
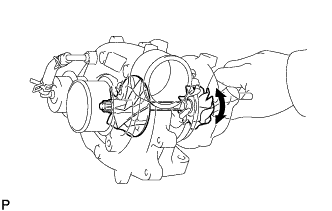
Check that the turbine shaft turns smoothly.
If the turbine shaft turns remarkably heavily or is stuck, replace the bearing housing. At that time, check also that the turbine housing interferes with the compressor housing.
-
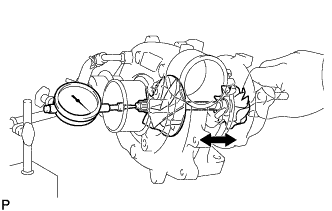
Inspect the axial play of the turbine shaft.
-
Using a dial indicator, insert the needle of the dial indicator into the exhaust side.
-
Moving the turbine shaft in the axial direction, measure the axial play of the turbine shaft.
Maximum play 0.08 mm (0.0031 in.) or less If the axial play is greater than the maximum, replace the bearing housing. At that time, check also that the turbine housing interferes with the compressor housing.
-
-
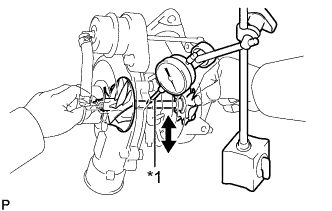
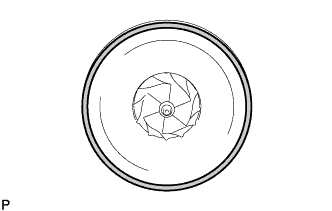
Text in Illustration *1 Oil Outlet Hole Inspect the radial play of turbine shaft.
-
Set a dial indicator to the center of the turbine shaft by inserting the dial indicator needle into the oil outlet hole.
-
Move the turbine shaft in a radial direction, measure the radial play of the turbine shaft.
Maximum play 0.11 mm (0.0043 in.) or less If the radial play is greater than maximum, replace the bearing housing. At that time, check also that the turbine housing interferes with the compressor housing.
-
-
-
INSPECT ACTUATOR LINK ASSEMBLY
-
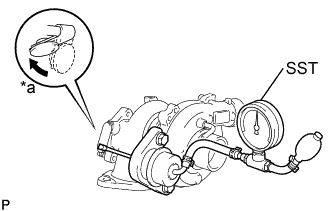
Text in Illustration *a Open Disconnect the actuator hose from the compressor housing.
-
Using SST, apply 114 kPa (1.16 kgf*cm2, 16.4 psi) of the pressure to the actuator.
- SST
- 09992-00242
-
Check that the actuator push rod is moved and the waste gate valve is opened.
Note
Never apply more than 147 kPa (1.50 kgf*cm2, 21.2 psi) of pressure to the actuator.
If the operation is not as specified, replace the turbocharger.
-
Reconnect the actuator hose to the compressor hosing.
-
-
REMOVE ACTUATOR AND LINK ASSEMBLY
-
Remove the actuator hose.
-
Using SST, apply pressure to the actuator.
- SST
- 09992-00242
Note
Never apply more than 147 kPa (1.50 kgf*cm2, 21.2 psi) to pressure to the actuator.
-
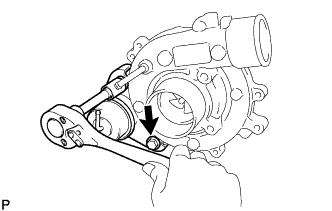
Remove the 2 bolts, E-ring and actuator.
-
-
REMOVE COMPRESSOR HOUSING
-
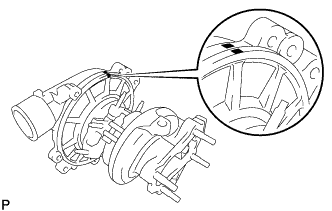
Place the matchmarks on the compressor housing and bearing housing.
-
Remove the 5 bolts.
-
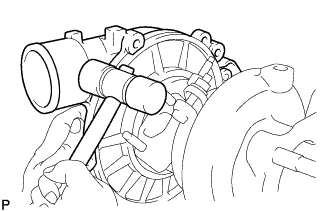
Tap the turbine housing by a plastic-faced hammer, remove the compressor housing.
Note
-
Remove the bearing housing as straight as possible and do not interfere the turbine wheel with the turbine housing.
-
Do not tap the bearing housing.
-
-
-
REMOVE TURBINE HOUSING
-
Place the matchmarks on the V band, turbine housing and bearing housing.
-
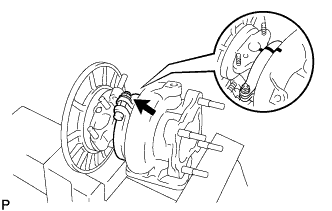
Remove the bolt, nut and V band.
-
Tap the turbine housing by a plastic-faced hammer, remove the bearing housing.
Note
-
Remove the bearing housing as straight as possible and do not interfere the turbine wheel with the turbine housing.
-
Do not tap the bearing housing.
-
-
-
CLEAN PARTS
-
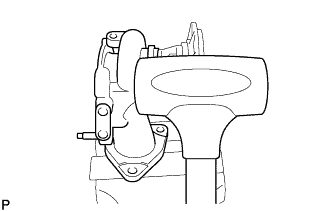
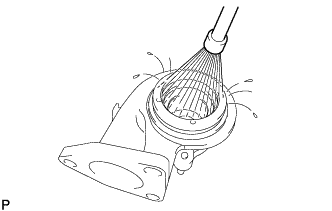
Clean the turbine housing.
-
Spray the engine conditioner to the section where the carbon dirt is adhered.
Note
Be careful not to erase the matchmark of the turbine housing.
-
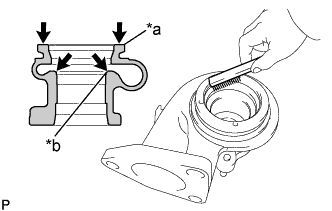
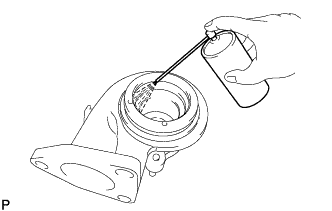
Text in Illustration *a Seal Surface *b Shroud Section Using a wire brush, remove all the carbon dirt inside the turbine housing.
Note
Clean the seal surface and shroud section thoroughly, shown in the illustration. And also clean the waste gate valve seat thoroughly.
Tech Tips
When the carbon dirt is heavily adhered, remove it using a scraper.
-
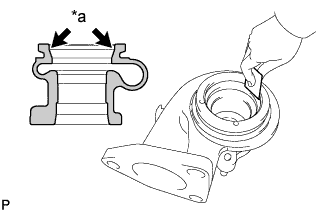
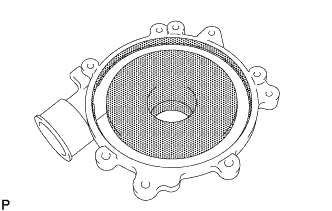
Text in Illustration *a Inside Diameter Section Clean the inside diameter section with a sandpaper (No.100) until the metal surface appears.
Note
If the cleaning is not enough, installation of the bearing housing becomes harder, so clean it well.
-
Wash the turbine housing with compressed air or a steam cleaner.
Note
Wash the turbine housing well without leaving any irregular objects.
-
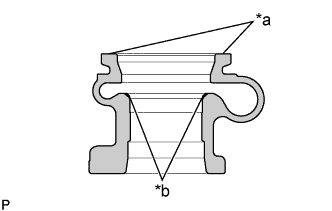
Text in Illustration *a Seal Surface *b Shroud Section Check that there is no severe damage on the seal surface.
-
Check that there is no bore made by the interference with the turbine wheel in the shroud section.
If the turbine housing has remarkable damage or bore, replace the turbocharger.
-
-
Inspect the waste gate valve.
-
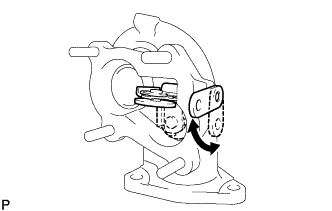
Move the waste gate valve link and check that it runs smoothly without sticking.
If the link is badly running, clean it again. If it is badly running even after cleaning, replace the turbocharger.
-
-
Clean the compressor housing.
Note
Be careful not to drop any oil on the contact surfaces.
-
Using a razor blade and gasket scraper, remove all the old packing (FIPG).
-
Thoroughly clean all the components to remove all the loose material.
-
Using a non-residue solvent, clean both sealing surfaces.
-
Wipe off the dirt from the inside of the housing with a shop rag.
-
Check that there is no severe interference with the impeller wheel.
If there is bur made by a slight interference damage, remove it with a sandpaper (No.400) and blow the dust with compressed air.
If the housing has heavy damage, replace the turbocharger.
-
-
Clean the bearing housing.
Note
Be careful not to drop any oil on the contact surfaces.
-
Using a razor blade and gasket scraper, remove all the old packing (FIPG).
-
-