CYLINDER HEAD (w/ DPF) REPAIR
-
REPAIR INTAKE VALVE SEAT
-
Check the valve seating position.
-
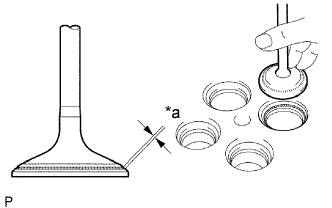
Text in Illustration *a Width Apply a light coat of Prussian blue to the valve face.
-
Lightly press the valve against the seat. Do not rotate the valve.
-
-
Check the valve face and seat for the following:
-
If blue appears 360° around the face, the valve is concentric. If not, replace the valve.
-
If blue appears 360° around the valve seat, the guide and face are concentric. If not, resurface the seat.
-
Check that the seat contact is in the middle of the valve face with the width below.
Standard width 1.2 to 1.6 mm (0.047 to 0.063 in.)
-
-
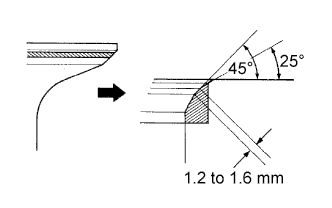
If the seating is too high on the valve face, use 25 and 45° cutters to correct the seat.
-

If the seating is too low on the valve face, use 70 and 45° cutters to correct the seat.
-
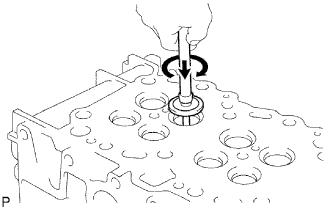
Hand-lap the valve and valve seat with an abrasive compound.
-
After hand-lapping, clean the valve and valve seat.
-
-
REPAIR EXHAUST VALVE SEAT
-
Check the valve seating position.
-
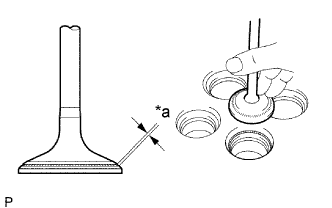
Text in Illustration *a Width Apply a light coat of Prussian blue to the valve face.
-
Lightly press the valve against the seat. Do not rotate valve.
-
-
Check the valve face and seat for the following:
-
If blue appears 360° around the face, the valve is concentric. If not, replace the valve.
-
If blue appears 360° around the valve seat, the guide and face are concentric. If not, resurface the seat.
-
Check that the seat contact is in the middle of the valve face with the width below.
Standard width 1.6 to 2.0 mm (0.063 to 0.079 in.)
-
-

If the seating is too high on the valve face, use 25 and 45° cutters to correct the seat.
-
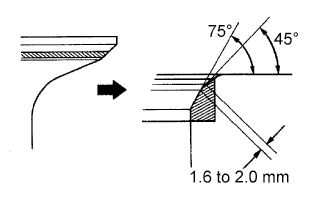
If the seating is too low on the valve face, use 75 and 45° cutters to correct the seat.
-
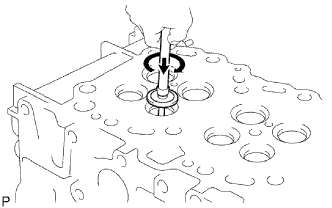
Hand-lap the valve and valve seat with an abrasive compound.
-
After hand-lapping, clean the valve and valve seat.
-