ECM REMOVAL
-
CHECK FOR INJECTOR COMPENSATION CODE
-
Check that the injection compensation code of the fuel injector installed on each cylinder match the ones registered in the ECM Click here.
If they do not match, correct the registration details Click here.
-
-
DISCONNECT CABLE FROM NEGATIVE BATTERY TERMINAL
-
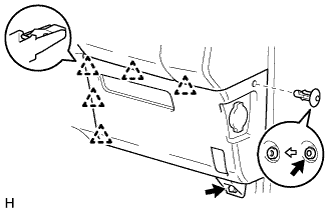
REMOVE LOWER INSTRUMENT COVER (w/ Heater)
-
Remove the clip and bolt.
-
Detach the 5 clips and remove the lower instrument cover.
-
-
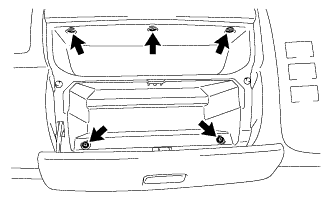
REMOVE LOWER CENTER INSTRUMENT COVER (w/ Heater)

-
Remove the 2 clips and 2 bolts.
-
Detach the 3 clips and remove the lower center instrument cover.
-
-
REMOVE GLOVE COMPARTMENT DOOR ASSEMBLY (w/o Heater)
-
Remove the 5 screws.
-
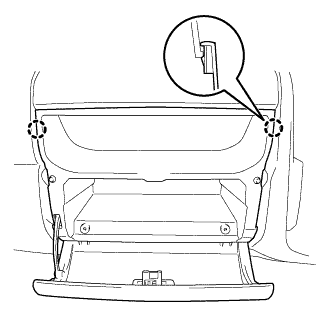
Disengage the 2 claws to remove the glove compartment door assembly from the instrument panel sub-assembly.
-
-
REMOVE ECM (w/ Heater)
-
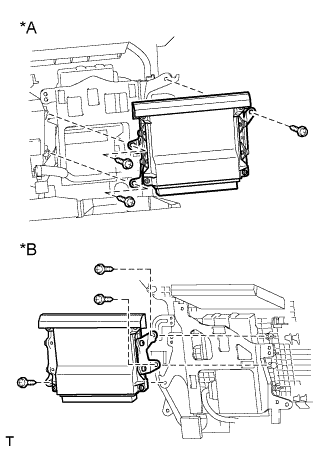
Text in Illustration *A for LHD *B for RHD Remove the 3 screws and remove the ECM.
-
Disconnect the 6 connectors from the ECM.
-
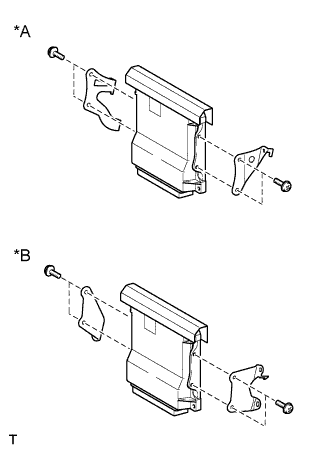
Text in Illustration *A for LHD *B for RHD Remove the 2 screws and remove the No. 1 ECM bracket.
-
Remove the 2 screws and remove the No. 2 ECM bracket.
-
-
REMOVE ECM COVER (w/ Heater)
-
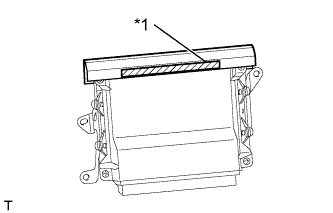
Text in Illustration *1 Double-sided Tape Remove the ECM cover.
-
-
REMOVE ECM (w/o Heater)
-
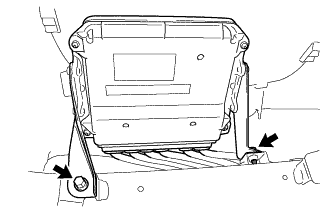
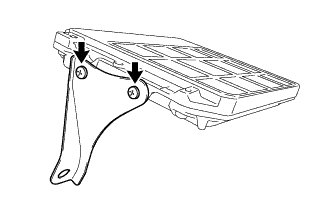
Remove the 2 bolts to separate the ECM with No. 1 ECM bracket and No. 2 ECM bracket from the instrument panel reinforcement.
-

Disconnect the 6 ECM connectors to remove the ECM with No. 1 ECM bracket and No. 2 ECM bracket.
Note
If a component has been dropped or subjected to a strong impact, replace the ECM.
-
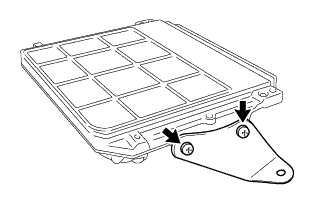
Remove the 2 screws to remove the No. 1 ECM bracket from the ECM.
-
Remove the 2 screws to remove the No. 2 ECM bracket from the ECM.
-