STARTER REASSEMBLY

-
INSTALL DUST STARTER PROTECTOR
-
Install the dust starter protector to the starter drive housing.
-
-
INSTALL STARTER CLUTCH SUB-ASSEMBLY
-
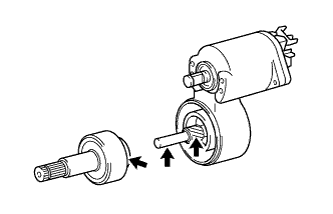
Apply high-temperature grease to the starter clutch sub-assembly and starter planetary shaft sub-assembly as shown in the illustration.
Text in Illustration 
High-temperature Grease -
Align the grooves of the starter clutch sub-assembly and the starter planetary shaft sub-assembly and install the starter clutch sub-assembly.
-
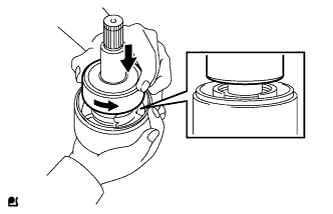
While pushing the starter clutch sub-assembly and starter planetary shaft sub-assembly together, slightly turn the starter clutch sub-assembly as shown in the illustration.
-
Check that the starter clutch sub-assembly is installed securely to the starter planetary shaft sub-assembly by pulling up the clutch.
-
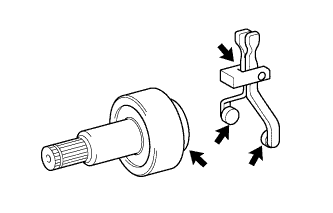
Install the starter plate.
-
Lift up the starter clutch sub-assembly. Using needle nose pliers, install the clip.
-
Apply high-temperature grease to the pinion drive lever and starter clutch sub-assembly as shown in the illustration.
Text in Illustration High-temperature Grease -
Install the pinion drive lever.
-
Install a new switch gasket.
-
Apply high-temperature grease to the starter clutch sub-assembly and starter drive housing as shown in the illustration.
Text in Illustration High-temperature Grease -
Install the starter drive housing with the 2 bolts.
- Torque:
- 4.3 N*m { 44 kgf*cm, 38 in.*lbf }
-
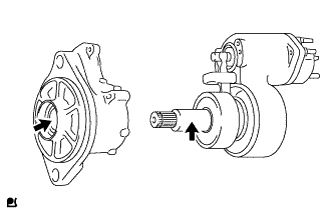
Install the starter pinion assembly with a new retainer.
Note
Make sure that the retainer is in the groove of the starter pinion assembly.
-
-
INSTALL STARTER YOKE ASSEMBLY
-
Install 2 new rubber seals.
-
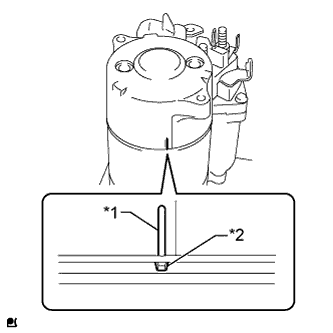
Text in Illustration *1 Key *2 Keyway Align the key of the starter yoke assembly with the keyway of the starter motor housing, and install the starter yoke assembly to the starter motor housing.
-
-
INSTALL STARTER ARMATURE ASSEMBLY
-
Install the starter armature assembly to the starter yoke assembly.
-
-
INSTALL STARTER BRUSH HOLDER ASSEMBLY
-
Install the starter brush holder assembly to the starter armature assembly.
-
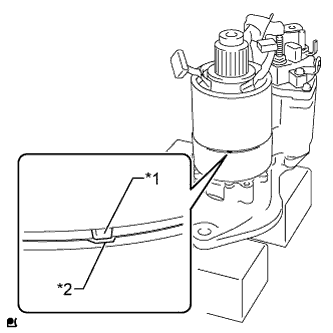
Text in Illustration *1 Cutout *2 Alignment Mark Align the cutout of the starter brush holder assembly with the alignment mark on the lead wire.
-
Connect the 4 brushes to the starter brush holder.
-
Using a screwdriver with its tip wrapped with protective tape, hold back the spring.
-
Connect the brush to the brush holder.
Note
Check that the positive (+) lead wires are not grounded.
-
-
Apply high-temperature grease to the starter armature bearing.
-
Apply high-temperature grease to the starter plate and install the starter plate.
-
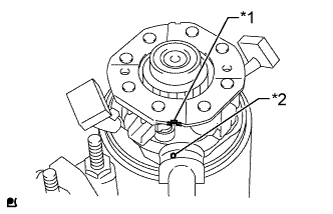
Text in Illustration *1 Alignment Mark *2 Key Align the alignment mark of the commutator end frame with the key of the starter yoke assembly.
-
Align the screw holes in the commutator end frame and starter brush holder assembly and install the commutator end frame with the 2 bolts.
- Torque:
- 4.3 N*m { 44 kgf*cm, 38 in.*lbf }
-
Install the 2 bolts.
- Torque:
- 15 N*m { 153 kgf*cm, 11 ft.*lbf }
-
Connect the lead wire to terminal M with the 2 washers and nut.
- Torque:
- 14 N*m { 138 kgf*cm, 10 ft.*lbf }
-