STARTER INSPECTION

-
INSPECT STARTER ASSEMBLY
Note
These tests must be performed within 3 to 5 seconds to prevent the coil from burning out. Use a thick cable for carrying a large electric current.
-
Perform pull-in / holding test.
-
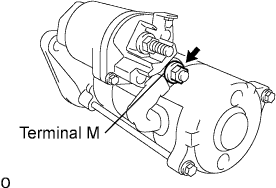
Pull off the dust protector cap.
-
Remove the nut and disconnect the lead wire from terminal M.
-
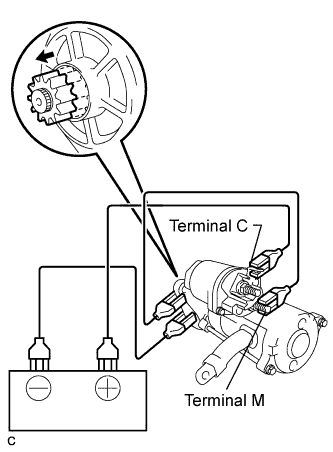
Connect the battery to the magnetic switch as shown in the illustration. Then check that the clutch pinion gear moves outward.
-
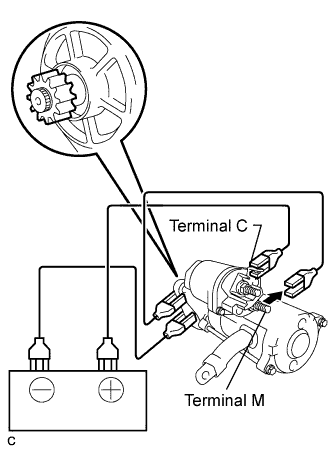
Disconnect the negative (-) lead from terminal M. Check that the pinion gear remains out.
-
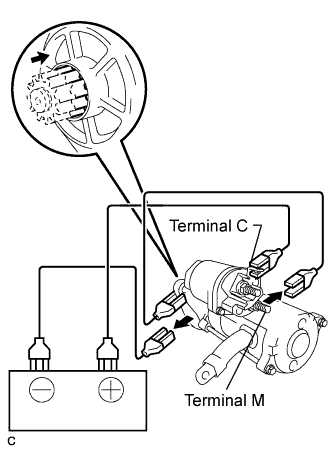
Disconnect the negative (-) lead from the starter body. Check that the clutch pinion gear returns inward.
If the result is not as specified, repair or replace the starter motor housing assembly.
-
-
Perform operation test without load.
-
Connect the lead wire to terminal M.
- Torque:
- 14 N*m { 138 kgf*cm, 10 ft.*lbf }
-
Using a vise and aluminum protection plates, fix the starter assembly.
-
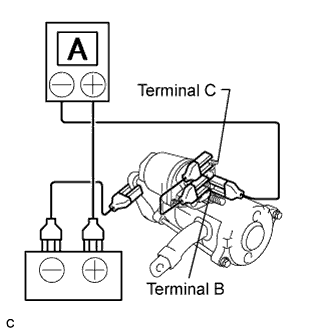
Connect the battery and an ammeter to the starter with terminal C disconnected, as shown in the illustration.
Note
Do not connect terminal C to the battery in step (3).
-
Connect terminal C to the battery and check that the starter rotates smoothly and steadily while the pinion gear is out. Then measure the current.
Standard current 180 A or less at 23 V If the result is not as specified, replace the starter assembly.
-
-