RADIATOR REMOVAL

-
TILT UP CAB
CAUTION:
-
Make sure that the vehicle is on a level surface before tilting the cab up.
-
Make sure that all the doors are closed before tilting the cab up.
-
Make sure that nobody is inside or near the cab when tilting it up.
-
Be sure to have 2 people tilt the cab up when a heavy object such as a roof rack or cargo carrier is installed to the cab.
-
Be sure to remove anything set on top of the cab before tilting it up.
-
Make sure that the cab is securely locked in place after it is tilted up.
-
Make sure that there are no tools, cloths, etc. left in the engine room before tilting the cab back down.
-
Make sure that the cab is securely locked in place after tilting it back down.
-
-
DRAIN ENGINE COOLANT
CAUTION:
Do not remove the radiator cap sub-assembly, radiator drain cock plug or engine drain plug while the engine and radiator are still hot. Pressurized, hot engine coolant and steam may be released and cause serious burns.
-
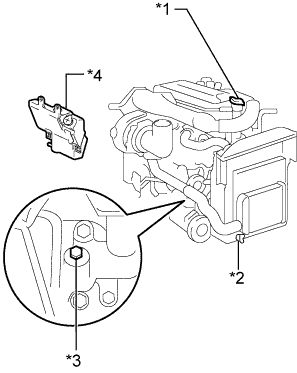
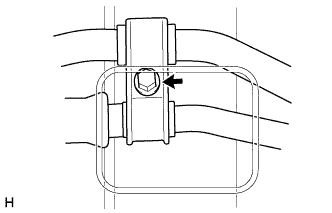
Text in Illustration *1 Radiator Cap Sub-assembly *2 Radiator Drain Cock Plug *3 Engine Drain Plug *4 Radiator Reservoir Assembly Loosen the radiator drain cock plug and engine drain plug.
-
Remove the radiator cap sub-assembly, and then drain the coolant.
Tech Tips
Collect the coolant in a container and dispose of it according to the local regulations.
-
Tighten the radiator drain cock plug by hand.
-
Tighten the engine drain plug.
- Torque:
- 27 N*m { 275 kgf*cm, 20 ft.*lbf }
-
-
REMOVE INTERCOOLER ASSEMBLY
-
DISCONNECT NO. 5 RADIATOR HOSE
-
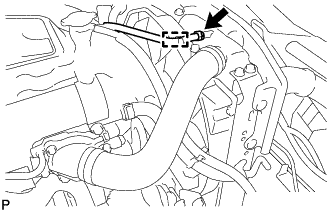
Slide the hose clamp and disconnect the No. 5 radiator hose from the radiator assembly.
-
Detach the clamp to disconnect the No. 5 radiator hose from the fan shroud.
-
-
DISCONNECT INLET RADIATOR HOSE
-
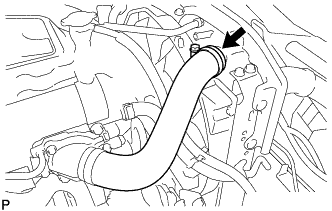
Loosen the hose clamp and disconnect the inlet radiator hose from the radiator assembly.
-
-
DISCONNECT OUTLET RADIATOR HOSE
-
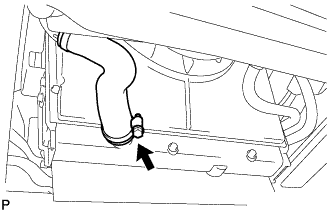
Loosen the hose clamp and disconnect the outlet radiator hose from the radiator assembly.
-
-
REMOVE FAN
-
Loosen the 4 nuts.
-
Remove the fan and generator V belt Click here.
-
Remove the 4 nuts and fan.
-
-
REMOVE NO. 1 RADIATOR TO SUPPORT SEAL
-
Remove the 4 bolts, 4 clips and No. 1 radiator to support seal.
-
-
DISCONNECT HEATER PIPE
-
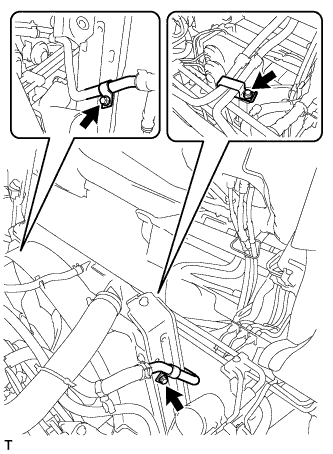
Remove the 3 bolts and disconnect the heater pipe.
-
-
DISCONNECT NO. 4 RADIATOR BRACKET
-
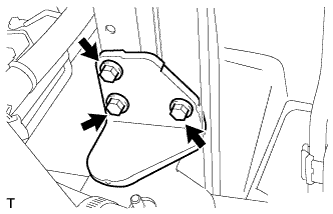
Remove the 3 bolts and disconnect the No. 4 radiator bracket.
-
-
DISCONNECT NO. 2 RADIATOR SUPPORT
-
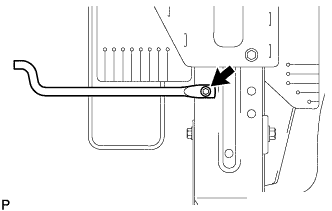
Remove the bolt and disconnect the No. 2 radiator support from the radiator assembly.
-
-
DISCONNECT NO. 3 RADIATOR BRACKET
-

Remove the 3 bolts and disconnect the No. 3 radiator bracket.
-
Remove the bolt and disconnect the No. 1 cooler refrigerant discharge hose.
-

Detach the transmission control cable clamp.
-
-
DISCONNECT NO. 1 RADIATOR SUPPORT
-
Remove the bolt and disconnect the No. 1 radiator support from the radiator assembly.
-
-
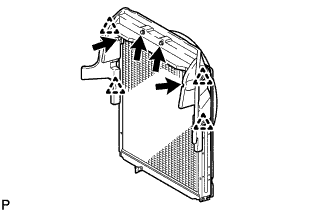
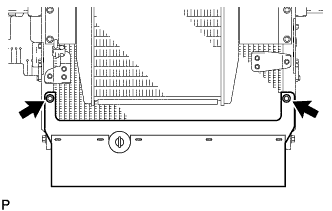
REMOVE RADIATOR ASSEMBLY
-
Remove the radiator assembly together with the fan shroud.
Note
Do not allow the radiator assembly to interfere with other parts.
-
-
REMOVE FAN SHROUD
-

Remove the 4 bolts and fan shroud.
-
-
REMOVE NO. 3 RADIATOR AIR GUIDE
-
Remove the 2 bolts and No. 3 radiator air guide.
-