RADIATOR REMOVAL

-
DRAIN ENGINE COOLANT
CAUTION:
Do not loosen the radiator drain cock plug and engine drain plug while the engine and radiator are still hot. Pressurized, hot engine coolant and steam may be released and cause serious burns.
-
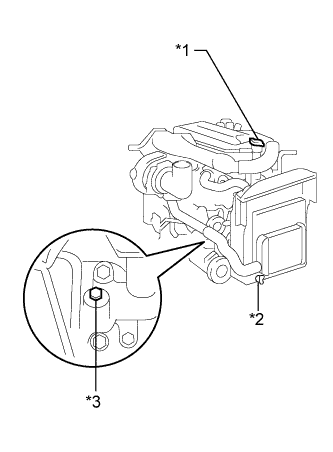
Text in Illustration *1 Radiator Cap Sub-assembly *2 Radiator Drain Cock Plug *3 Engine Drain Plug Loosen the radiator drain cock plug and engine drain plug.
-
Remove the radiator cap sub-assembly, then drain the coolant.
-
Close the radiator drain cock plug.
-
Tighten the engine drain plug.
- Torque:
- 27 N*m { 275 kgf*cm, 20 ft.*lbf, for the engine drain plug }
-
-
DISCONNECT INLET RADIATOR HOSE
-

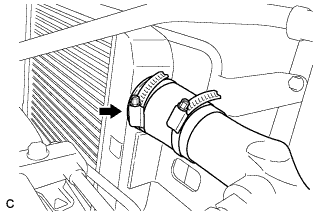
Loosen the 2 clamps, and disconnect the inlet radiator hose and No. 5 radiator hose.
-
-
DISCONNECT OUTLET RADIATOR HOSE
-
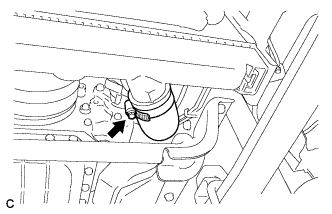
Loosen the clamp and disconnect the outlet radiator hose.
-
-
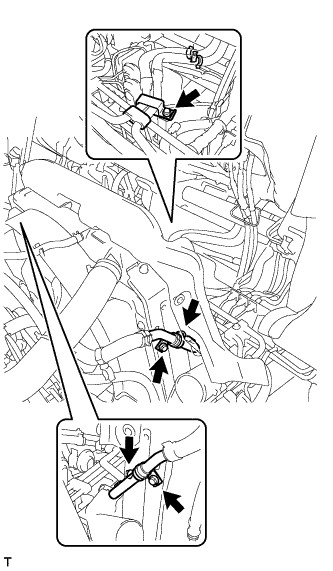
REMOVE NO. 1 INTAKE AIR PIPE WITH NO. 4 AIR HOSE
-
Disconnect the hose band.
-

Remove the bolt.
-

Disconnect the turbo pressure sensor connector and wire harness clamp, and remove the bolt.
-
Loosen the hose band and remove the No. 1 intake air pipe with No. 4 air hose.
-
-
REMOVE NO. 2 AIR HOSE
-

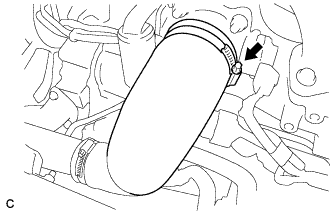
Loosen the 2 hose bands and remove the No. 2 air hose.
-
-
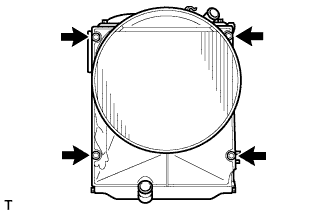
REMOVE INTERCOOLER ASSEMBLY
-

Remove the 4 bolts and intercooler assembly.
-
-
REMOVE FAN
-
Loosen the 4 nuts.
-
Remove the fan and generator V belt Click here.
-
Remove the 4 nuts and fan.
-
-
REMOVE FAN PULLEY
-
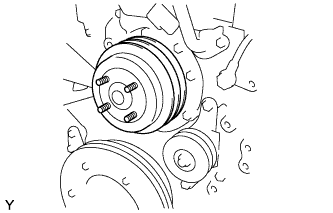
Remove the fan pulley.
-
-
SEPARATE HEATER HOSE
-
Remove the 5 bolts and separate the heater hose.
-
-
SEPARATE NO. 4 RADIATOR BRACKET
-
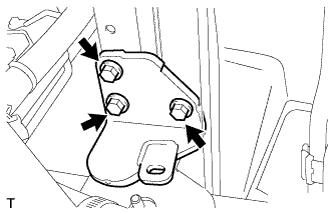
Remove the 3 bolts and separate the No. 4 radiator bracket.
-
-
REMOVE NO. 2 RADIATOR SUPPORT
-
Remove the bolt and No. 2 radiator support.
-
-
SEPARATE NO. 3 RADIATOR BRACKET
-

Remove the 3 bolts and separate the No. 3 radiator bracket.
-
-
REMOVE NO. 1 RADIATOR SUPPORT
-
Remove the bolt and No. 1 radiator support.
-
-
REMOVE RADIATOR ASSEMBLY
-
Remove the radiator assembly with the fan shroud.
-
-
REMOVE FAN SHROUD
-
Remove the 4 bolts and fan shroud.
-
-
REMOVE NO. 1 RADIATOR TO SUPPORT SEAL
-
Remove the 4 bolts, 4 clips and No. 1 radiator to support seal.
-