RADIATOR REMOVAL

-
DRAIN ENGINE COOLANT
CAUTION:
Do not remove the radiator cap sub-assembly while the engine and radiator are still hot. Pressurized, hot engine coolant and steam may be released and cause serious burns.
-
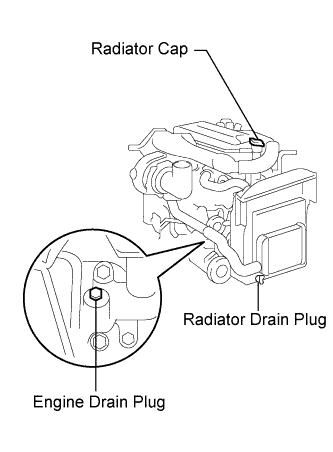
Loosen the radiator drain cock plug and engine drain plug.
-
Remove the radiator cap, then drain the coolant.
-
Close the radiator drain cock plug.
-
Tighten the engine drain plug.
- Torque:
- 27 N*m { 275 kgf*cm, 20 ft.*lbf, for the engine drain plug }
-
-
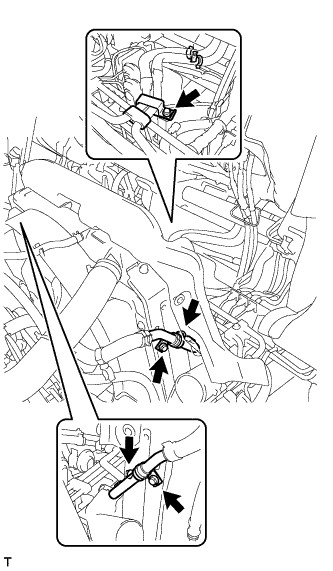
DISCONNECT RADIATOR HOSE INLET
-

Loosen the 2 clips and disconnect the radiator hose inlet and No. 5 radiator hose.
-
-
DISCONNECT RADIATOR HOSE OUTLET
-
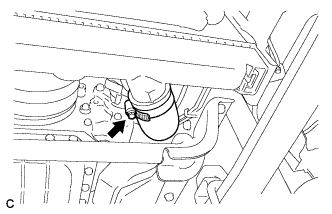
Loosen the clip and disconnect the radiator hose outlet.
-
-
REMOVE NO. 1 INTAKE AIR PIPE WITH NO. 4 AIR HOSE
-
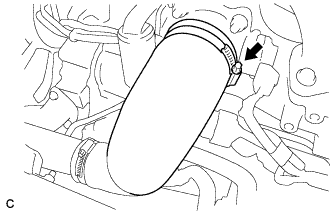
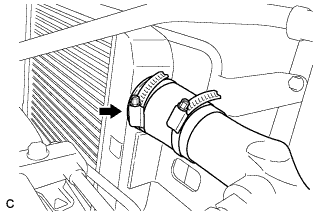
Disconnect the hose band.
-

Remove the bolt.
-
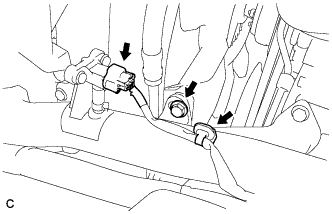
Disconnect the turbo pressure sensor connector and wire harness clamp, and remove the bolt.
-
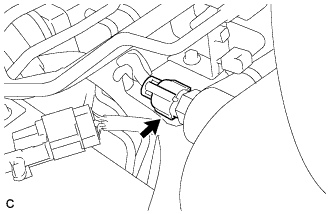
Disconnect the intake air temperature sensor connector.
-
Disconnect the hose band, and remove the No. 1 intake air pipe with No. 4 air hose.
-
-
REMOVE NO. 2 AIR HOSE
-

Disconnect the 2 hose bands and No. 1 air hose.
-
-
REMOVE INTERCOOLER ASSEMBLY
-
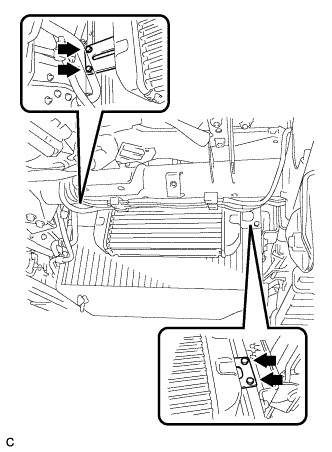
Remove the 4 bolts and intercooler assembly.
-
-
REMOVE FAN
-
Loosen the 4 nuts.
-
Remove the fan and generator V belt Click here.
-
Remove the 4 nuts and fan.
-
-
REMOVE FAN PULLEY
-
Remove the fan pulley.
-
-
SEPARATE HEATER HOSE
-
Remove the 5 bolts and separate the heater hose.
-
-
SEPARATE NO. 4 RADIATOR BRACKET
-
Remove the 3 bolts and separate the No. 4 radiator bracket.
-
-
REMOVE NO. 2 RADIATOR SUPPORT
-
Remove the bolt and No. 2 radiator support.
-
-
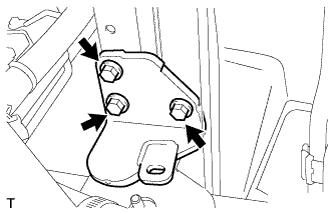
SEPARATE NO. 3 RADIATOR BRACKET
-

Remove the 3 bolts and separate the No. 3 radiator bracket.
-
-
REMOVE NO. 1 RADIATOR SUPPORT
-
Remove the bolt and No. 1 radiator support.
-
-
REMOVE RADIATOR ASSEMBLY
-
Remove the radiator assembly with the fan shroud.
-
-
REMOVE FAN SHROUD
-
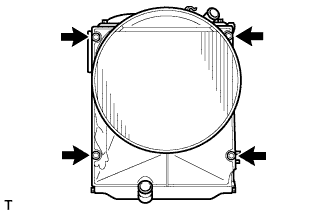
Remove the 4 bolts and fan shroud.
-
-
REMOVE NO. 1 RADIATOR TO SUPPORT SEAL
-
Remove the 4 bolts, 4 clips and the No. 1 radiator to support seal.
-