EXHAUST MANIFOLD INSTALLATION

-
INSTALL EXHAUST MANIFOLD
-
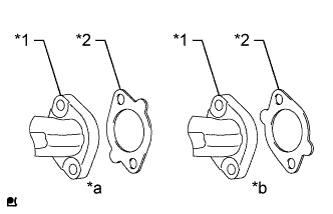
Text in Illustration *1 Exhaust Manifold *2 Gasket *a INCORRECT *b CORRECT Install 4 new gaskets to the cylinder head sub-assembly as shown in the illustration.
-
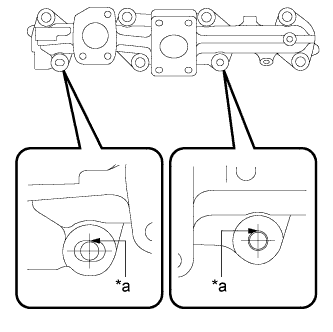
Text in Illustration *a Contact Temporarily install the exhaust manifold.
Tech Tips
The stud bolts should contact the exhaust manifold as shown in the illustration.
-
Temporarily install 8 new nuts and the 8 spacers to the exhaust manifold.
Tech Tips
Be sure to install the spacers for the positions labeled A in the orientation shown in the illustration.
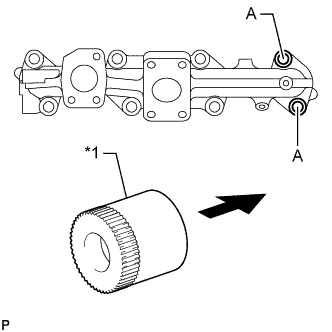
Text in Illustration *1 Spacer 
Engine Side -
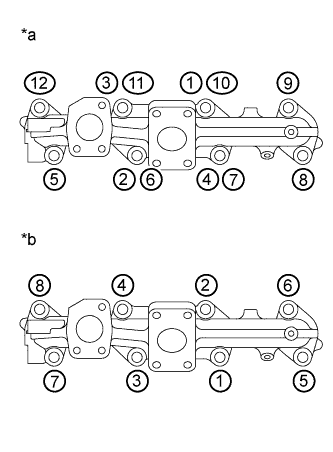
Text in Illustration *a New Exhaust Manifold *b Used Exhaust Manifold Tighten the nuts in the order shown in the illustration.
- Torque:
- 60 N*m { 612 kgf*cm, 44 ft.*lbf }
-

Text in Illustration *a New Exhaust Manifold *b Used Exhaust Manifold Retighten the nuts in the order shown in the illustration.
- Torque:
- 60 N*m { 612 kgf*cm, 44 ft.*lbf }
-
-
INSTALL EXHAUST MANIFOLD HEAT INSULATOR SUB-ASSEMBLY
-
Install the exhaust manifold heat insulator sub-assembly with the 3 bolts.
- Torque:
- 29 N*m { 291 kgf*cm, 21 ft.*lbf }
-
-
INSTALL TURBOCHARGER SUB-ASSEMBLY