RADIATOR DISASSEMBLY

-
REMOVE RADIATOR SIDE PLATE
-
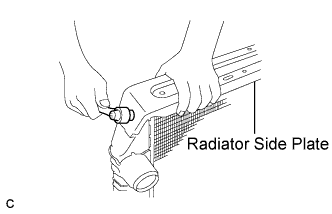
Remove the 4 bolts, the left and the right side plates.
-
Remove the collars and bushings.
-
Remove the drain cock and O-ring.
-
-
REMOVE RADIATOR TANK UPPER
-

Adjust dimension B shown in the illustration using the stopper bolt so that it is 0.2 to 0.3 mm when the handle of SST touches the stopper bolt.
- SST
- 09230-01010 ( 09231-01010, 09231-01030 )
Note
If the stopper bolt is not adjusted, the claw may be damaged.
-
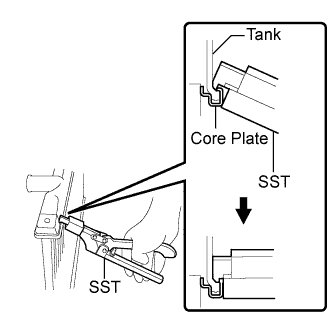
As the aluminum radiator adopts an integral core plate crimp construction, remove the upper and lower tanks by lifting up the core plate crimping in such a way that the latter is not damaged. Release the crimping by using SST and by gripping it until it hits the stopper bolt of the handle as shown in the illustration.
- SST
- 09230-01010 ( 09231-01010, 09231-01030 )
Note
Do not lift up the core plate crimping more than 90°.
-
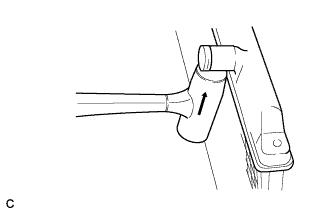
Remove the upper tank by lightly tapping the radiator hose fitting position.
Note
-
Remember the mounting direction of the core sub-assembly.
-
Remount it in such a way that the original mounting direction can be maintained.
-
-
Remove the O-ring.
-
-
REMOVE RADIATOR TANK LOWER
Tech Tips
The removal procedure of the radiator tank lower is the same as that of the radiator tank upper.