FUEL FILTER REPLACEMENT

Tech Tips
If replacing only the fuel filter element sub-assembly, steps 2 through 5 are not necessary.
-
REMOVE FUEL FILTER ELEMENT SUB-ASSEMBLY
-
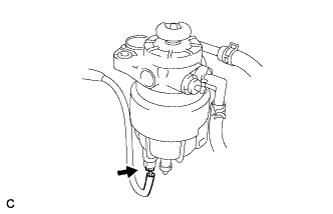
Disconnect the level warning switch connector.
-
Place a drain pan under the filter.
-
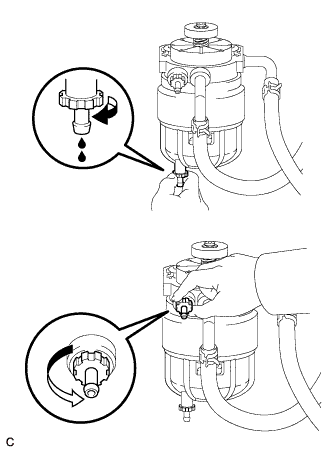
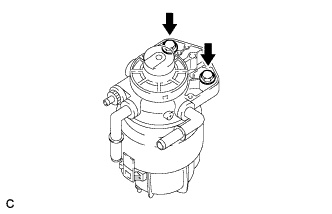
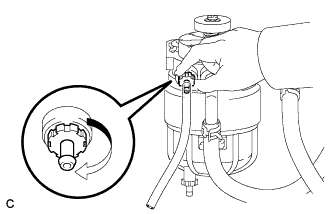
Loosen the drain plug and the air bleed plug as shown in the illustration. Drain the fuel.
Note
-
Do not use any tools.
-
Do not allow any fuel to spill.
-
If any fuel spills on any part of the engine, wipe it clean with a shop rag or a piece of cloth.
-
-
When fuel stops draining from the drain plug, tighten the drain plug and air bleed plug.
Note
Do not use any tools.
-
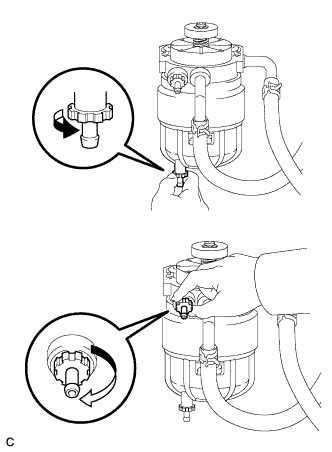
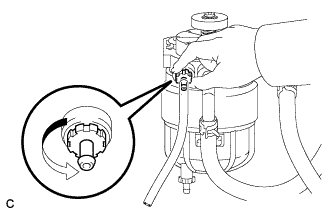
Text in Illustration *1 Fuel Filter Case *2 Claw *a Turn Disengage the claw. Remove the fuel filter case by turning it counterclockwise approximately 120°.
-
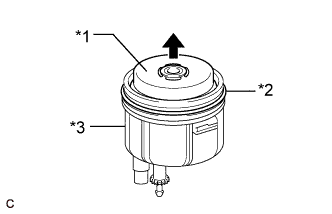
Text in Illustration *1 Fuel Filter Element Sub-assembly *2 O-ring *3 Fuel Filter Case Remove the fuel filter element sub-assembly.
-
Remove the O-ring from the fuel filter case.
-
-
REMOVE FUEL FILTER ASSEMBLY
-
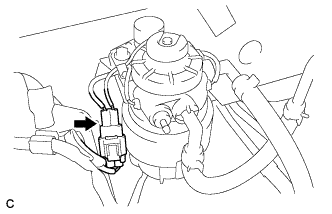
Disconnect the fuel heater connector (w/ Heater).
-
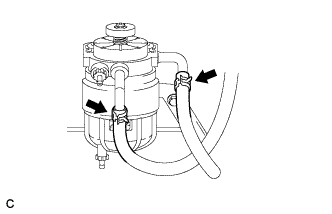
Disconnect the 2 fuel hoses.
-
Remove the 2 bolts and the fuel filter assembly.
-
-
REMOVE FUEL PREFILTER ASSEMBLY
-

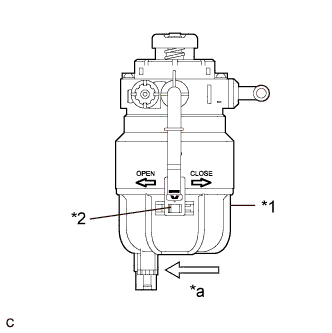
Loosen the drain plug as shown in the illustration. Drain the fuel.
Note
-
Do not use any tools.
-
Do not allow any fuel to spill.
-
If any fuel spills on any part of the engine, wipe it clean with a shop rag or a piece of cloth.
-
-
When fuel stops draining from the drain plug, tighten the drain plug.
-
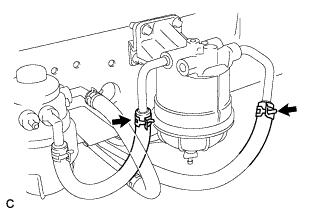
Disconnect the 2 fuel hoses.
-
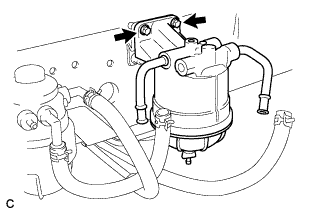
Remove the 2 bolts and the fuel prefilter assembly.
-
-
INSTALL FUEL PREFILTER ASSEMBLY
-
Install the fuel prefilter assembly with the 2 bolts.
- Torque:
- 44 N*m { 449 kgf*cm, 33 ft.*lbf }
-
Connect the 2 fuel hoses.
-
-
INSTALL FUEL FILTER ASSEMBLY
-
Install the fuel filter assembly with the 2 bolts.
- Torque:
- 18 N*m { 178 kgf*cm, 13 ft.*lbf }
-
Connect the 2 fuel hoses.
-
Connect the fuel heater connector (w/ Heater).
-
-
INSTALL FUEL FILTER ELEMENT SUB-ASSEMBLY
-

Text in Illustration *1 Fuel Filter Element Sub-assembly *2 O-ring *3 Fuel Filter Case Install a new fuel filter element sub-assembly to the fuel filter case.
-
Install a new O-ring to the fuel filter case.
-
Apply a light coat of fuel to the O-ring of the fuel filter case.
-

Text in Illustration *1 Fuel Filter Case *2 Claw *a Turn Install the fuel filter case by turning it clockwise until the claw is engaged.
-
Connect the level warning switch connector.
-
-
BLEED AIR FROM FUEL SYSTEM
-
Connect the drain hose to the air bleed plug.
-
Loosen the fuel filter's air bleed plug.
Note
-
Do not use any tools.
-
Do not allow any fuel to spill.
-
If any fuel spills on any part of the engine, wipe it clean with a piece of cloth.
-
-
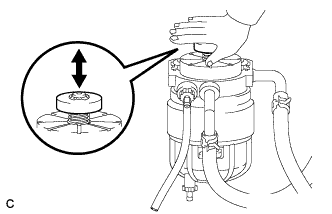
While covering the drain hose with a piece of cloth, press and release the priming pump until the fuel from the drain hose does not have any bubbles.
-
Tighten the air bleed plug.
Note
Do not use any tools.
-
-
INSPECT FOR FUEL LEAK
-
Perform the Active Test.
-
Connect the intelligent tester to the DLC3.
-
Start the engine.
-
Turn the intelligent tester on.
-
Enter the following menus: Powertrain / Engine and ECT / Active Test.
-
Perform the Active Test.
Intelligent Tester Display Test Details Control Range Diagnostic Notes Test the Fuel Leak Pressurizes common rail internal fuel pressure, and checks for fuel leaks Stop or Start
-
Fuel pressure inside common rail is pressurized to specified value and engine speed is increased to 2000 rpm when Start is selected.
-
Above conditions preserved while Start is selected.
-
-
-