REAR CRANKSHAFT OIL SEAL REMOVAL

-
REMOVE MANUAL TRANSMISSION ASSEMBLY
-
REMOVE CLUTCH COVER ASSEMBLY
-
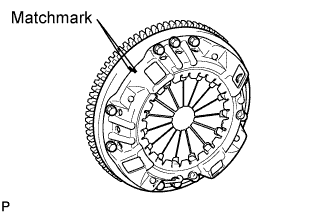
Put matchmarks on the clutch cover assembly and the flywheel sub-assembly.
-
Loosen each set bolt one turn at a time until spring tension is released.
-
Remove the set bolts, and pull off the clutch cover assembly.
Note
Do not drop the clutch disc assembly.
-
-
REMOVE CLUTCH DISC ASSEMBLY
Note
Keep the lining part of the clutch disc assembly, the pressure plate and the surface of the flywheel sub-assembly away from oil and foreign matter.
-
REMOVE FLYWHEEL SUB-ASSEMBLY
-
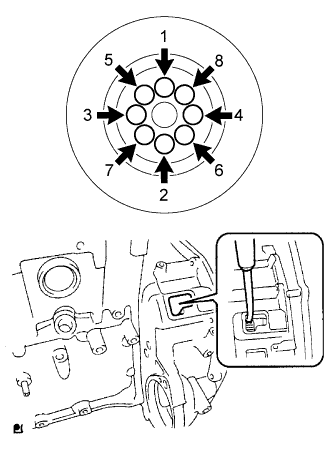
Uniformly loosen and remove the 8 flywheel set bolts in the order shown in the illustration.
Tech Tips
Insert a screwdriver through the inspection hole of the flywheel housing into the ring gear of the flywheel sub-assembly to prevent the ring gear from turning together with the crankshaft.
-
Remove the flywheel sub-assembly.
Note
The flywheel sub-assembly is heavy. When removing, be careful not to drop it on your feet.
-
-
REMOVE REAR ENGINE OIL SEAL
-
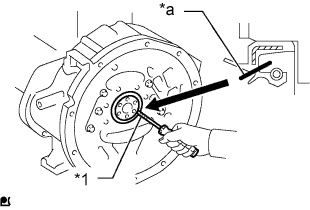
Text in Illustration *1 Protective Tape *a Cut Position Using a knife, cut off the lip of the rear engine oil seal.
-
Using a screwdriver with its tip wrapped in protective tape, pry out the rear engine oil seal.
-