BACK WINDOW GLASS REMOVAL

-
REMOVE FRONT DOOR SCUFF PLATE LH (w/ Back Panel Trim)
Tech Tips
Use the same procedure described for the RH side.
-
REMOVE FRONT DOOR SCUFF PLATE RH (w/ Back Panel Trim)
-
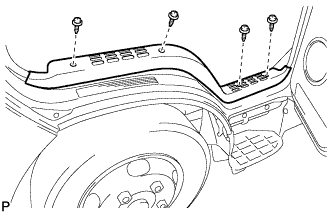
Remove the 4 screws and front door scuff plate RH.
-
-
REMOVE LOWER QUARTER TRIM PANEL ASSEMBLY LH (w/ Back Panel Trim)
Tech Tips
Use the same procedure described for the RH side.
-
REMOVE LOWER QUARTER TRIM PANEL ASSEMBLY RH (w/ Back Panel Trim)
-
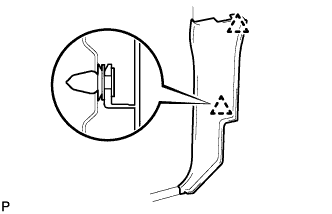
Detach the 2 clips and remove the lower quarter trim panel assembly RH.
-
-
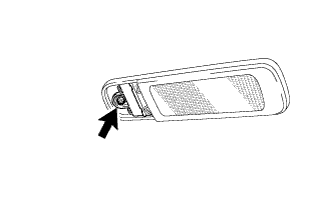
REMOVE SEAT BELT ANCHOR COVER CAP (for Driver Side)
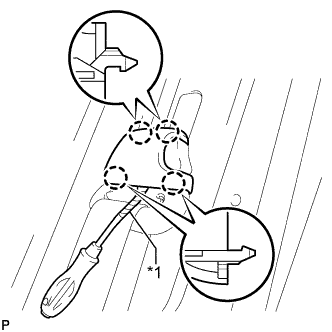
Text in Illustration *1 Protective Tape
-
Using a clip remover, detach the 4 claws and remove the seat belt anchor cover cap.
Tech Tips
Tape the clip remover tip before use.
-
-
REMOVE FRONT QUARTER TRIM PANEL ASSEMBLY LH (for Full-trim)
-

Remove the bolt and disconnect the front seat outer belt assembly LH shoulder anchor.
-
Detach the 5 clips and remove the front quarter trim panel assembly LH.
-
-
REMOVE FRONT QUARTER TRIM PANEL ASSEMBLY RH (for Full-trim)
-
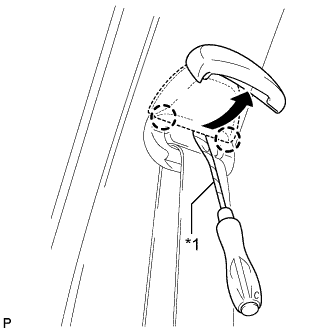
Text in Illustration *1 Protective Tape Using a clip remover, detach the 2 claws and open the shoulder anchor cover.
Tech Tips
Tape the clip remover tip before use.
-
Remove the bolt and disconnect the front seat outer belt assembly RH shoulder anchor.
-
Detach the 5 clips and remove the front quarter trim panel assembly RH.
-
-
REMOVE FRONT DOOR OPENING TRIM LH (w/ Back Panel Trim)
Tech Tips
Use the same procedure described for the RH side.
-
REMOVE FRONT DOOR OPENING TRIM RH (w/ Back Panel Trim)
-
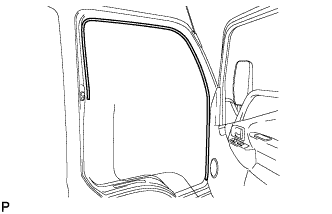
Remove the front door opening trim RH.
-
-
REMOVE NO. 1 ROOM LIGHT COVER (w/ LED Type Room Light)
-
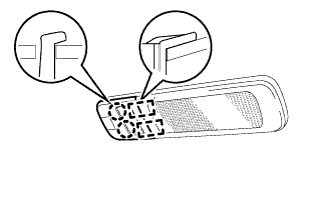
Detach the 2 claws and 2 guides and remove the No. 1 room light cover.
-
-
REMOVE NO. 2 ROOM LIGHT ASSEMBLY (w/ LED Type Room Light)
-
Remove the screw and No. 2 room light assembly.
-
Disconnect the connector.
-
-
REMOVE COAT HOOK (w/ Back Panel Trim)
Tech Tips
Use the same procedure for the other coat hook.
-
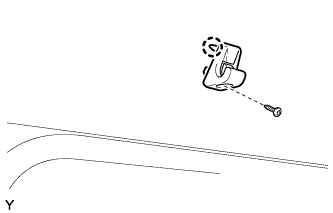
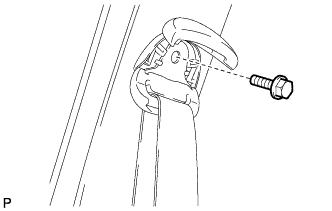
Remove the screw.
-
Detach the claw and remove the coat hook.
-
-
REMOVE ROOF HEADLINING ASSEMBLY (w/ Back Panel Trim)
-
Partially remove the roof headlining assembly.
-
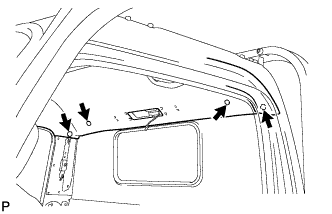
Using a clip remover, remove the 4 clips.
-
-
-
REMOVE BACK PANEL TRIM (w/ Back Panel Trim)
-
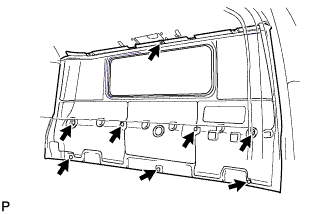
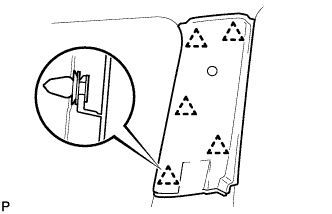
Using a clip remover, detach the 8 clips and remove the back panel trim.
-
-
REMOVE BACK WINDOW GLASS
Note
Be careful when removing the back window glass, as it may fall and become damaged.
-
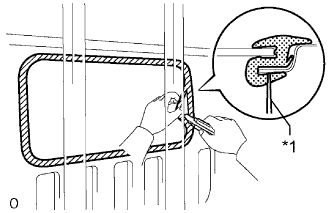
Text in Illustration *1 Knife Using a knife, cut off the back window glass weatherstrip as shown in the illustration.
-
Using suction cups, remove the back window glass.
-
-
REMOVE BACK WINDOW GLASS WEATHERSTRIP
-
Remove the back window glass weatherstrip from the back window glass.
-
-
CLEAN BACK WINDOW GLASS
-
Using a scraper, remove the adhesive sticking to the back window glass.
-
Clean the outer circumference of the back window glass with non-residue solvent.
Note
-
Do not touch the back window glass surface after cleaning it.
-
Be careful not to damage the back window glass.
-
Even if using new back window glass, clean the back window glass with non-residue solvent.
-
-
-
CLEAN VEHICLE BODY
-
Clean the contact surface of the vehicle body with cleaner.
Tech Tips
Even if all the adhesive has been removed, clean the vehicle body.
-