FRONT WIPER MOTOR REMOVAL

-
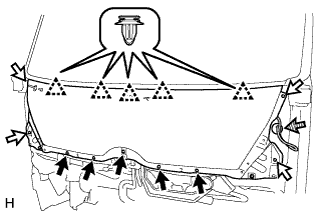
REMOVE RADIATOR GRILLE
-
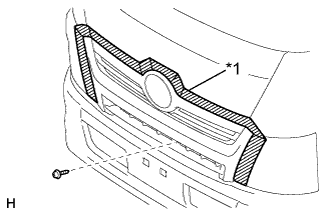
Text in Illustration *1 Protective Tape Put protective tape around the radiator grille.
-
Remove the screw.
-
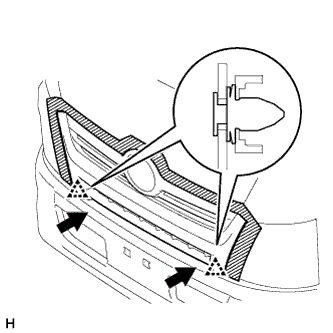
Place your fingers at the locations indicated by the arrows in the illustration and detach the 2 clips.
-
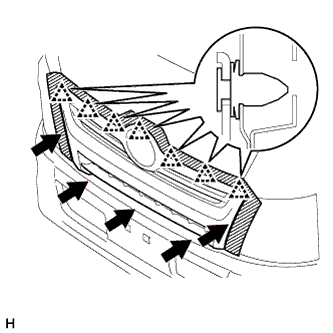
Place your fingers at the locations indicated by the arrows in the illustration, pull the radiator grill straight off the vehicle to detach the 7 clips, and then remove the radiator grille.
-
-
REMOVE FRONT SIDE PANEL SUB-ASSEMBLY LH
-
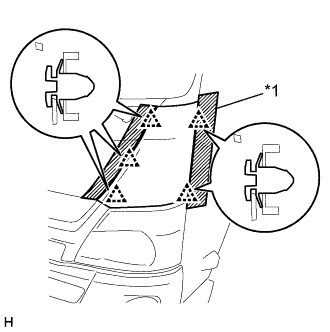
Text in Illustration *1 Protective Tape Put protective tape around the front side panel sub-assembly LH.
-
Detach the 5 clips and remove the front side panel sub-assembly LH.
-
-
REMOVE FRONT SIDE PANEL SUB-ASSEMBLY RH
Tech Tips
Use the same procedure described for the LH side.
-
REMOVE FRONT WIPER ARM HEAD CAP
-
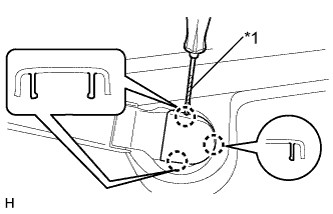
Text in Illustration *1 Protective tape Using a screwdriver, detach the 3 claws and remove the front wiper arm head cap.
Tech Tips
-
Tape the screwdriver tip before use.
-
Use the same procedure for both front wiper arm head caps.
-
-
-
REMOVE FRONT WIPER ARM LH
-
Disconnect the washer hose.
-
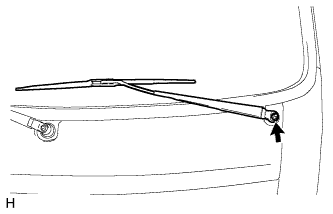
Remove the nut and front wiper arm LH.
-
-
REMOVE FRONT WIPER ARM RH
-
Disconnect the washer hose.
-

Remove the nut and front wiper arm RH.
-
-
REMOVE FRONT WIPER SHAFT PACKING
-
Remove the 2 pieces of front wiper shaft packing.
-
-
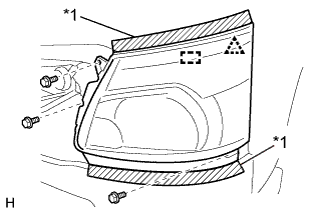
REMOVE HEADLIGHT ASSEMBLY LH
-
Put protective tape around the headlight assembly LH.
Text in Illustration *1 Protective Tape -
Remove the 3 bolts.
-
Detach the clip and guide.
-
Disconnect the connectors, detach the clamps, and remove the headlight assembly LH.
-
-
REMOVE HEADLIGHT ASSEMBLY RH
Tech Tips
Use the same procedure described for the LH side.
-
REMOVE OUTER COWL TOP PANEL SUB-ASSEMBLY
-
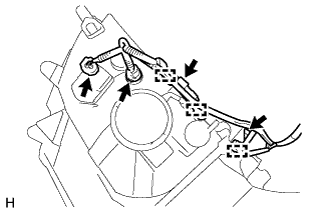
Disconnect the washer hose.
Text in Illustration 
Bolt 
Screw 
Washer hose -
Remove the 5 bolts and 4 screws.
-
Detach the 5 clips and remove the outer cowl top panel sub-assembly.
-
-
REMOVE NO. 1 FRONT PANEL COVER PROTECTOR
-
Remove the No. 1 front panel cover protector.
-
-
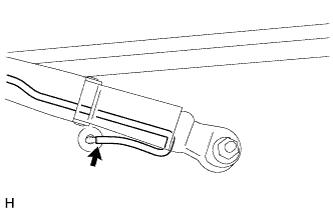
REMOVE WINDSHIELD WIPER LINK ASSEMBLY
-
Open the cover and remove the windshield wiper link assembly from the front wiper motor and bracket assembly.
-
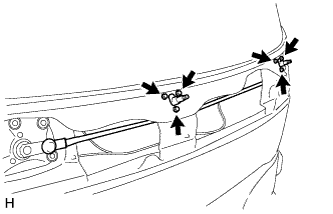
Remove the 6 bolts and windshield wiper link assembly.
-
-
REMOVE FRONT WIPER MOTOR AND BRACKET ASSEMBLY
-
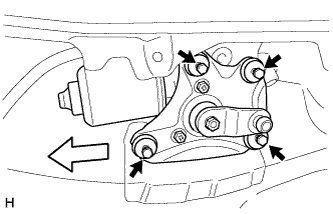
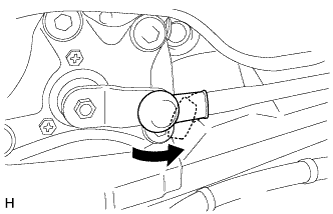
Remove the 4 bolts.
Text in Illustration Bolt Slide -
Move the wiper cushion in the direction shown by the arrow in the illustration to detach the front wiper motor and bracket assembly from the body, and remove the front wiper motor and bracket assembly.
-
Disconnect the connector.
-