WASHER MOTOR REMOVAL

-
REMOVE CENTER INSTRUMENT CLUSTER FINISH PANEL SUB-ASSEMBLY
-
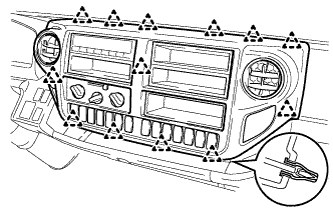
Detach the 13 clips and remove the center instrument cluster finish panel sub-assembly.
-
Disconnect each connector.
-
-
REMOVE INSTRUMENT PANEL BOX ASSEMBLY
-
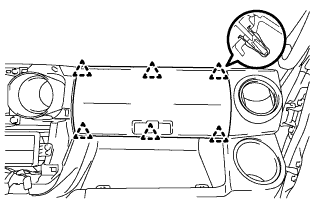
Detach the 6 clips and remove the instrument panel box.
-
-
REMOVE INSTRUMENT PANEL BOX HOLDER
-
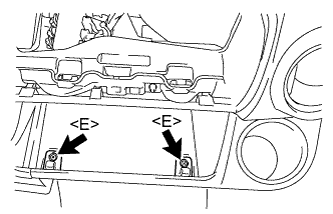
Remove the 2 screws <E> and 2 instrument panel box holders.
-
-
REMOVE LOWER INSTRUMENT COVER
-
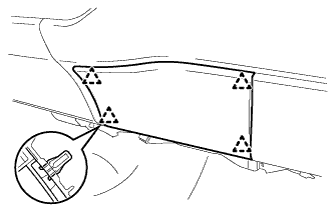
Detach the 4 clips and remove the lower instrument cover.
-
-
REMOVE LOWER INSTRUMENT PANEL
-
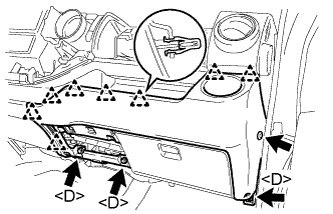
Remove the clip.
-
Remove the 3 bolts <D>.
-
Detach the 8 clips and remove the lower instrument panel.
-
-
REMOVE NO. 1 INSTRUMENT PANEL BOX
-
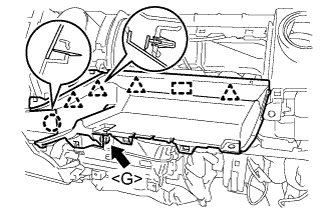
Remove the bolt <G>.
-
Detach the 4 clips, claw and guide and remove the No. 1 instrument panel box.
-
Detach the 2 clamps.
-
-
REMOVE FRONT WASHER TANK CAP
-
Remove the front washer tank cap.
-
-
REMOVE WASHER INLET SUB-ASSEMBLY
-
Remove the washer inlet sub-assembly.
-
-
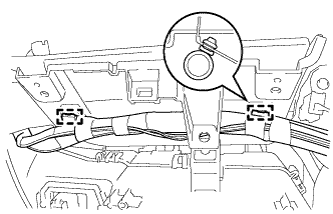
REMOVE WINDSHIELD WASHER JAR ASSEMBLY
-
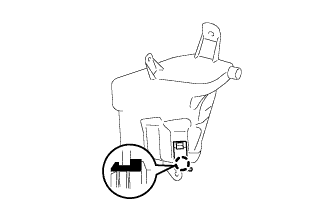
Detach the clamp and disconnect the connector.
Text in Illustration 
Bolt 
Connector -
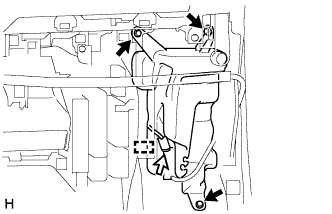
Remove the 3 bolts and windshield washer jar assembly.
-
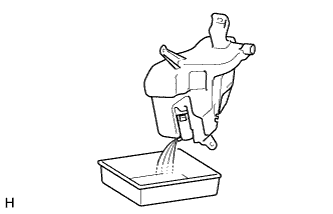
Disconnect the washer hose from the hose of the windshield washer motor and pump assembly, and then drain the washer fluid.
-
-
REMOVE WINDSHIELD WASHER MOTOR AND PUMP ASSEMBLY
-
Detach the claw and windshield washer motor and pump assembly.
-