HEADLIGHT ASSEMBLY INSTALLATION

Tech Tips
-
Use the same procedure for the RH and LH sides.
-
The procedure listed below is for the LH side.
-
INSTALL HEADLIGHT ASSEMBLY LH
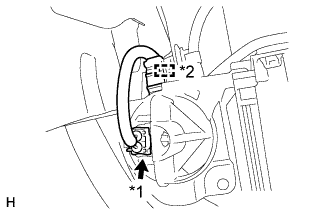
Text in Illustration *1 Front Turn Signal Light Connector *2 Clamp
-
Connect the connectors and attach the clamps.
Tech Tips
Before installing the headlight assembly LH, disconnect the front turn signal light connector and detach the clamp shown in the illustration to allow for easy installation of the headlight assembly LH. Once the headlight assembly LH is installed, reconnect the front turn signal light connector and attach the clamp shown in the illustration from the rear.
-
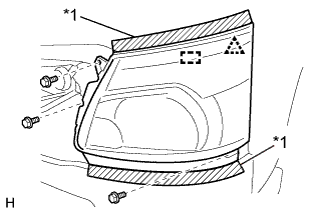
Text in Illustration *1 Protective Tape Put protective tape around the headlight assembly LH.
-
Attach the clip and guide to install the headlight assembly LH.
-
Install the 3 bolts.
- Torque:
- 5.0 N*m { 51 kgf*cm, 44 in.*lbf }
-
-
INSTALL RADIATOR GRILLE
Tech Tips
Make sure the claws of the clips are not damaged. If a claw is damaged, replace the clip with a new one.
-
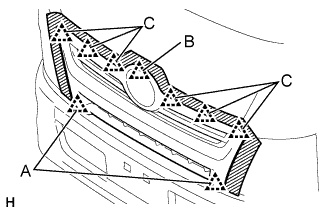
Partially attach the clips labeled A.
-
Attach the clip labeled B, and then attach the clips labeled C.
-
Fully attach the clips labeled A to install the radiator grille.
-
Install the screw.
-
-
ADJUST HEADLIGHT AIMING