AIR CONDITIONING PANEL REASSEMBLY

-
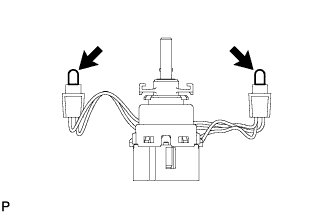
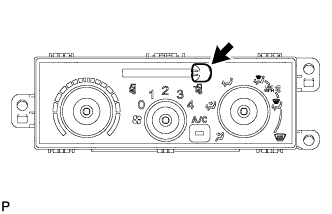
INSTALL HEATER BLOWER SWITCH BULB
-
Connect the 2 heater blower switch bulbs.
-
-
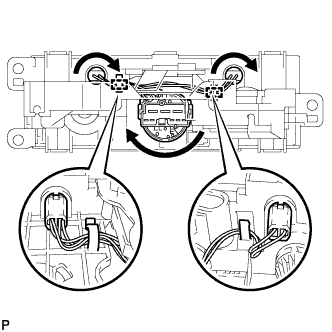
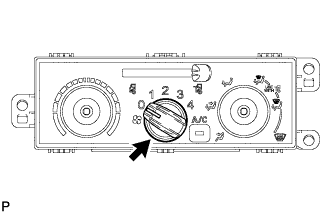
INSTALL HEATER BLOWER SWITCH
-
Rotate the heater blower switch in the direction shown by the arrow in the illustration and install it.
-
Rotate the 2 heater blower switch bulbs and the 2 wire harness clamps in the directions shown by the arrows in the illustration and install them.
-
-
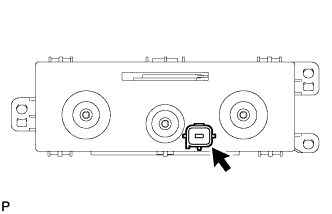
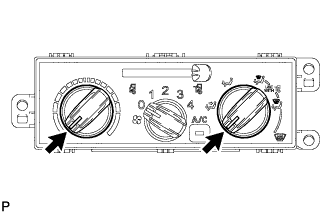
INSTALL COOLER CONTROL SWITCH KNOB
-
Install the cooler control switch knob.
-
-
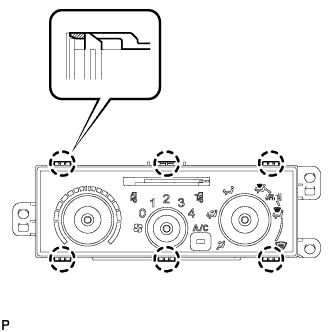
INSTALL HEATER CONTROL NAME PLATE
-
Attach the 6 claws to install the heater control name plate.
-
-
INSTALL HEATER CONTROL LEVER KNOB
-
Install the heater control lever knob.
-
-
INSTALL CONTROL KNOB SUB-ASSEMBLY
-
Install the control knob sub-assembly.
-
-
INSTALL CONTROL KNOB SUB-ASSEMBLY
-
Install the 2 control knob sub-assemblies.
-
-
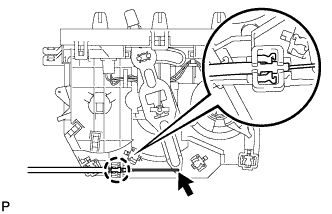
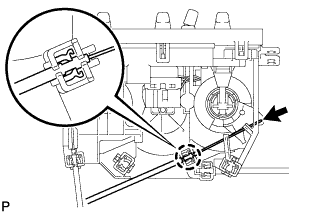
INSTALL AIR INLET DAMPER CONTROL CABLE SUB-ASSEMBLY
-
Install the tip of the inner cable of the air inlet damper control cable sub-assembly to the control lever.
-
Install the outer cable of the air inlet damper control cable sub-assembly to the cable clamp.
Note
Operate the heater control lever knob and confirm that the knob stops properly at both the RECIRC and FRESH positions, and that the knob does not move back out of position by itself.
-
-
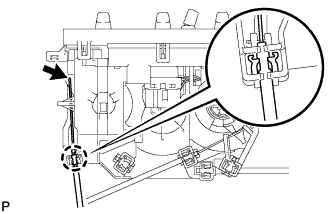
INSTALL NO. 1 HEATER CONTROL CABLE SUB-ASSEMBLY
-
Install the tip of the inner cable of the No. 1 heater control cable sub-assembly to the heater control lever.
-
Install the outer cable of the No. 1 heater control cable sub-assembly to the cable clamp.
Note
Operate the heater control knob and confirm that the knob stops properly at both the FACE and DEF positions, and that the knob does not move back out of position by itself.
-
-
INSTALL AIRMIX DAMPER CONTROL CABLE SUB-ASSEMBLY
-
Install the tip of the inner cable of the airmix damper control cable sub-assembly to the heater control lever.
-
Install the outer cable of the airmix damper control cable sub-assembly to the cable clamp.
Note
Operate the heater control knob and confirm that the knob stops properly at both the MAX COOL and MAX HOT positions, and that the knob does not move back out of position by itself.
-