AIR CONDITIONING UNIT REMOVAL

-
RECOVER REFRIGERANT FROM REFRIGERATION SYSTEM
-
Start up the engine.
-
A/C switch on.
-
Turn the blower switch to on.
-
Operate the cooler compressor with an engine speed of approximately 1000 rpm for 5 to 6 minutes to circulate the refrigerant and collect the remaining compressor oil from each component, in the cooler compressor.
-
Stop the engine.
-
Remove the caps from the service valves on the refrigerant line.
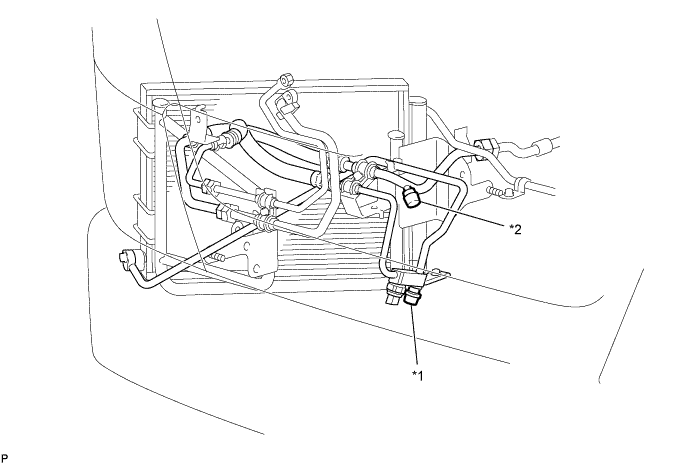
Text in Illustration *1 High Pressure Service Valve *2 Low Pressure Service Valve -
Connect the refrigerant recovery unit.
-
Recover the refrigerant from the air conditioning system using a refrigerant recovery unit.
Tech Tips
Use the refrigerant recovery unit in accordance with the manufacturer's instruction manual.
-
-
TILT UP CAB
CAUTION:
-
Make sure that the vehicle is on a level surface before tilting the cab up.
-
Make sure that all the doors are closed before tilting the cab up.
-
Make sure that nobody is inside or near the cab when tilting it up.
-
Be sure to have 2 people tilt the cab up when a heavy object such as a roof rack or cargo carrier is installed to the cab.
-
Be sure to remove anything set on top of the cab before tilting it up.
-
Make sure that the cab is securely locked in place after it is tilted up.
-
Make sure that there are no tools, cloths, etc. left in the engine room before tilting the cab back down.
-
Make sure that the cab is securely locked in place after tilting it back down.
-
-
DRAIN ENGINE COOLANT
CAUTION:
Do not remove the radiator cap sub-assembly, radiator drain cock plug or engine drain plug while the engine and radiator are still hot. Pressurized, hot engine coolant and steam may be released and cause serious burns.
-
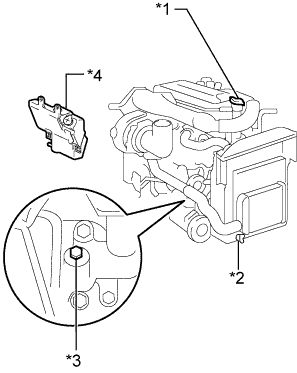
Text in Illustration *1 Radiator Cap Sub-assembly *2 Radiator Drain Cock Plug *3 Engine Drain Plug *4 Radiator Reservoir Assembly Loosen the radiator drain cock plug and engine drain plug.
-
Remove the radiator cap sub-assembly, and then drain the coolant.
Tech Tips
Collect the coolant in a container and dispose of it according to the local regulations.
-
Tighten the radiator drain cock plug by hand.
-
Tighten the engine drain plug.
- Torque:
- 27 N*m { 275 kgf*cm, 20 ft.*lbf }
-
-
REMOVE HEADLIGHT ASSEMBLY RH
-
REMOVE COWL TOP OUTER PANEL SUB-ASSEMBLY
-
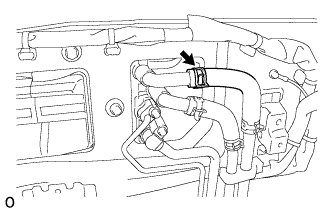
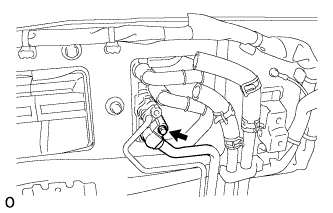
REMOVE HEATER WATER OUTLET HOSE C
-
Slide the clip and disconnect the heater water outlet hose C from the air conditioning unit.
-
-
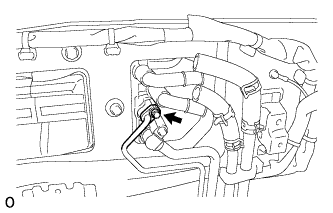
REMOVE HEATER WATER INLET HOSE C

-
Slide the clip and disconnect the heater water inlet hose C from the air conditioning unit.
-
-
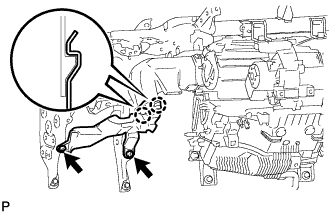
SEPARATE COOLER REFRIGERANT LIQUID PIPE A
-
Remove the bolt and separate the cooler refrigerant liquid pipe A.
-
Remove the O-ring from the cooler refrigerant liquid pipe A.
Note
Seal the opening of the disconnected parts using vinyl tape to prevent the entry of moisture and foreign matter.
-
-
SEPARATE COOLER REFRIGERANT SUCTION PIPE A
-
Remove the bolt and separate the cooler refrigerant suction pipe A.
-
Remove the O-ring from the cooler refrigerant suction pipe A.
Note
Seal the opening of the disconnected parts using vinyl tape to prevent the entry of moisture and foreign matter.
-
-
REMOVE INSTRUMENT PANEL SUB-ASSEMBLY
-
REMOVE STEERING COLUMN ASSEMBLY
-
REMOVE ECU BRACKET
-
Disconnect the connectors.
-
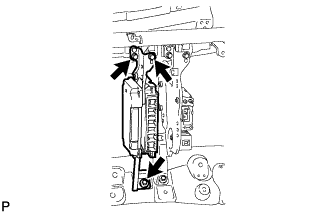
Remove the 3 bolts and the ECU bracket.
-
-
REMOVE ECU BRACKET
-
Disconnect the connectors.
-
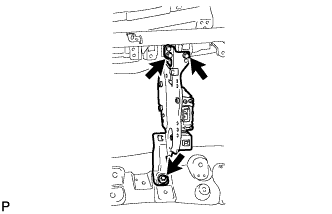
Remove the 3 bolts and the ECU bracket.
-
-
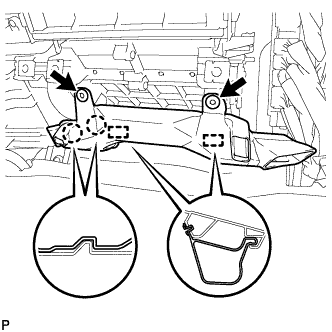
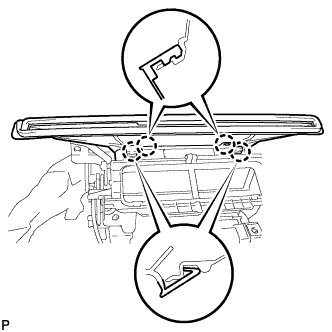
REMOVE NO. 3 AIR DUCT SUB-ASSEMBLY
-
Remove the 2 clips.
-
Detach the 2 claws and 2 guides, then remove the No. 3 air duct sub-assembly.
-
-
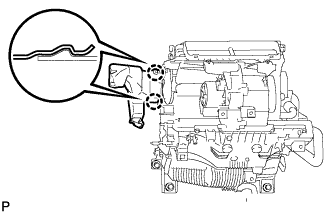
REMOVE NO. 4 AIR DUCT SUB-ASSEMBLY
-
Remove the 2 clips.
-
Detach the 2 claws and remove the No. 4 air duct sub-assembly.
-
-
REMOVE NO. 1 INSTRUMENT PANEL BRACE SUB-ASSEMBLY

-
Remove the 3 bolts and the No. 1 instrument panel brace sub-assembly.
-
-
DISCONNECT BRAKE MASTER CYLINDER RESERVOIR ASSEMBLY
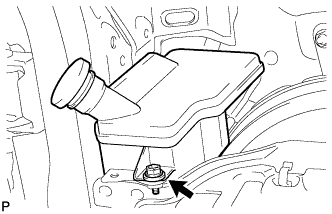
-
Remove the bolt and separate the brake master cylinder reservoir assembly.
-
-
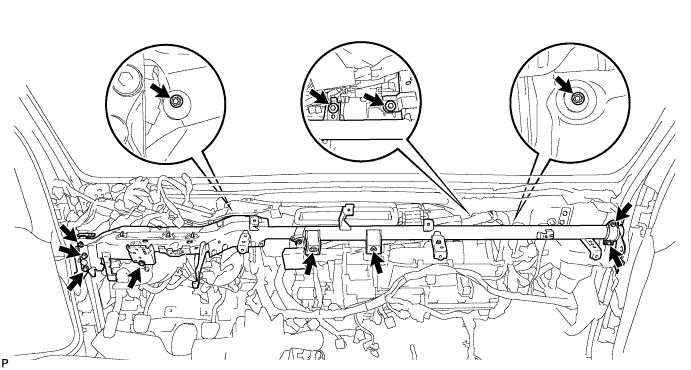
REMOVE INSTRUMENT PANEL REINFORCEMENT
-
Remove the bolt.
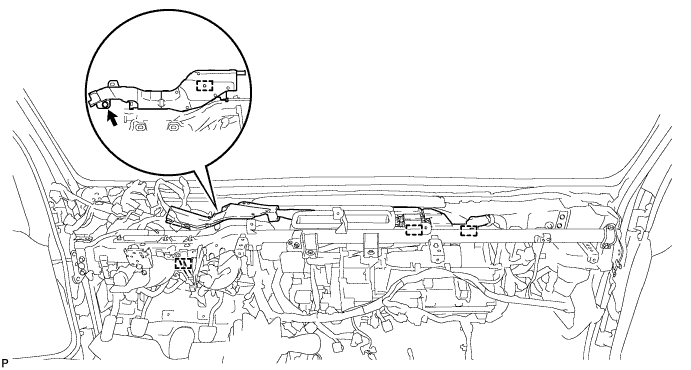
-
Disconnect the connectors and detach the 4 clamps, then separate the wire harness.
-
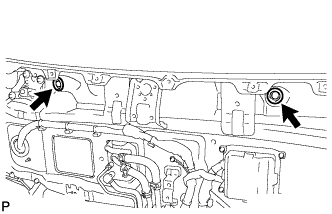
Remove the 2 grommets.
-
Remove the 10 bolts and 2 nuts, then instrument panel reinforcement.
-
-
REMOVE NO. 1 AIR DUCT SEAL
-
Detach the 2 clips and remove the No. 1 air duct seal.
-
-
REMOVE NO. 2 AIR DUCT SEAL
-
Detach the 2 clips and remove the No. 2 air duct seal.
-
-
REMOVE AIR DAMPER CASE ASSEMBLY

-
Disconnect the connectors and detach the 4 clamps, then separate the wire harness.
-
Remove the 3 bolts and the air damper case assembly.
-
-
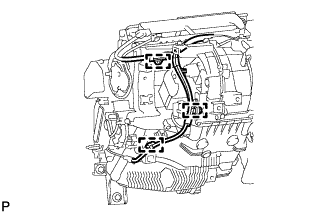
REMOVE HEATER WIRE
-
Disconnect the connectors and detach the 3 clamps, then remove the heater wire.
-
-
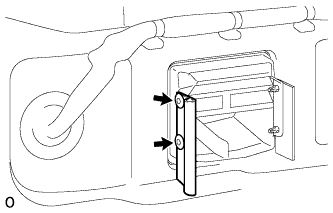
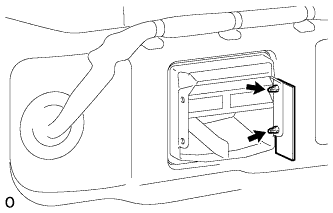
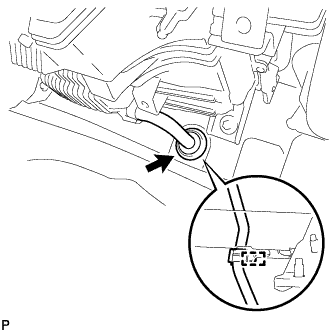
SEPARATE NO. 1 COOLER UNIT DRAIN HOSE
-
Detach the clamp.
-
Remove the grommet and separate the No. 1 cooler unit drain hose.
-
-
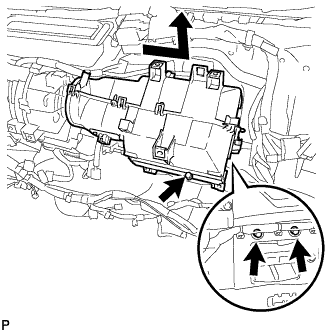
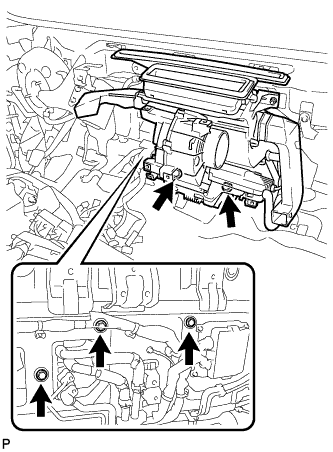
REMOVE AIR CONDITIONING UNIT ASSEMBLY
-
Remove the 5 bolts and the air conditioner unit assembly.
-
-
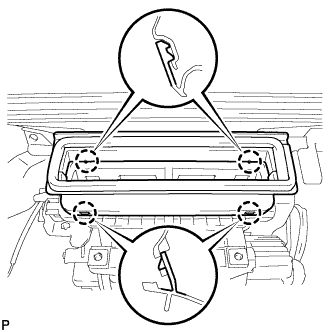
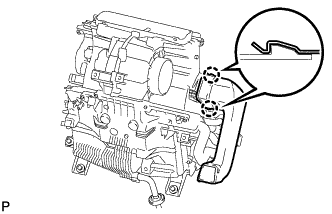
REMOVE HEATER TO REGISTER DUCT ASSEMBLY
-
Detach the 4 claws and remove the heater to register duct assembly.
-
-
REMOVE LOWER DEFROSTER NOZZLE
-
Detach the 4 claws and remove the lower defroster nozzle.
-
-
REMOVE NO. 2 AIR DUCT SUB-ASSEMBLY
-
Detach the 2 claws and remove the No. 2 air duct sub-assembly.
-
-
REMOVE NO. 1 AIR DUCT SUB-ASSEMBLY
-
Detach the 2 claws and remove the No. 1 air duct sub-assembly.
-
-
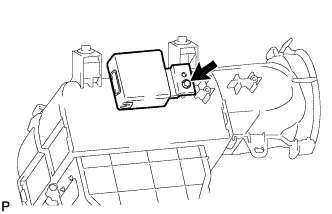
REMOVE NO. 1 AIR CONDITIONING AMPLIFIER ASSEMBLY
-
Remove the bolt and the No. 1 air conditioning amplifier assembly.
-