BRAKE BOOSTER REMOVAL

-
REMOVE PEDAL BRACKET ASSEMBLY
-
REMOVE BRAKE BOOSTER ASSEMBLY
-
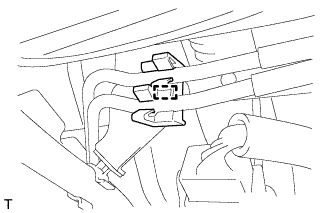
Slide the 2 clips and disconnect the 2 master cylinder reservoir tubes.
-
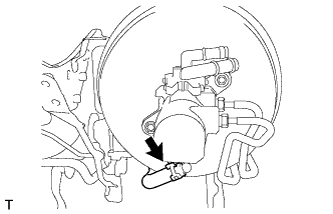
Slide the clip and disconnect the vacuum hose.
-

Using a 12 mm union nut wrench, disconnect the 2 brake tubes from the brake tube way.
-

Using a 12 mm union nut wrench, disconnect the 2 brake tubes from the brake master less reservoir tank cylinder sub-assembly.
-
Disconnect the clamp and remove the 2 brake tubes.
-
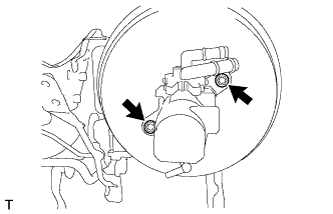
Remove the 2 nuts and brake master less reservoir tank cylinder sub-assembly.
Note
-
The master cylinder requires careful handling. Do not allow the master cylinder to receive any impact, such as from being dropped. Do not reuse a master cylinder that has been dropped.
-
Do not strike or pinch the master cylinder piston, and do not cause any damage to the master cylinder piston by any other means.
-
Release the vacuum from the booster by depressing the brake pedal several times. Then remove the brake master cylinder from the brake booster.
-
When installing the brake master cylinder sub-assembly onto the brake booster, or when removing the brake master cylinder sub-assembly from the brake booster, make sure that the brake master cylinder sub-assembly is kept horizontal or its tip faces downward (the piston faces upward) to prevent the master cylinder piston from falling off.
-
Do not allow any foreign objects to contaminate the master cylinder piston. If a foreign object gets on the piston, remove it by using a piece of cloth and then apply an even layer of lithium soap based glycol grease around the circumference (sliding part) of the piston.
-
Do not use any other type of grease or fluid.
-
-
Remove the O-ring from the brake master less reservoir tank cylinder sub-assembly.
-
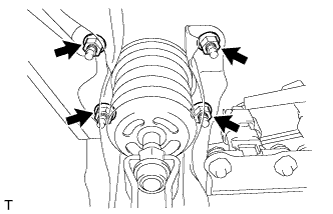
Remove the 4 nuts and the brake booster assembly from the pedal bracket assembly.
-
-
REMOVE BRAKE MASTER CYLINDER PUSH ROD CLEVIS
-
Loosen the lock nut and remove the brake master cylinder push rod clevis and the lock nut.
-