REAR LEAF SPRING DISASSEMBLY

-
DISASSEMBLE REAR SPRING ASSEMBLY
-
Secure the rear spring assembly in a vise between aluminum plates.
-
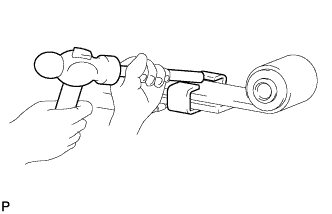
Using a brass bar and hammer, pry open the 2 spring clips.
Note
Do not damage the leaf spring and rear No. 1 spring silencers.
-

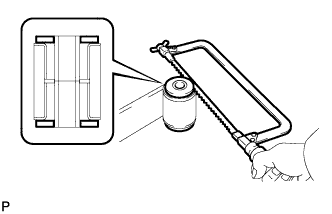
Secure the rear spring assembly with a C-clamps as shown in the illustration.
-
Remove the rear center spring bolt nut and rear center spring bolt.
-
w/o Rear stabilizer bar:
-
Remove the rear No. 1 spring spacer, rear No. 1 helper leaf spring, rear No. 2 helper leaf spring, rear No. 3 helper leaf spring, rear No. 1 leaf spring, rear No. 2 leaf spring, rear No. 3 leaf spring, 5 rear leaf spring spacers, 4 rear No. 1 spring silencers and 3 rear No. 3 spring spacers.
-
-
w/ Rear stabilizer bar:
-
Remove the rear No. 1 spring spacer, rear No. 1 helper leaf spring, rear No. 2 helper leaf spring, rear No. 3 helper leaf spring, rear No. 1 leaf spring, rear No. 2 leaf spring, rear No. 3 leaf spring, 5 rear leaf spring spacers, 4 rear No. 1 spring silencers, rear No. 3 spring spacer and stabilizer bracket sub-assembly.
-
-
-
REMOVE REAR LEAF SPRING BUSHING
-
Fix the rear No. 1 leaf spring with a vise.
-
for front side:
-
Using a metal saw, cut both rubber ends of the 2 rear leaf spring bushings.
-
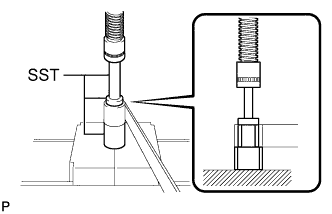
Using SST and a press, press out the 2 rubber part of the bushings.
- SST
- 09309-60010
- 09950-60010 ( 09951-00300 )
- 09950-70010 ( 09951-07100 )
-
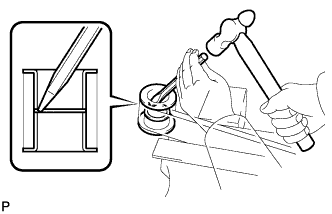
Using a chisel and hammer, remove the rear leaf spring bushing from the rear No. 1 leaf spring.
-
-
for rear side:
Tech Tips
Use the same procedure described for the front side.
-