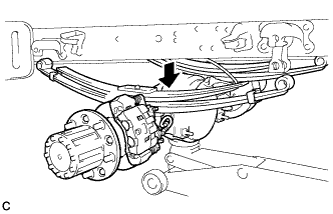
REAR LEAF SPRING REMOVAL

Tech Tips
-
Use the same procedure for the RH side and LH side.
-
The procedure listed below is for the LH side.
-
SEPARATE REAR STABILIZER BAR (w/ Rear Stabilizer)
-
Remove the 3 bolts, 2 washers, rear inner stabilizer end bracket LH and rear outer stabilizer end bracket LH.
-
-
SUPPORT FRAME
-
Jack up and support the frame on stands.
-
Support the rear axle housing using a jack.
-
Lower the rear axle housing until the rear spring tension is free, and keep it at this position.
-
-
REMOVE REAR WHEEL
-
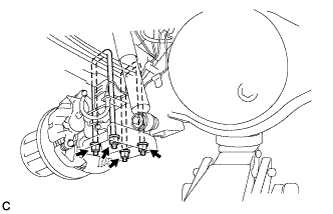
DISCONNECT REAR SHOCK ABSORBER ASSEMBLY
-
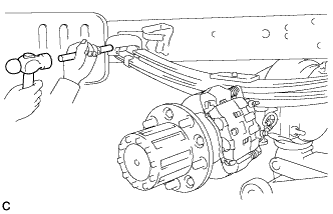
Remove the bolt and disconnect the rear shock absorber assembly from the rear axle housing.
-
-
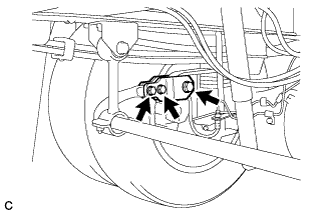
REMOVE REAR SPRING U BOLT
-
Remove the 4 nuts, 4 washers, 2 rear spring U bolts, spring U bolt seat sub-assembly and rear upper spring seat.
-
-
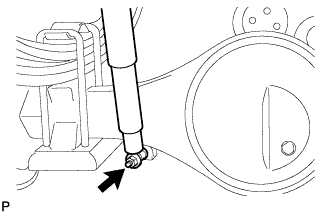
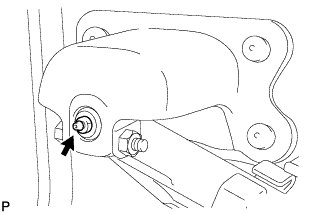
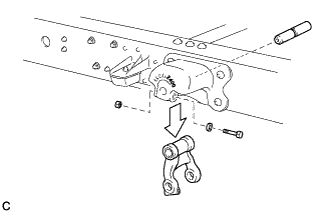
REMOVE REAR SPRING BRACKET PIN GREASE NIPPLE
-
Remove the rear spring bracket pin grease nipple on the front of the rear spring assembly.
-
Remove the 2 rear spring bracket pin grease nipples on the rear of the rear spring assembly.
-
-
REMOVE REAR SPRING ASSEMBLY
-
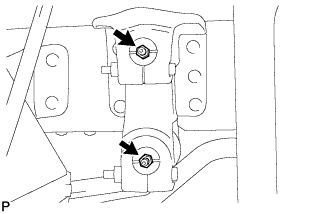
Remove the bolt, washer, and nut on the front of the rear spring assembly.
Note
Turn the bolt while holding the nut.
-
Remove the bolt, washer, and nut on the rear of the rear spring assembly.
Note
Turn the bolt while holding the nut.
-
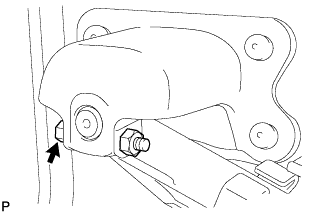
Using a hammer and brass bar, tap out the rear spring bracket pin on the front of the rear spring assembly.
-

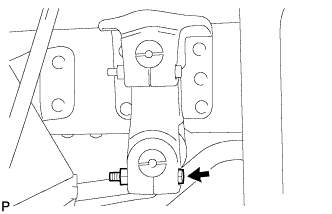
Using a hammer and brass bar, tap out the rear spring bracket pin on the rear of the rear spring assembly.
Note
Be careful not to drop the rear spring when removing the rear spring bracket pin.
-
Lower the jack and remove the rear spring assembly.
-
-
REMOVE REAR NO. 2 SPRING SHACKLE SUB-ASSEMBLY
-
Remove the bolt, nut and washer.
Note
Turn the bolt while holding the nut.
-
Using a hammer and brass bar, tap out the rear spring bracket pin and remove the rear No. 2 spring shackle sub-assembly.
-