ROOF HEADLINING REMOVAL

-
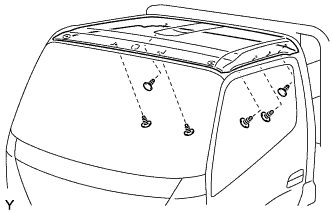
REMOVE FRONT DOOR SCUFF PLATE RH
-
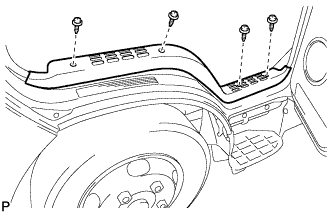
Remove the 4 screws and front door scuff plate RH.
-
-
REMOVE FRONT DOOR SCUFF PLATE LH
Tech Tips
Use the same procedure described for the RH side.
-
DISCONNECT FRONT SEAT OUTER BELT ASSEMBLY RH
-
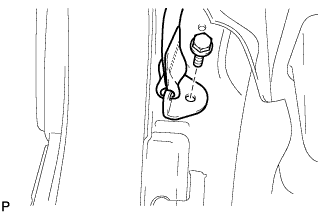
Remove the bolt and disconnect the front seat outer belt assembly RH floor anchor.
-
-
DISCONNECT FRONT SEAT OUTER BELT ASSEMBLY LH
Tech Tips
Use the same procedure described for the RH side.
-
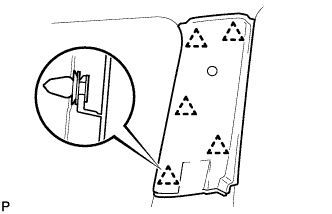
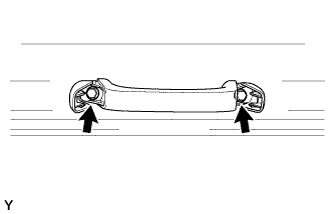
REMOVE LOWER QUARTER TRIM PANEL ASSEMBLY RH
-
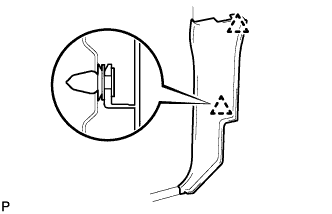
Detach the 2 clips and remove the lower quarter trim panel assembly RH.
-
-
REMOVE LOWER QUARTER TRIM PANEL ASSEMBLY LH
Tech Tips
Use the same procedure described for the RH side.
-
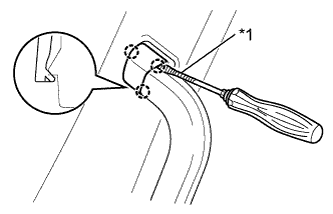
REMOVE SEAT BELT ANCHOR COVER CAP (for Driver Side)
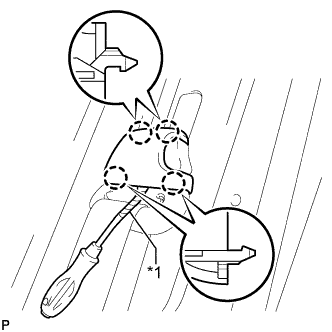
Text in Illustration *1 Protective Tape
-
Using a clip remover, detach the 4 claws and remove the seat belt anchor cover cap.
Tech Tips
Tape the clip remover tip before use.
-
-
REMOVE FRONT QUARTER TRIM PANEL ASSEMBLY RH (for Full-trim)
-
Text in Illustration *1 Protective Tape Using a clip remover, detach the 2 claws and open the shoulder anchor cover.
Tech Tips
Tape the clip remover tip before use.
-
Remove the bolt and disconnect the front seat outer belt assembly RH shoulder anchor.
-
Detach the 5 clips and remove the front quarter trim panel assembly RH.
-
-
REMOVE FRONT QUARTER TRIM PANEL ASSEMBLY LH (for Full-trim)
-

Remove the bolt and disconnect the front seat outer belt assembly LH shoulder anchor.
-
Detach the 5 clips and remove the front quarter trim panel assembly LH.
-
-
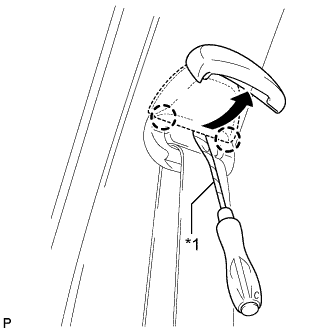
REMOVE ASSIST GRIP PLUG
-
Text in Illustration *1 Protective Tape Using a screwdriver, detach the 3 claws and remove the assist grip plug.
Tech Tips
-
Use the same procedure for the other assist grip plug.
-
Tape the screwdriver tip before use.
-
-
-
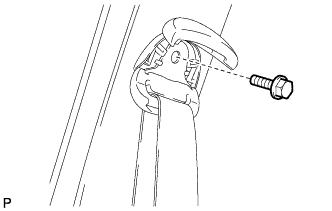
REMOVE NO. 2 ASSIST GRIP ASSEMBLY RH
-
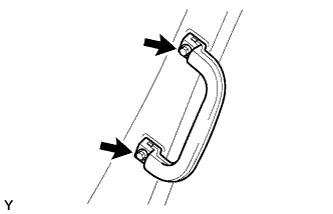
Remove the 2 screws and No. 2 assist grip assembly RH.
-
-
REMOVE NO. 2 ASSIST GRIP ASSEMBLY LH
Tech Tips
Use the same procedure described for the RH side.
-
REMOVE FRONT PILLAR GARNISH RH
-
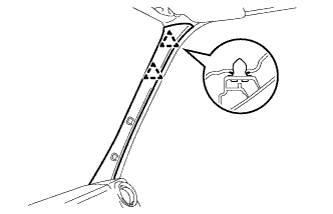
Detach the 2 clips and remove the front pillar garnish RH.
-
-
REMOVE FRONT PILLAR GARNISH LH
Tech Tips
Use the same procedure described for the RH side.
-
REMOVE FRONT DOOR OPENING TRIM RH
-
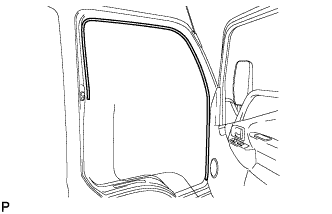
Remove the front door opening trim RH.
-
-
REMOVE FRONT DOOR OPENING TRIM LH
Tech Tips
Use the same procedure described for the RH side.
-
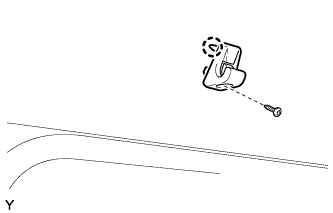
REMOVE INNER REAR VIEW MIRROR ASSEMBLY
-
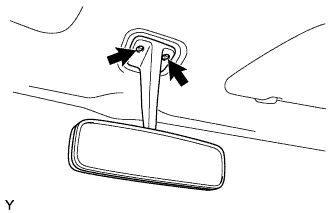
Remove the 2 screws and inner rear view mirror assembly.
-
-
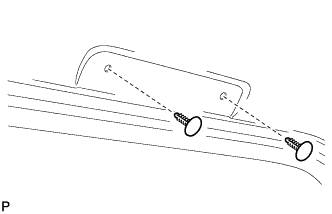
REMOVE VISOR ASSEMBLY RH
-
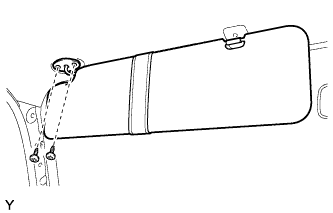
Remove the 2 screws and visor assembly RH.
-
-
REMOVE VISOR ASSEMBLY LH
Tech Tips
Use the same procedure described for the RH side.
-
REMOVE VISOR HOLDER
Tech Tips
Use the same procedure for the other visor holder.
-
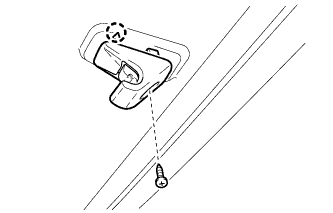
Remove the screw.
-
Detach the claw and remove the visor holder.
-
-
REMOVE ROOF CONSOLE BOX
-
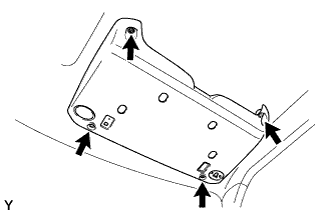
Remove the 4 screws.
-
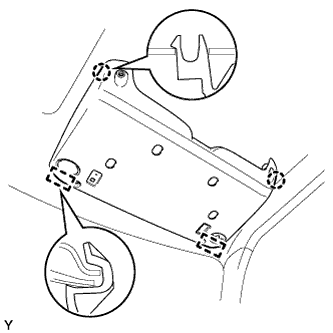
Detach the 2 claws and 2 guides and remove the roof console box.
-
-
REMOVE NO. 1 ROOM LIGHT LENS
-
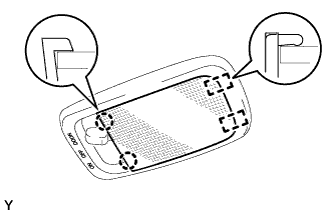
Detach the 2 claws and 2 guides and remove the No. 1 room light lens.
-
-
REMOVE NO. 1 ROOM LIGHT ASSEMBLY
-
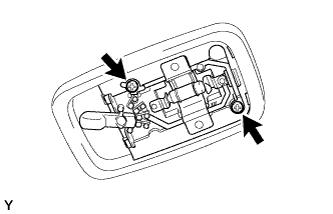
Remove the 2 screws and No. 1 room light assembly.
-
Disconnect the connector.
-
-
REMOVE NO. 1 ROOM LIGHT COVER (w/ LED Type Room Light)
-
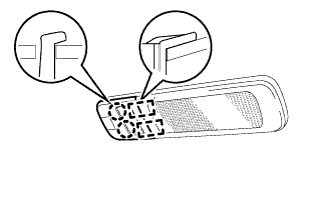
Detach the 2 claws and 2 guides and remove the No. 1 room light cover.
-
-
REMOVE NO. 2 ROOM LIGHT ASSEMBLY (w/ LED Type Room Light)
-
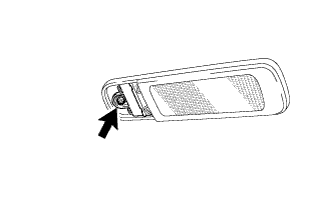
Remove the screw and No. 2 room light assembly.
-
Disconnect the connector.
-
-
REMOVE COAT HOOK
Tech Tips
Use the same procedure for the other coat hook.
-
Remove the screw.
-
Detach the claw and remove the coat hook.
-
-
REMOVE ASSIST GRIP SUB-ASSEMBLY (w/ Assist Grip)
-

Text in Illustration *1 Protective Tape Using a screwdriver, detach the 4 claws and open the 2 covers.
Tech Tips
Tape the screwdriver tip before use.
-
Remove the 2 bolts and assist grip sub-assembly.
-
-
REMOVE CLIP (w/o Assist Grip)
-
Remove the 2 clips.
-
-
REMOVE ROOF HEADLINING ASSEMBLY
-
Remove the 6 clips.
-
Pull out the roof headlining assembly from the vehicle through the passenger door.
Note
Be careful not to damage the roof headlining assembly when taking it out.
-