REAR CONSOLE BOX REMOVAL
PROCEDURE
-
REMOVE SHIFT LEVER KNOB SUB-ASSEMBLY (for 5MT)
-
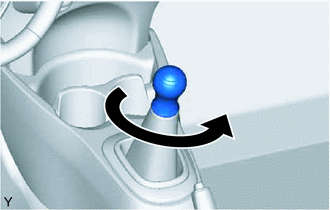
Turn the shift lever knob sub-assembly counterclockwise and remove the shift lever knob sub-assembly.
-
-
REMOVE SHIFT LEVER KNOB SUB-ASSEMBLY (for 6MT)
-
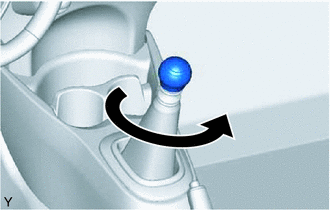
Turn the shift lever knob sub-assembly counterclockwise and remove the shift lever knob sub-assembly.
-
-
REMOVE SHIFTING HOLE COVER SUB-ASSEMBLY (for Integrated Console Box Type)
-
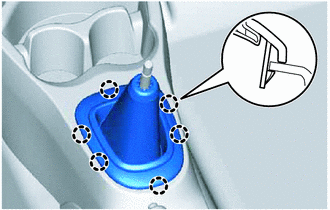
for 5MT:
-
Disengage the 6 claws and remove the shifting hole cover sub-assembly.
-
-
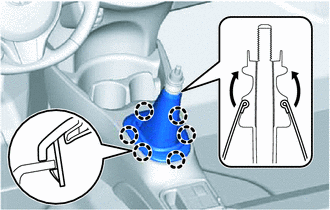
for 6MT:
-
Disengage the 6 claws and remove the shifting hole cover sub-assembly as shown in the illustration.
-
-
-
REMOVE REAR CONSOLE BOX SUB-ASSEMBLY (for Separate Console Box Type)
-
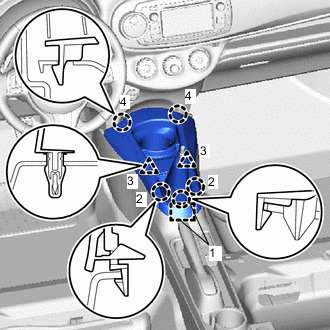
for 5MT:
-
Disengage the 5 claws, 2 clips and guide and remove the rear console box sub-assembly.
Tech Tips
Remove the rear console box sub-assembly in the order shown in the illustration.
Note
Be careful not to damage the lower instrument panel when removing it.
-
-
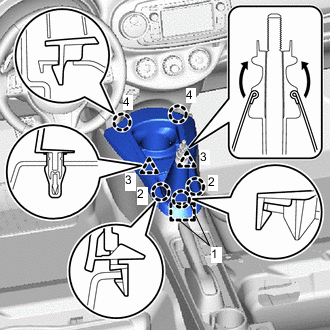
for 6MT:
-
Disengage the 5 claws, 2 clips and guide and remove the rear console box sub-assembly as shown in the illustration.
Tech Tips
Remove the rear console box sub-assembly in the order shown in the illustration.
Note
Be careful not to damage the lower instrument panel when removing it.
-
-
-
REMOVE FRONT ASH RECEPTACLE ASSEMBLY (w/ Ashtray)
-
REMOVE REAR CONSOLE BOX COVER
-
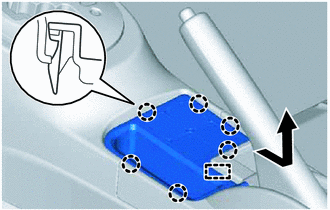
Disengage the 6 claws.
-
Disengage the guide and pull out the rear console box cover as shown in the illustration.
-
Disconnect the connectors and remove the rear console box cover.
-
-
REMOVE CONSOLE BOX CARPET
-
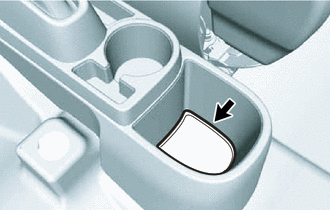
Remove the console box carpet.
-
-
REMOVE REAR CONSOLE BOX ASSEMBLY
-
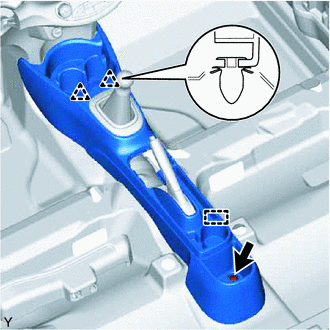
Remove the bolt.
-
Disengage the 2 clips and guide and remove the rear console box assembly.
Note
Be careful not to damage the lower instrument panel when removing it.
-