AIR CONDITIONING PANEL(for Manual Air Conditioning System) DISASSEMBLY
PROCEDURE
-
REMOVE NO. 1 HEATER CONTROL SUB-ASSEMBLY
-
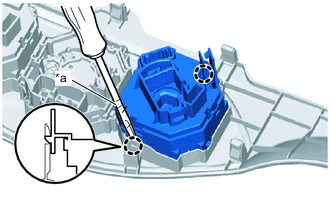
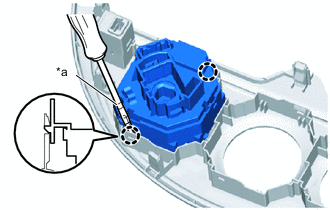
Text in Illustration *a Protective Tape Using a screwdriver with its tip wrapped in protective tape, disengage the 2 claws to remove the No. 1 heater control sub-assembly.
-
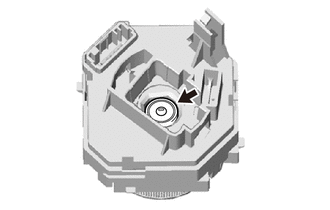
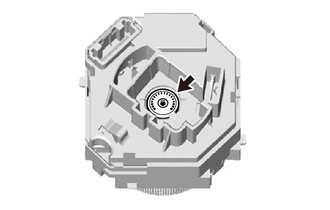
Remove the bulb.
-
-
REMOVE NO. 2 HEATER CONTROL SUB-ASSEMBLY
-
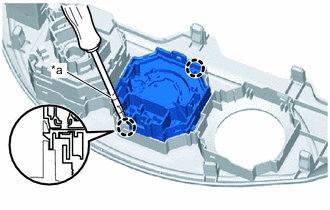
Text in Illustration *a Protective Tape Using a screwdriver with its tip wrapped in protective tape, disengage the 2 claws to remove the No. 2 heater control sub-assembly.
-
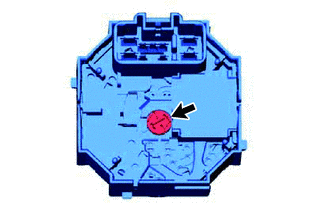
Remove the bulb.
-
-
REMOVE NO. 3 HEATER CONTROL SUB-ASSEMBLY
-
Text in Illustration *a Protective Tape Using a screwdriver with its tip wrapped in protective tape, disengage the 2 claws to remove the No. 3 heater control sub-assembly.
-
Remove the bulb.
-
-
REMOVE AMPLIFIER MICROPHONE ASSEMBLY (w/ Microphone)