COOLER EXPANSION VALVE(except 1ND-TV) REMOVAL
PROCEDURE
-
RECOVER REFRIGERANT FROM REFRIGERATION SYSTEM
-
REMOVE WINDSHIELD WIPER MOTOR AND LINK (for 1KR-FE)
-
REMOVE FRONT NO. 1 VENTILATOR SEAL (for 1KR-FE)
-
REMOVE FRONT AIR SHUTTER SEAL RH (for 1KR-FE)
-
REMOVE INNER COWL TOP TO COWL BRACE (for 1KR-FE)
-
REMOVE OUTER COWL TOP PANEL (for 1KR-FE)
-
REMOVE NO. 1 ENGINE COVER (for 1NR-FE)
-
REMOVE AIR CLEANER CAP SUB-ASSEMBLY (for 1NR-FE)
-
REMOVE AIR CLEANER FILTER ELEMENT SUB-ASSEMBLY (for 1NR-FE)
-
REMOVE AIR CLEANER CASE SUB-ASSEMBLY (for 1NR-FE)
-
DISCONNECT SUCTION TUBE SUB-ASSEMBLY B
-
DISCONNECT LIQUID TUBE SUB-ASSEMBLY A
-
REMOVE COOLER EXPANSION VALVE
-
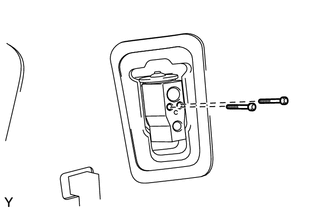
Using a 4 mm hexagon wrench, remove the 2 hexagon bolts.
-
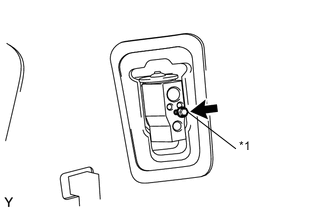
Text in Illustration *1 Bolt For The Suction Tube Sub-assembly Temporarily attach the bolt for the suction tube sub-assembly halfway to the cooler expansion valve.
-
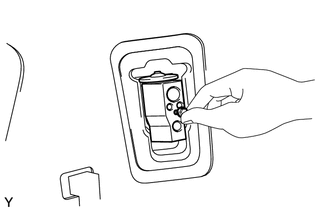
Hold the bolt and pull it to remove the cooler expansion valve as shown in the illustration.
-
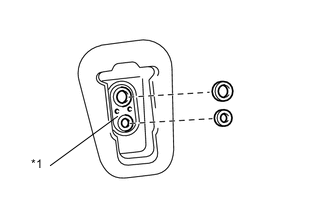
Text in Illustration *1 Cooler Evaporator Remove the 2 O-rings from the cooler evaporator.
-