REAR SEAT ASSEMBLY(for 60/40 Split Seat Type LH Side) REASSEMBLY
CAUTION / NOTICE / HINT
CAUTION:
Wear protective gloves. Sharp areas on the parts may injure your hands.
PROCEDURE
-
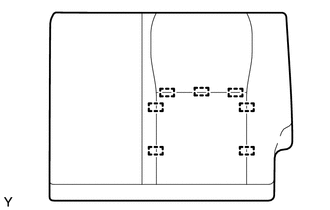
INSTALL SEPARATE TYPE REAR SEATBACK COVER (for TMC Made)
-
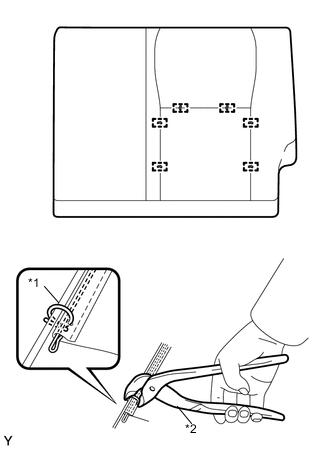
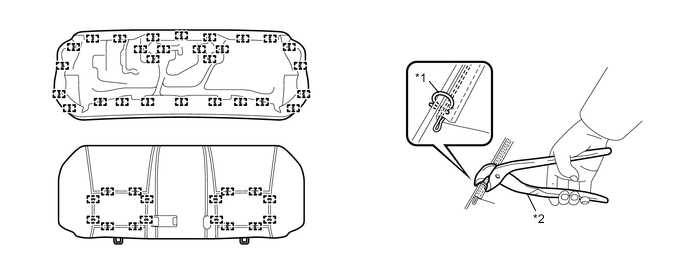
Text in Illustration *1 New Hog Ring *2 Hog Ring Pliers Using hog ring pliers, install the separate type rear seatback cover to the separate type rear seatback pad with 6 new hog rings.
Note
-
Do not soil or scratch the separate type rear seatback cover.
-
When installing hog rings, minimize wrinkles as much as possible.
-
-
-
INSTALL SEPARATE TYPE REAR SEATBACK COVER (for TMMF Made)
-
Engage the 7 hooks to install the separate type rear seatback cover to the separate type rear seatback pad.
-
-
INSTALL REAR SEATBACK LOCK ASSEMBLY LH
-
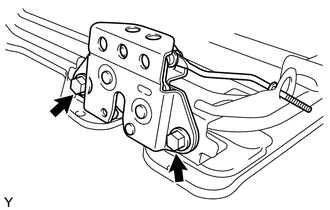
Install the rear seatback lock assembly LH with the 2 bolts.
- Torque:
- 32 N*m { 326 kgf*cm, 24 ft.*lbf }
-
-
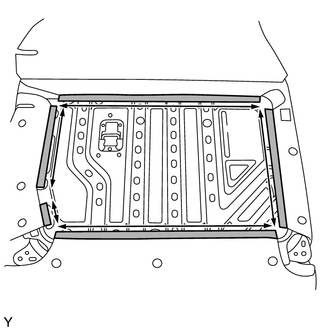
INSTALL REAR SEATBACK FRAME SUB-ASSEMBLY (for TMC Made)
-
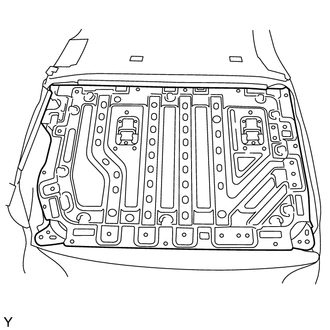
Temporary install the rear seatback frame sub-assembly.
-
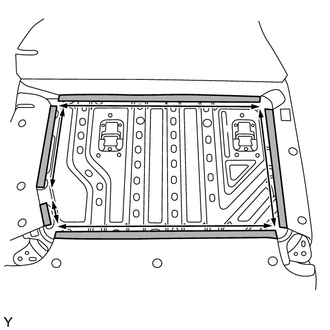
Engage the 5 hooks.
-
Engage the 8 clips to install the rear seatback frame sub-assembly.
-
-
INSTALL REAR SEATBACK FRAME SUB-ASSEMBLY (for TMMF Made)
-
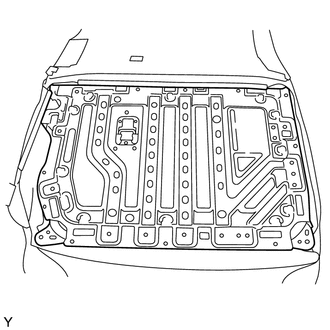
Temporary install the rear seatback frame sub-assembly.
-
Engage the 5 hooks.
-
Fasten the 5 hook and loop fasteners.
-
Engage the 3 clips to install the rear seatback frame sub-assembly.
-
-
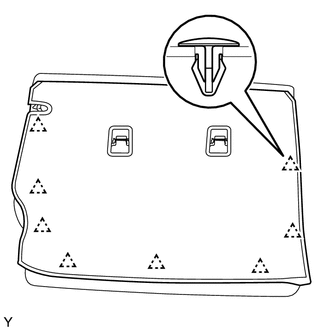
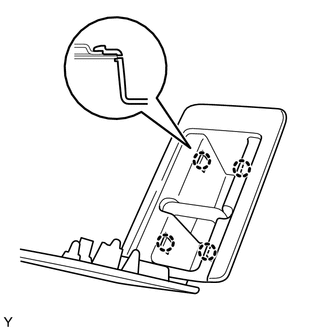
INSTALL REAR SEAT HEADREST SUPPORT
-

Text in Illustration *a Protruding Align the protruding portion of the rear seat headrest support with the installation groove of the rear seat adjuster frame.
-
Engage the 8 claws to install the 4 rear seat headrest support.
-
-
INSTALL REAR SEATBACK STOP BUTTON GROMMET
-
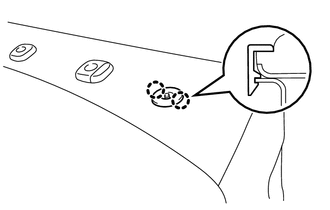
Engage the 2 claws to install the rear seatback stop button grommet.
-
-
INSTALL REAR SEATBACK LOCK RELEASE BUTTON
-
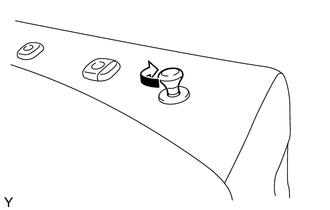
Turn the rear seatback lock release button in the direction indicated by arrow to install it.
-
-
INSTALL REAR SEATBACK COVER
-
Engage the 4 claws to install the rear seatback cover.
Tech Tips
Use the same procedure for both sides. (for TMC Made)
-
-
INSTALL REAR SEAT HEADREST ASSEMBLY
-
Install the rear seat headrest assembly.
-
-
INSTALL REAR SEAT CENTER HEADREST ASSEMBLY
-
Install the rear seat center headrest assembly.
-
-
INSTALL BENCH TYPE REAR SEAT CUSHION COVER (for TMC Made)
-
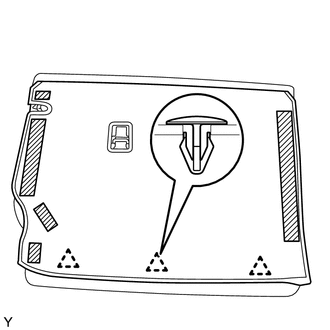
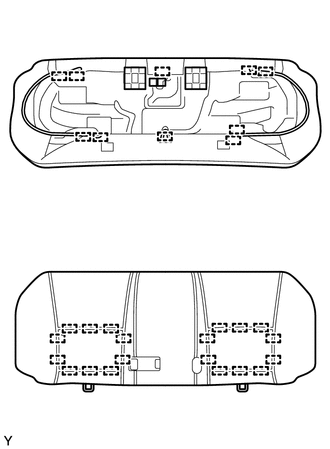
Using hog ring pliers, install the bench type rear seat cushion cover to the bench type rear seat cushion pad with 44 new hog rings.
Text in Illustration *1 New Hog Ring *2 Hog Ring Pliers Note
-
Do not soil or scratch the bench type rear seat cushion cover.
-
When installing hog rings, minimize wrinkles as much as possible.
-
-
-
INSTALL BENCH TYPE REAR SEAT CUSHION COVER (for TMMF Made)
-
Engage the 30 hooks to install the bench type rear seat cushion cover to the bench type rear seat cushion pad.
-