CURTAIN SHIELD AIRBAG ASSEMBLY(for 3 Door) REMOVAL

CAUTION / NOTICE / HINT
CAUTION:
Some of these service operations affect the SRS airbag system. Read the precautionary notices concerning the SRS airbag system before servicing Click here.
Tech Tips
The procedure described below is for the RH side. Use the same procedure for both the RH and LH sides, unless otherwise specified.
PROCEDURE
-
PRECAUTION
Note
After turning the ignition switch off, waiting time may be required before disconnecting the cable from battery terminal. Therefore, make sure to read the disconnecting the cable from the battery terminal notice before proceeding with work Click here.
-
DISCONNECT CABLE FROM NEGATIVE BATTERY TERMINAL
CAUTION:
Wait at least 90 seconds after disconnecting the cable from the negative (-) battery terminal to disable the SRS system.
-
REMOVE ROOF HEADLINING ASSEMBLY
-
REMOVE CURTAIN SHIELD AIRBAG ASSEMBLY
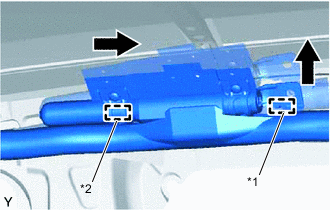
-
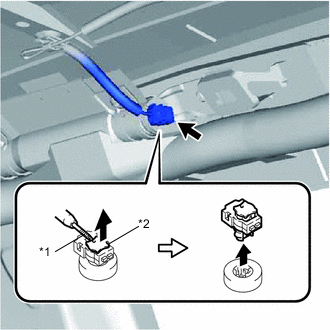
Text in Illustration *1 Protective Tape *2 Locking Button Using a thin-bladed screwdriver with its tip wrapped with protective tape, release the locking button.
-
Disengage the airbag connector.
-
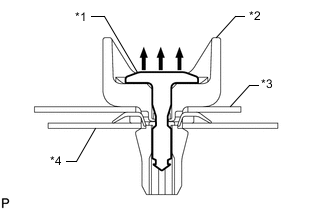
Text in Illustration *1 Pin *2 Clip *3 Airbag *4 Body Panel Using a clip remover, pull up the 6 pins.
-
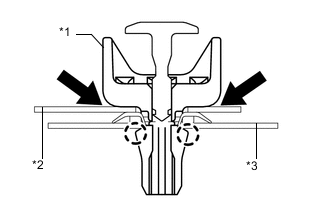
Text in illustration *1 Clip *2 Airbag *3 Body Panel Using needle-nose pliers, disengage each 2 claws to disconnect the 6 clips and curtain shield airbag from the body panel as shown in the illustration.
-
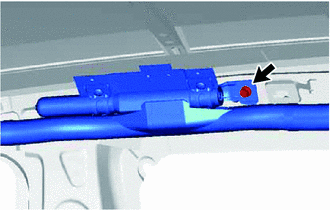
Remove the bolt.
-
Text in illustration *1 Hook A *2 Hook B Disengage hook A in the direction shown in the illustration, then disengage hook B by sliding in the direction shown in the illustration, and remove the curtain shield airbag assembly.
-
Remove the 6 clips and 6 spacers from the curtain shield airbag assembly.
Note
If clips and spacers are removed, always replace them with new ones even though they may not appear to be damaged.
-