MANUAL TRANSAXLE UNIT DISASSEMBLY

PROCEDURE
-
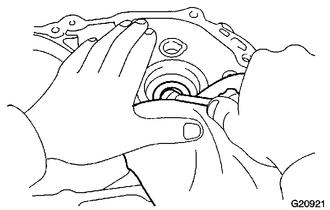
REMOVE CLUTCH RELEASE BEARING ASSEMBLY
-
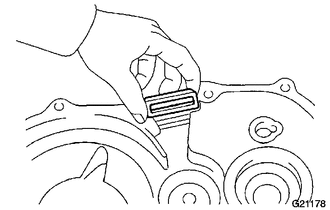
REMOVE CLUTCH RELEASE FORK LEVER
-
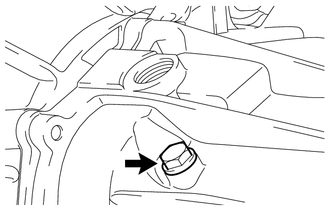
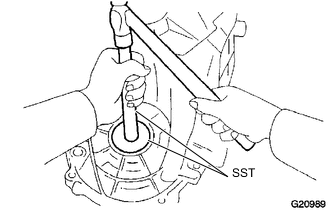
REMOVE MANUAL TRANSAXLE CASE PLUG
-
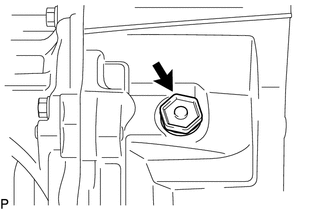
Remove the manual transaxle case plug and gasket from the manual transaxle case.
-
-
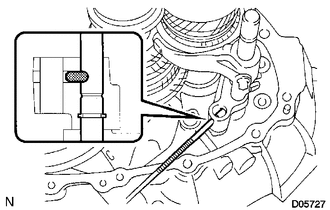
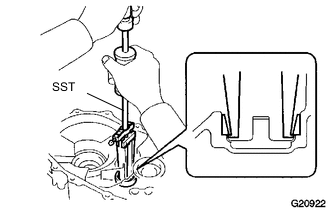
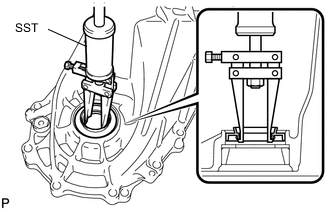
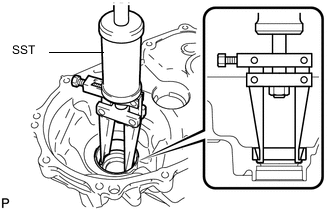
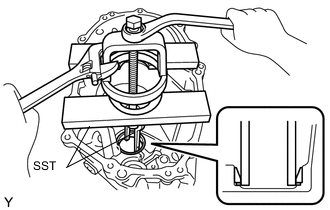
REMOVE BACK-UP LIGHT SWITCH ASSEMBLY
-
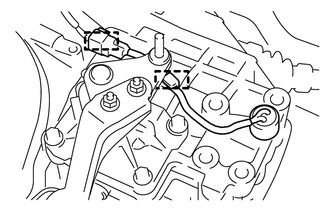
Disengage the 2 clamps and disconnect the wire harness connector.
-
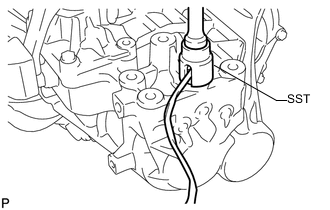
Using SST, remove the back-up light switch and gasket from the manual transmission case.
- SST
- 09817-16011
-
-
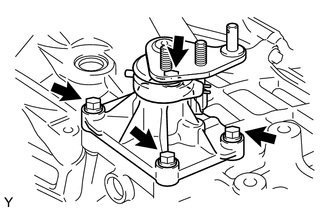
REMOVE CONTROL CABLE BRACKET
-
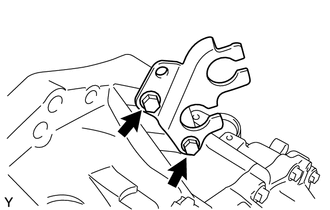
Remove the 2 bolts and the control cable bracket.
-
-
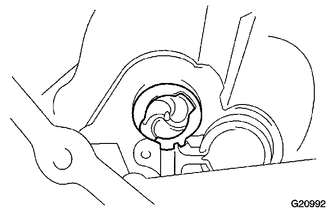
REMOVE SHIFT GATE PIN
-

Remove the shift gate pin from the manual transmission case.
-
-
REMOVE SHIFT AND SELECT LEVER SHAFT ASSEMBLY
-
Remove the 4 bolts and shift and select lever shaft assembly from the transmission case.
-
Remove the select return compression spring from the transmission case.
-
-
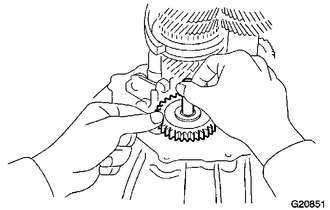
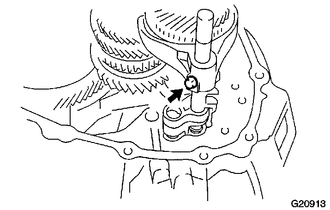
REMOVE REVERSE IDLER GEAR SHAFT BOLT
-
Remove the reverse idler gear shaft bolt and gasket.
-
-
REMOVE MANUAL TRANSMISSION CASE
-
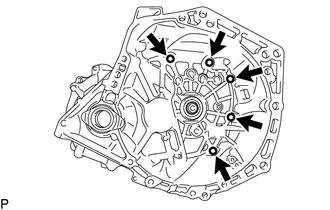
Remove the 5 bolts from the manual transaxle case side.
-
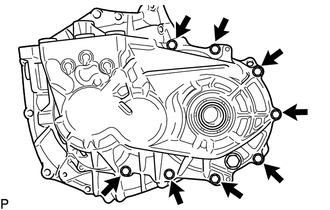
Remove the 8 bolts from the manual transmission case side.
-
Using a plastic hammer, remove the manual transmission case.
-
-
REMOVE REVERSE IDLER GEAR SHAFT
-
Remove the reverse idler gear shaft from the transaxle case.
-
-
REMOVE REVERSE IDLER GEAR SUB-ASSEMBLY
-
Remove the reverse idler gear sub-assembly from the transaxle case.
-
-
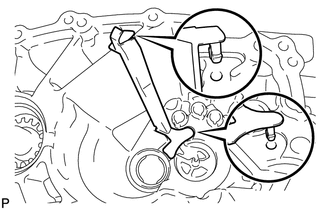
REMOVE REVERSE SHIFT ARM BRACKET ASSEMBLY
-
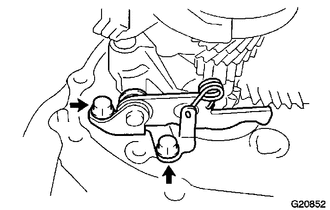
Remove the 2 bolts and the reverse shift arm bracket assembly from the front transaxle case.
-
-
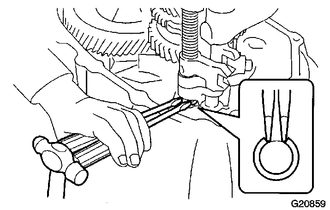
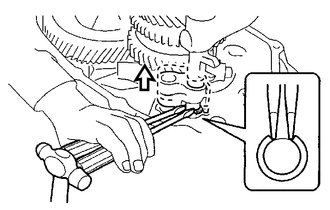
REMOVE NO. 1 GEAR SHIFT FORK SHAFT
-
Remove the bolt from No. 1 gear shift fork shaft.
-
Using a pin punch and hammer, remove the slotted spring pin from No. 1 gear shift head.
-
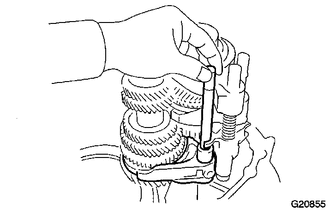
Remove No. 1 gear shift fork shaft, No. 1 gear shift head and No. 1 gear shift fork.
-
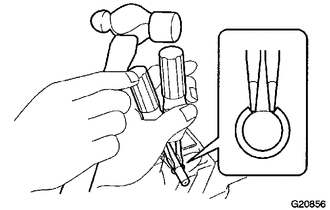
Hold the No. 1 gear shift fork shaft in a vise between aluminum plates.
Note
Do not overtighten the vise.
-
Using 2 screwdrivers and a hammer, remove the snap ring from No. 1 gear shift fork shaft.
Tech Tips
Use a piece of cloth to prevent the snap ring from flying off.
-
-
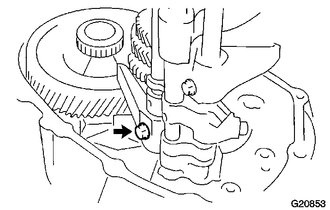
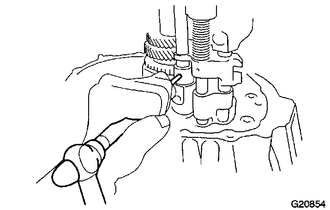
REMOVE NO. 3 GEAR SHIFT FORK SHAFT
-
Remove the straight pin from No. 3 gear shift fork.
-
Using a pin punch and hammer, remove the slotted spring pin from No. 3 gear shift head.
-
Using 2 screwdrivers and a hammer, remove the snap ring from No. 3 gear shift fork shaft.
Tech Tips
Use a piece of cloth to prevent the snap ring from flying off.
-
Remove No. 3 gear shift fork shaft, the compression spring, No. 3 gear shift head and No. 3 gear shift fork from the front transaxle case.
-
Hold the No. 3 gear shift fork shaft in a vise between aluminum plates.
Note
Do not overtighten the vise.
-
Using 2 screwdrivers and a hammer, remove the snap ring from No. 3 gear shift fork shaft.
Tech Tips
Use a piece of cloth to prevent the snap ring from flying off.
-
-
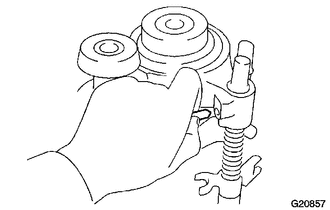
REMOVE NO. 2 GEAR SHIFT FORK SHAFT
-
Using a magnetic finger, remove the straight pin from the reverse shift fork.
-
While lifting the reverse shift fork, using 2 screwdrivers and a hammer, remove the snap ring from the No. 2 gear shift fork shaft.
Tech Tips
Use a piece of cloth to prevent the snap ring from flying off.
-
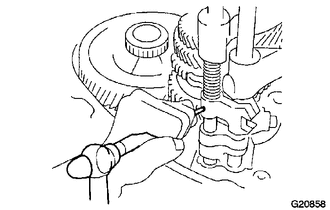
Remove the bolt from No. 2 gear shift fork.
-

Shift the No. 2 gear shift fork and No. 2 transmission clutch hub sleeve to the 4th gear position.
-
Remove No. 2 gear shift fork shaft, No. 2 gear shift fork and the reverse shift fork.
-
Hold the No. 2 gear shift fork shaft in a vise between aluminum plates.
Note
Do not overtighten the vise.
-
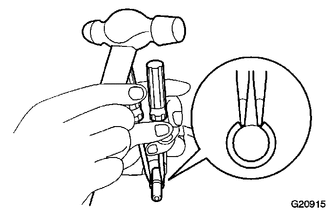
Using 2 screwdrivers and a hammer, remove the snap ring from No. 2 gear shift fork shaft.
Tech Tips
Use a piece of cloth to prevent the snap ring from flying off.
-
-
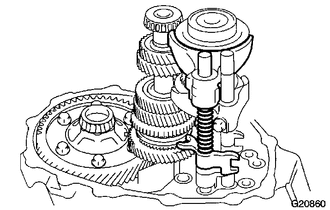
REMOVE INPUT SHAFT ASSEMBLY
-

Remove the input shaft assembly from the manual transaxle case.
-
-
REMOVE OUTPUT SHAFT ASSEMBLY
-
Remove the output shaft assembly from the manual transaxle case.
-
-
REMOVE DIFFERENTIAL CASE ASSEMBLY
-

Remove the differential case assembly from the front transaxle case.
-
-
REMOVE NO. 2 OIL RECEIVER PIPE
-
Remove the No. 2 oil receiver pipe from the manual transmission case.
Note
Do not damage No. 2 oil receiver pipe.
-
-
REMOVE TRANSMISSION MAGNET
-
Remove the transmission magnet from the front transaxle case.
-
-
REMOVE FRONT TRANSAXLE CASE OIL SEAL
-
Using a screwdriver with its tip wrapped with protective tape, pry out the front transaxle case oil seal.
Note
Do not damage the installation surfaces of the front transaxle case.
-
-
REMOVE OUTPUT SHAFT FRONT BEARING
-
Using SST, remove the output shaft front bearing (outer race) from the front transaxle case.
- SST
- 09308-00010
-
-
REMOVE OUTPUT SHAFT COVER
-
Remove the output shaft cover from the transaxle case.
-
-
REMOVE TRANSMISSION CASE OIL SEAL
-
Using SST, remove the transmission case oil seal from the manual transaxle case.
- SST
- 09308-00010
Note
Do not damage the installation surfaces of the manual transmission case.
-
-
REMOVE FRONT DIFFERENTIAL CASE REAR TAPERED ROLLER BEARING
-
Using SST, remove the front differential case rear tapered roller bearing outer race and differential case shim from the manual transmission case.
- SST
- 09950-60010 ( 09951-00560 )
- 09950-70010 ( 09951-07200 )
-
-
REMOVE TRANSAXLE CASE OIL SEAL
-

Using SST, remove the transaxle case oil seal from the transaxle case.
- SST
- 09308-00010
Note
Do not damage the installation surfaces of the front transaxle case.
-
-
REMOVE FRONT DIFFERENTIAL CASE FRONT TAPERED ROLLER BEARING
-
Using SST, remove the front differential case front tapered roller bearing outer race from the front transaxle case.
- SST
- 09308-00010
-
-
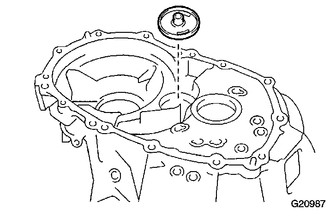
REMOVE REAR INPUT SHAFT BEARING SHIM
-
Remove the rear input shaft bearing shim from the transmission case.
-
-
REMOVE REAR OUTPUT SHAFT BEARING
-
Using SST, remove the rear output shaft bearing outer race from the manual transmission case.
- SST
- 09527-30010
- 09612-65014 ( 09612-01030, 09612-01050 )
-
-
REMOVE REAR OUTPUT SHAFT BEARING SHIM
-
Remove the rear output shaft bearing shim from the manual transmission case.
-