STARTER(for TMC Made Cold Area Specification Vehicles) DISASSEMBLY
PROCEDURE
-
REMOVE MAGNET STARTER SWITCH ASSEMBLY
-
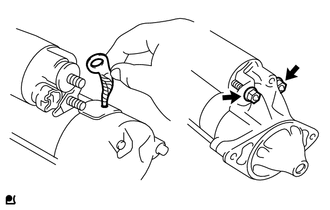
Remove the nut, and disconnect the lead wire from the magnetic switch terminal.
-
Loosen the 2 nuts holding the magnetic switch onto the starter housing.
-
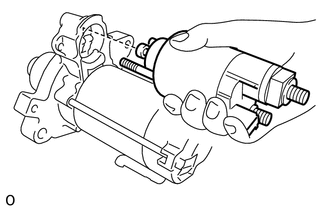
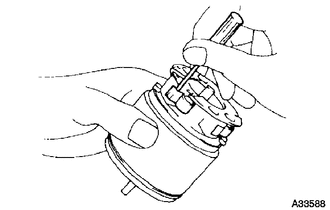
Pull the magnetic switch and while lifting the front part of the magnetic switch, release the plunger hook from the driver lever, then remove the magnetic switch.
-
-
REMOVE STARTER YOKE ASSEMBLY
-
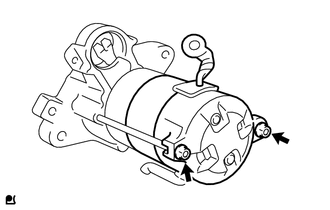
Remove the 2 through bolts, and pull out the field frame together with the armature.
-
-
REMOVE STARTER BRUSH HOLDER ASSEMBLY
-
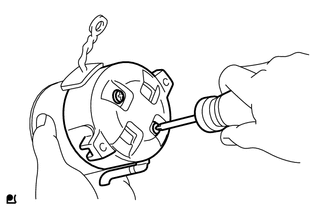
Remove the 2 screws and commutator end frame, and hold down the lead wire while releasing the commutator end frame.
Note
To avoid interference between the brush holder and the dust protector, pull the commutator end frame away at an angle.
-
Using a screwdriver, hold the spring back and disconnect the brush holder.
-
Disconnect the 4 brushes, and remove the brush holder.
-
-
REMOVE STARTER ARMATURE ASSEMBLY
-
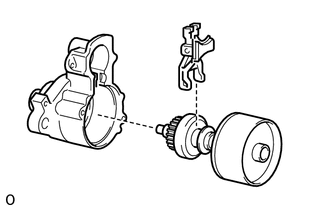
REMOVE STARTER CLUTCH SUB-ASSEMBLY
-
Remove the drive lever and starter clutch sub-assembly together with the shock absorber from the starter housing.
-
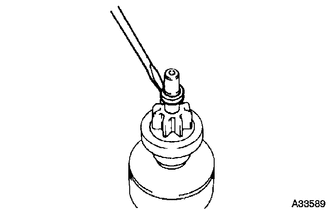
Using a screwdriver, tap in the stop collar toward the starter clutch sub-assembly.
-
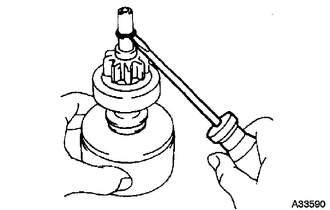
Using a screwdriver, pry off the snap ring.
-
Remove the rear collar and starter clutch from the planetary shaft.
-