RADIATOR REMOVAL
CAUTION / NOTICE / HINT
CAUTION:
-
Be sure that the ignition switch is off if you work near the electric cooling fans or radiator grille. With the ignition switch ON, the electric cooling fans may automatically start if the engine coolant temperature is high or the air conditioning is on.
-
Some of these service operations affect the SRS airbag system. Read the precautionary notices concerning the SRS airbag system before servicing. Click here
PROCEDURE
-
DISCONNECT CABLE FROM NEGATIVE BATTERY TERMINAL
CAUTION:
Wait at least 90 seconds after disconnecting the cable from the negative (-) battery terminal to disable the SRS system.
-
REMOVE ENGINE UNDER COVER LH
-
DRAIN ENGINE COOLANT
-
REMOVE HEADLIGHT ASSEMBLY
-
REMOVE HOOD LOCK ASSEMBLY
-
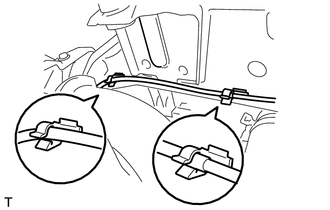
Separate the hood lock cable assembly from the 2 clamps.
-
Remove the 3 bolts and the hood lock assembly.
-
-
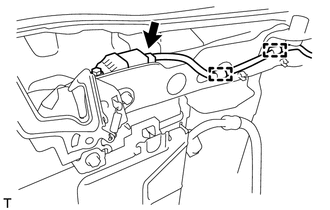
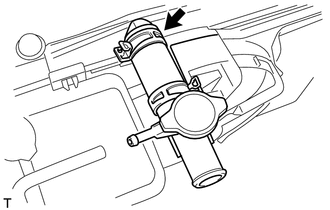
REMOVE AIRBAG SENSOR BRACKET
-
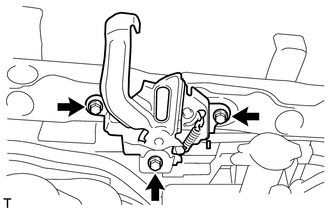
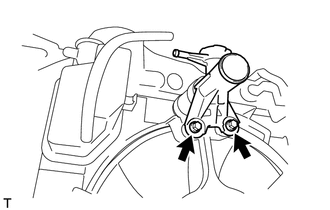
REMOVE UPPER RADIATOR SUPPORT SUB-ASSEMBLY
-
Disconnect the front airbag sensor connector and disengage the wire harness 2 clamps.
-
Disconnect the horn connector.
-
Remove the 4 bolts and the upper radiator support sub-assembly.
-
-
DISCONNECT RADIATOR RESERVE TANK HOSE
-
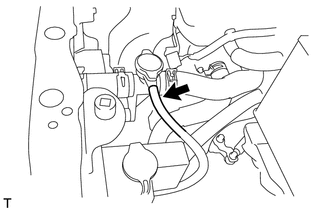
Disconnect radiator reserve tank hose.
-
-
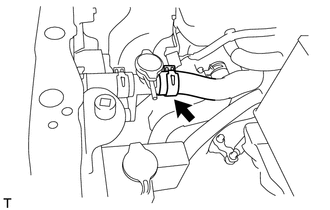
DISCONNECT NO. 1 RADIATOR HOSE
-
Loosen the clip and remove the No. 1 radiator hose.
-
-
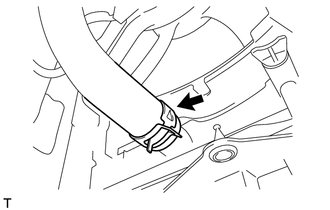
DISCONNECT NO. 2 RADIATOR HOSE
-
Loosen the clip and remove the No. 2 radiator hose.
-
-
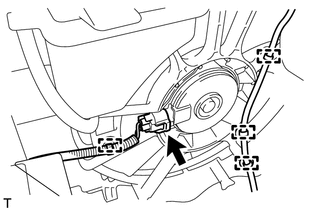
REMOVE RADIATOR ASSEMBLY
-
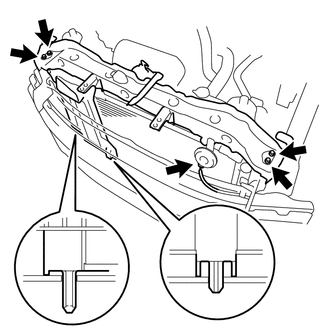
Disconnect the cooling fan motor connector and disengage the wire harness clamp.
-
Disengage the 3 clamps and separate the oxygen sensor wire harness.
-
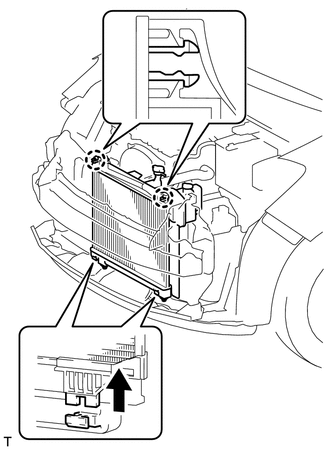
Disengage the 2 claws.
-
Remove the radiator assembly from the vehicle.
-
-
REMOVE WATER FILLER SUB-ASSEMBLY
-
Remove the 2 bolts and separate the water filler sub-assembly.
-
Loosen the clip and disconnect No. 3 radiator hose.
-
-
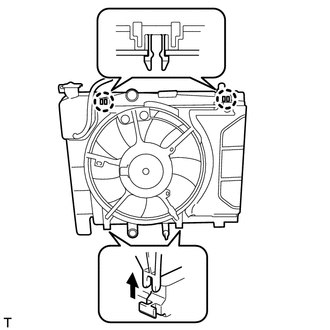
REMOVE FAN SHROUD
-
Remove the 2 pawl fittings and the fan shroud.
-
Engage the 2 claws.
-
-
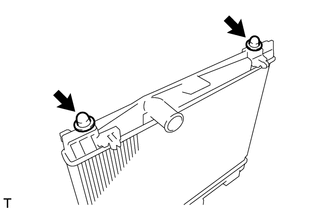
REMOVE RADIATOR SUPPORT CUSHION
-
Remove the 2 radiator support cushions from the radiator assembly.
-
-
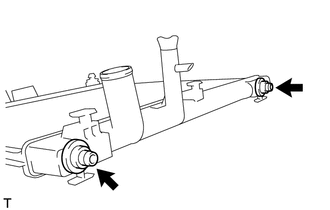
REMOVE LOWER RADIATOR SUPPORT GROMMET
-
Remove the 2 lower radiator support grommets from the radiator assembly.
-
-
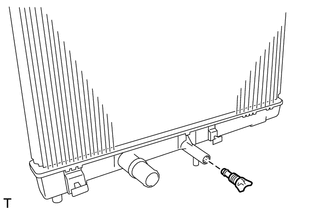
REMOVE RADIATOR DRAIN COCK PLUG
-
Remove the radiator drain cock plug.
-