FUEL INJECTOR(w/ DPF) REMOVAL
CAUTION / NOTICE / HINT
PROCEDURE
-
REMOVE NO. 1 ENGINE COVER
-
REMOVE NO. 1 AIR CLEANER HOSE
-
REMOVE NO. 1 GLOW PLUG CONNECTOR
-
REMOVE NO. 1 VACUUM SWITCHING VALVE ASSEMBLY
-
REMOVE NOZZLE LEAKAGE PIPE ASSEMBLY
-
REMOVE NO. 1 INJECTION PIPE SUB-ASSEMBLY
-
REMOVE NO. 2 INJECTION PIPE SUB-ASSEMBLY
-
REMOVE NO. 3 INJECTION PIPE SUB-ASSEMBLY
-
REMOVE FUEL INLET PIPE SUB-ASSEMBLY
-
REMOVE NO. 4 INJECTION PIPE SUB-ASSEMBLY
-
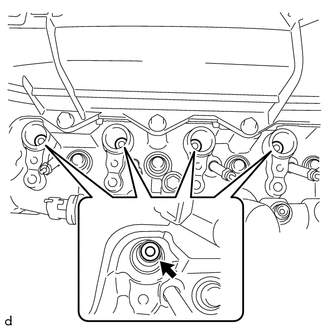
REMOVE NO. 1 NOZZLE HOLDER CLAMP
-

Remove the 4 bolts.
-
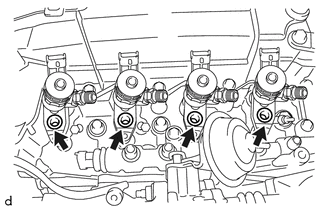
Remove the 4 washers from each No. 1 nozzle holder clamp.
-
Remove the 4 No. 1 nozzle holder clamps from each injector assembly and each nozzle holder clamp seat.
-
-
REMOVE NOZZLE HOLDER CLAMP SEAT
-
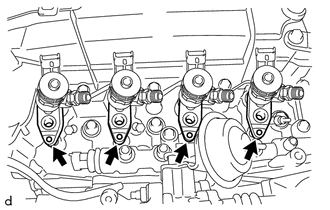
Remove the 4 nozzle holder clamp seats from the cylinder head sub-assembly.
-
-
REMOVE INJECTOR ASSEMBLY
-
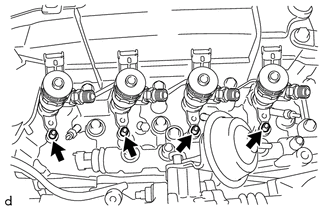
Remove the 4 injector assemblies from the cylinder head sub-assembly.
Note
-
Each injector assembly has its own fuel injection part number. When replacing the injector assemblies, store them in the correct order so that they can be returned to their original locations when reassembled.
-
Arrange the injector assemblies, No. 1 nozzle holder clamps, washers, bolts and nozzle holder clamp seats in the correct order.
-
-
-
REMOVE INJECTION NOZZLE SEAT
-
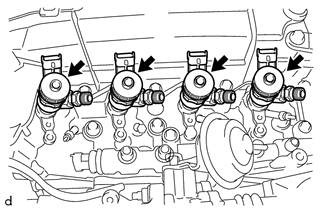
Remove the 4 injection nozzle seats from each injector assembly or cylinder head sub-assembly.
Note
When removing the injector assembly, check that the injector nozzle seat is either attached to the injector assembly or remains in the cylinder head sub-assembly.
-