FUEL PUMP DISASSEMBLY
PROCEDURE
-
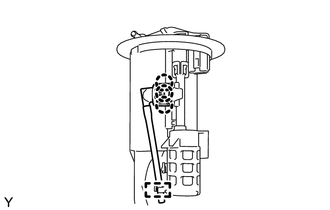
REMOVE FUEL SENDER GAUGE ASSEMBLY
-
REMOVE FUEL PUMP HARNESS
-
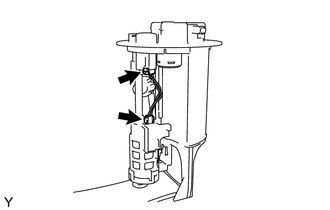
Disconnect the 2 connectors and remove the fuel pump harness.
-
-
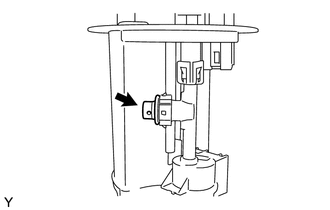
REMOVE FUEL PUMP FILTER
-
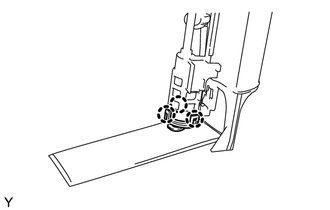
Disengage the 3 claws and remove the fuel pump.
Note
Do not damage the fuel pump filter.
-
-
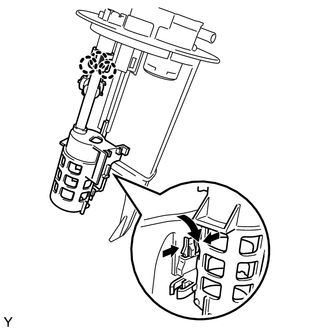
REMOVE FUEL PUMP
-
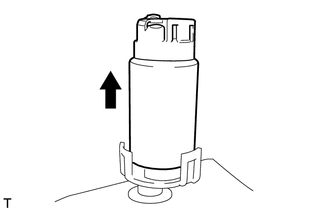
Holding the fuel pump filter by the plastic resin part, remove the fuel pump.
Note
Be careful not to let foreign matter enter the fuel pump or the fuel pump filter.
-
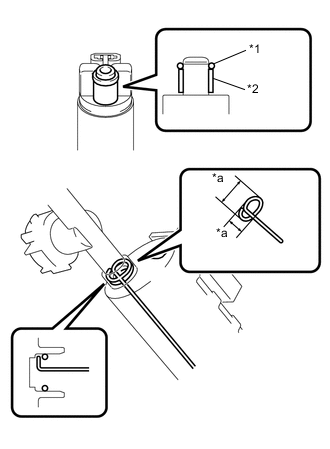
Text in Illustration *1 O-ring *2 Fuel Pump Spacer *a (5 mm (0.1969 in.) Remove the O-ring and fuel pump spacer from the fuel pump.
Note
Be careful not to damage the sealing surface.
Tech Tips
If the O-ring still remains in the No. 1 fuel suction support, remove it using a wire tip (φ1 mm (0.0394 in.)) that is formed as shown in the illustration.
-
-
REMOVE NO. 2 FUEL SUCTION SUPPORT
-
Disengage the 3 claws and the clamp as shown in the illustration, and remove the No. 2 fuel suction support from the No. 1 fuel suction support.
Note
Be careful not to damage No. 1 fuel support or No. 2 fuel support.
-
-
REMOVE FUEL PRESSURE REGULATOR ASSEMBLY
-
Remove the fuel pressure regulator assembly from the No. 1 fuel suction support.
Note
-
Be careful not to damage No. 1 fuel suction support.
-
Make sure that foreign material does not enter the fuel passages of the No. 1 fuel suction support.
-
-
-
REMOVE NO. 1 FUEL SUCTION SUPPORT
-
Text in Illustration *a Lock Disengage the 3 claws as shown in the illustration.
-
Release the lock, disengage the 2 claws, then slide the No. 1 fuel suction support and remove it.
-

Remove the O-ring from the fuel suction tube assembly.
-