CAMSHAFT TIMING CONTROL MOTOR REMOVAL
PROCEDURE
-
REMOVE NO. 1 ENGINE COVER
-
REMOVE ENGINE UNDER COVER RH
-
REMOVE ENGINE MOUNTING INSULATOR SUB-ASSEMBLY RH
-
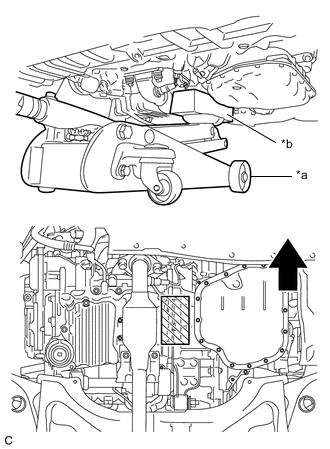
*a Jack *b Wooden Block 
Front of Vehicle 
Wooden Block Placement Location Support the engine assembly with transaxle using a jack and wooden block.
-
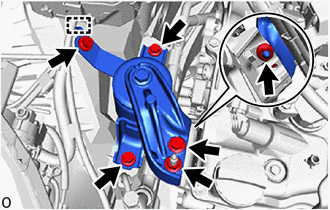
Remove the 4 bolts and 2 nuts.
-
Disengage the hook and remove the engine mounting insulator sub-assembly RH from the engine assembly and vehicle.
-
-
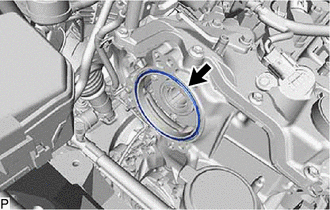
REMOVE CAMSHAFT TIMING CONTROL MOTOR WITH EDU ASSEMBLY
-
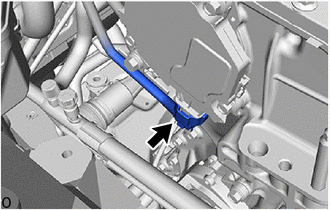
Disconnect the camshaft timing control motor with EDU assembly connector.
-
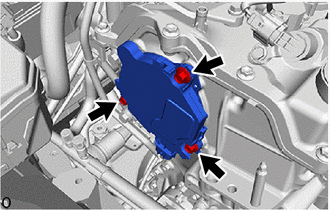
Remove the 3 bolts, camshaft timing control motor with EDU assembly from the timing chain cover assembly.
Note
-
Make sure the contact surface of the camshaft timing control motor with EDU assembly (the surface that contacts the timing chain cover assembly) is free of foreign matter.
-
Do not disassemble the camshaft timing control motor with EDU assembly. If disassembled, replace it.
-
If the camshaft timing control motor with EDU assembly has been struck or dropped, replace it.
-
-
-
REMOVE CAMSHAFT TIMING CONTROL MOTOR O-RING
-
Remove the camshaft timing control motor O-ring from the timing chain cover assembly.
-