INTEGRATION RELAY REMOVAL
PROCEDURE
-
REMOVE NO. 1 RELAY BLOCK COVER
-
REMOVE NO. 1 INTEGRATION RELAY
-
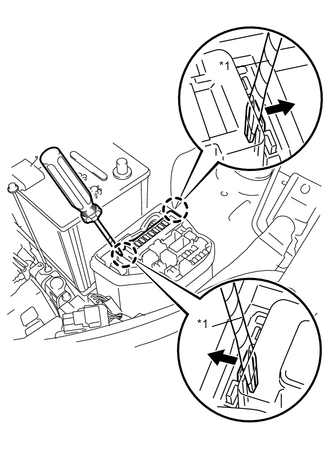
Text in Illustration *1 Protective Tape Using a screwdriver with its tip wrapped with protective tape, disengage the 2 claws and disconnect the No. 1 integration relay from the No. 1 relay block.
Note
Do not pull strongly on the No. 1 integration relay, because the wire harnesses are still connected.
-
Disconnect the 3 connectors and remove the No. 1 integration relay.
Note
If a component has been dropped or subjected to a strong impact, replace it.
-