BRAKE BOOSTER(for TMC Made RHD) REMOVAL
CAUTION / NOTICE / HINT
Note
Release the vacuum from booster by depressing the brake pedal several times.
Then remove the brake master cylinder from brake booster.
PROCEDURE
-
REMOVE LOWER NO. 1 INSTRUMENT PANEL AIRBAG ASSEMBLY
-
REMOVE WINDSHIELD WIPER MOTOR ASSEMBLY
-
REMOVE BRAKE MASTER CYLINDER SUB-ASSEMBLY
-
REMOVE FRONT NO. 1 VENTILATOR SEAL
-
Disengage the clamp and remove the front No. 1 ventilator seal.
-
-
REMOVE FRONT AIR SHUTTER SEAL RH
Tech Tips
Use the same procedure as for the No. 1 ventilator seal.
-
REMOVE INNER COWL TOP TO COWL BRACE
-
Remove the 2 bolts and the inner cowl top to cowl brace.
-
-
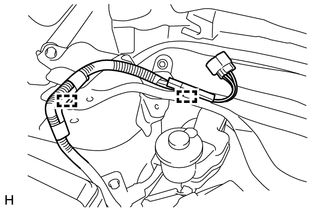
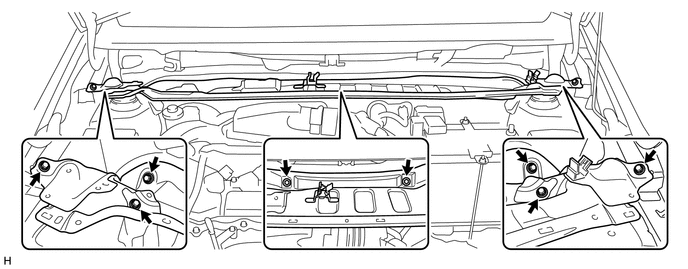
REMOVE OUTER COWL TOP PANEL
-
Disengage the 2 clamps and separate the wire harness.
-
Remove the 8 bolts and the outer cowl top panel.
-
-
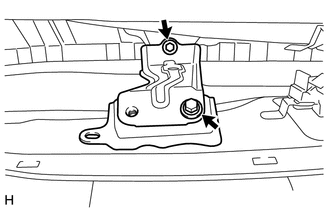
REMOVE BRAKE MASTER CYLINDER PUSH ROD CLEVIS
-
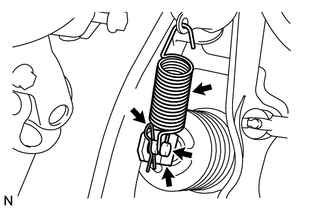
Remove the brake pedal return spring.
-
Loosen the push rod clevis lock nut.
-
Remove the clip and push rod pin and separate the push rod clevis from the brake pedal.
-
Remove the push rod clevis and push rod lock nut from the brake booster assembly.
-
-
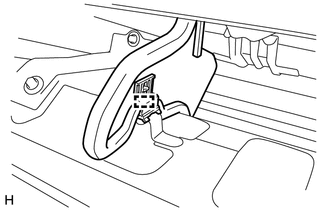
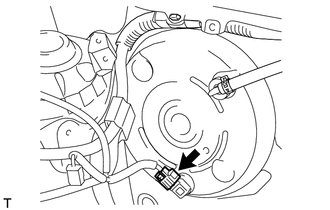
DISCONNECT VACUUM SENSOR CONNECTOR (w/ Stop And Start System)
-
Disconnect the vacuum sensor connector.
-
-
REMOVE BRAKE BOOSTER ASSEMBLY
-
Slide the clip and disconnect the vacuum hose from the vacuum check valve.
-
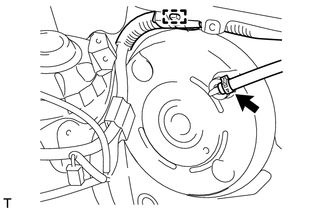
Separate the wire harness clamp.
-
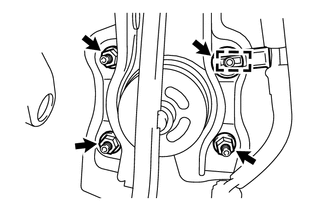
Separate the wire harness clamp and 4 nuts and remove the brake booster assembly.
Note
Do not damage the brake tubes.
-
Remove the gasket from the brake booster assembly.
-