ECM REMOVAL
PROCEDURE
-
PRECAUTION
Note
After turning the ignition switch off, waiting time may be required before disconnecting the cable from the battery terminal. Therefore, make sure to read the disconnecting the cable from the battery terminal notice before proceeding with work Click here.
-
DISCONNECT CABLE FROM NEGATIVE BATTERY TERMINAL
Note
When disconnecting the cable, some systems need to be initialized after the cable is reconnected Click here.
-
REMOVE WINDSHIELD WIPER MOTOR AND LINK
-
REMOVE FRONT AIR SHUTTER SEAL RH (for LHD)
-
REMOVE FRONT AIR SHUTTER SEAL RH (for RHD)
-
REMOVE FRONT NO. 1 VENTILATOR SEAL (for LHD)
-
REMOVE FRONT NO. 1 VENTILATOR SEAL (for RHD)
-
REMOVE INNER COWL TOP TO COWL BRACE (for LHD)
-
REMOVE INNER COWL TOP TO COWL BRACE (for RHD)
-
REMOVE OUTER COWL TOP PANEL (for LHD)
-
REMOVE OUTER COWL TOP PANEL (for RHD)
-
REMOVE ECM (for LHD)
-
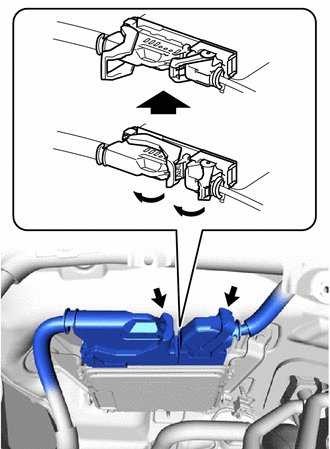
Raise the 2 levers while pushing the locks on the levers, and disconnect the 2 ECM connectors.
Note
After disconnecting the ECM connectors, make sure that dirt, water or other foreign matter does not contact the connecting parts of the ECM connectors.
-
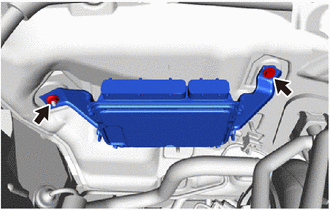
Remove the bolt, nut and ECM from the vehicle.
Note
If a component has been dropped or subjected to a strong impact, replace the ECM.
-
-
REMOVE ECM (for RHD)
-
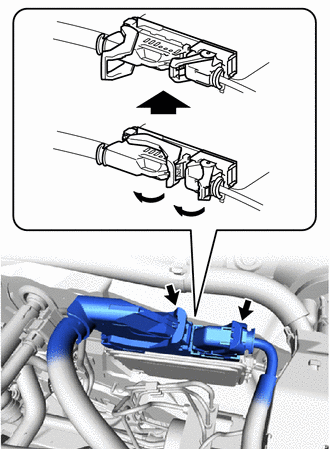
Raise the 2 levers while pushing the locks on the levers, and disconnect the 2 ECM connectors.
Note
After disconnecting the ECM connectors, make sure that dirt, water or other foreign matter does not contact the connecting parts of the ECM connectors.
-

Remove the bolt, nut and ECM from the vehicle.
Note
If a component has been dropped or subjected to a strong impact, replace the ECM.
-
-
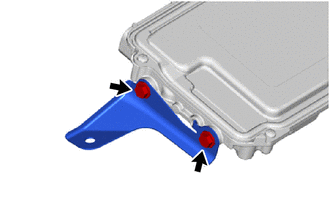
REMOVE NO. 1 ECM BRACKET (for LHD)
-
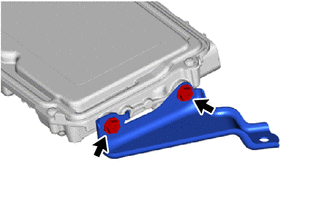
Remove the 2 screws and No. 1 ECM bracket from the ECM.
-
-
REMOVE NO. 1 ECM BRACKET (for RHD)
-
Remove the 2 screws and No. 1 ECM bracket from the ECM.
-
-
REMOVE NO. 2 ECM BRACKET (for LHD)
-
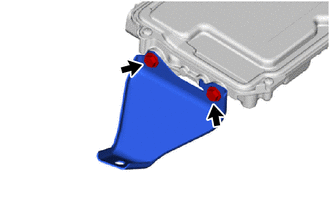
Remove the 2 screws and No. 2 ECM bracket from the ECM.
-
-
REMOVE NO. 2 ECM BRACKET (for RHD)
-
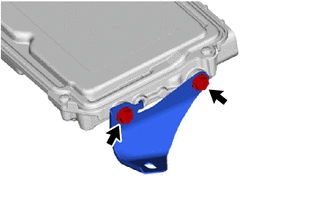
Remove the 2 screws and No. 2 ECM bracket from the ECM.
-