CAUTION / NOTICE / HINT
The necessary procedures (adjustment, calibration, initialization or registration) that must be performed after parts are removed, installed or replaced during the front seat airbag assembly removal/installation are shown below.
| Replacement Part or Procedure | Necessary Procedures | Effects / Inoperative when not Performed | Link |
|---|---|---|---|
| Disconnect cable from negative (-) auxiliary battery terminal | Memorize steering angle neutral point | LKA/LDA system (for Mono camera type) | for Mono Camera type: for Stereo Camera type: |
| Lane control system (for Stereo camera type) | |||
| Parking support brake system* | |||
| Pre-collision system (for Mono camera type) | |||
| Pre-collision system (for Stereo camera type) | |||
| Adaptive high beam system | |||
|
|||
| Variable gear ratio steering system | |||
| Parking assist monitor system | |||
| Panoramic View Monitor System | |||
| Initialize rear door sunshade system | Rear door sunshade system | ||
| Initialize power trunk lid system | Power trunk lid system | ||
|
Initialize position control ECU | Front Power Seat Control System | |
|
Zero point calibration (Occupant classification system) |
|
-
Use the same procedure for RHD and LHD vehicles.
-
The procedure listed below is for LHD vehicles.
-
Use the same procedure for the RH and LH sides.
-
The procedure listed below is for the LH side.
PROCEDURE
- Click here
PRECAUTION
CAUTION:
-
Be sure to read precaution thoroughly before servicing.
-
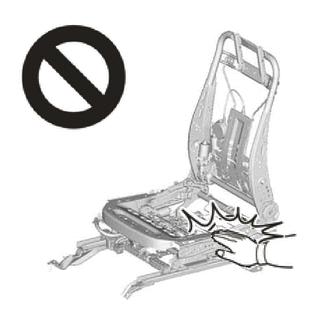
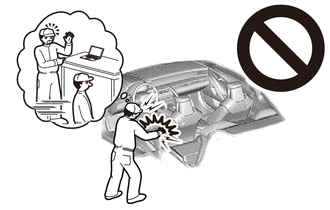
Wear protective gloves. Sharp areas on the parts may injure your hands.
-
There is risk of injury.
Note:After turning the power switch off, waiting time may be required before disconnecting the cable from the negative (-) auxiliary battery terminal. Therefore, make sure to read the disconnecting the cable from the negative (-) auxiliary battery terminal notices before proceeding with work.
-
- Click here
REMOVE FRONT SEAT ASSEMBLY LH
- Click here
REMOVE FRONT SEAT INNER BELT ASSEMBLY LH
- Click here
REMOVE FRONT POWER ADJUSTER SHIELD LH
- Click here
REMOVE FRONT SEATBACK BOARD SUB-ASSEMBLY LH
- Click here
REMOVE FRONT SEAT CUSHION SHIELD LH
- Click here
REMOVE FRONT SEAT INNER CUSHION SHIELD LH
- Click here
REMOVE FRONT SEAT HEADREST ASSEMBLY
- Click here
REMOVE FRONT SEATBACK BOARD
- Click here
REMOVE SEPARATE TYPE FRONT SEATBACK ASSEMBLY LH
- Click here
REMOVE SEPARATE TYPE FRONT SEATBACK COVER WITH PAD (for Sports Seat Type)
- Click here
REMOVE FRONT SEAT AIRBAG ASSEMBLY LH (for Standard Seat Type)
CAUTION:

Deployment Side
-
When storing the front seat airbag assembly LH, keep the airbag deployment side facing upward.
-
If the airbag deploys for any reason, it may cause a serious accident.
-
Protective Tape When removing part of the separate type front seatback cover LH:
-
Detach the hook.
-
Using a clip remover, remove the clip and disconnect the strap.
Tip:Tape the clip remover tip before use.
-
-
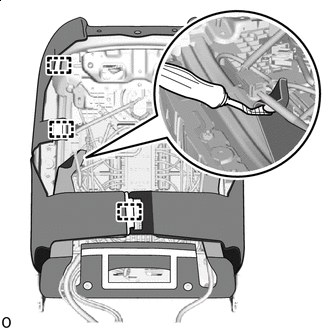
Detach the wire harness clamp.
-
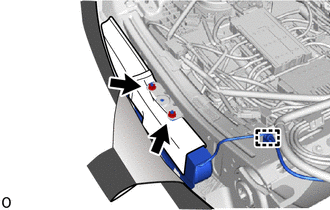
Remove the 2 nuts.
CAUTION:Do not reuse the nut.
-

Remove the front seat airbag assembly LH as shown in the illustration.
CAUTION:If the installation surface or surrounding area of the front seat airbag assembly LH is deformed or damaged, replace the front seatback frame sub-assembly LH with a new one.
-
- Click here
INSTALL FRONT SEAT AIRBAG ASSEMBLY LH (for Sports Seat Type)
CAUTION:
Deployment Side
-
When storing the front seat airbag assembly LH, keep the airbag deployment side facing upward.
-
If the airbag deploys for any reason, it may cause a serious accident.
-
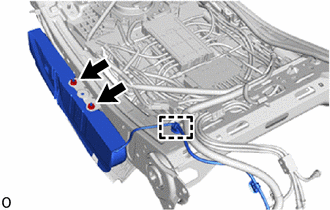
Detach the wire harness clamp.
-
Remove the 2 nuts and front seat airbag assembly LH.
CAUTION:
-
Do not reuse the nut.
-
If the installation surface or surrounding area of the front seat airbag assembly LH is deformed or damaged, replace the front seatback frame sub-assembly LH with a new one.
-
-