LUGGAGE COMPARTMENT ROOM LIGHT REMOVAL
CAUTION / NOTICE / HINT
The necessary procedures (adjustment, calibration, initialization, or registration) that must be performed after parts are removed, installed, or replaced during the luggage compartment room light assembly removal/installation are shown below.
| Replacement Part or Procedure | Necessary Procedure | Effects / Inoperative when not Performed | Link |
|---|---|---|---|
| When the luggage compartment door is opened using a mechanical key | Initialize luggage closer motor assembly | The power trunk lid does not operate |
PROCEDURE
-
REMOVE NO. 1 LUGGAGE COMPARTMENT LIGHT ASSEMBLY
-
Using moulding remover B, insert it between the No. 1 luggage compartment light assembly and front luggage compartment trim cover to detach the claw.
-
Pull out the No. 1 luggage compartment light assembly to detach the hook.
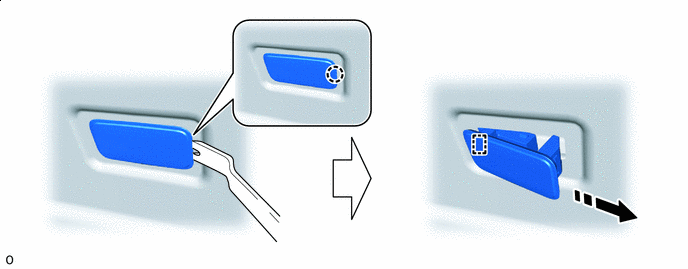

Remove in this Direction - - -
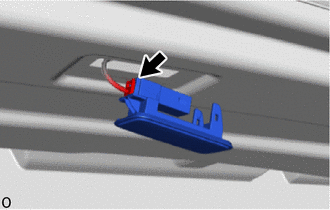
Disconnect the connector and remove the No. 1 luggage compartment light assembly.
-
-
REMOVE NO. 2 LUGGAGE COMPARTMENT LIGHT ASSEMBLY
-
Using moulding remover B, insert it between the No. 2 luggage compartment light assembly and luggage compartment door cover to detach the claw.
-
Pull out the No. 2 luggage compartment light assembly to detach the hook.
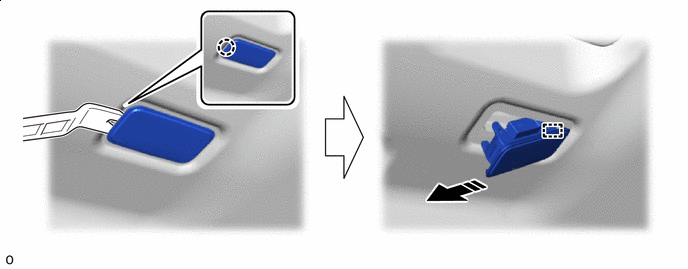
Remove in this Direction - - -
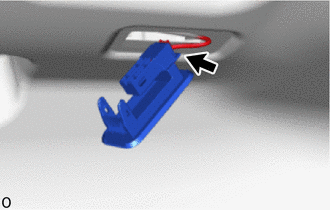
Disconnect the connector and remove the No. 2 luggage compartment light assembly.
-