PROCEDURE
- Click here
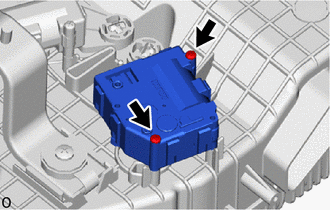
REMOVE NO. 2 AIR CONDITIONING HARNESS ASSEMBLY
-
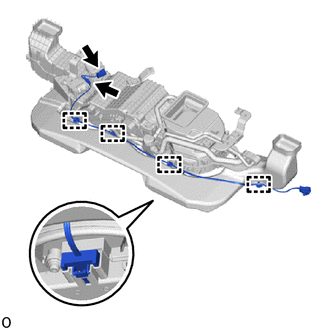
Disconnect the connectors, detach the clamp and remove the No. 2 air conditioning harness assembly from the upper case.
-
- Click here
REMOVE AIR DUCT SUB-ASSEMBLY
-
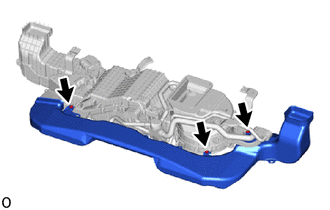
Remove the 3 screws and air duct sub-assembly.
-
- Click here
REMOVE NO. 2 COOLER UNIT DRAIN HOSE
-
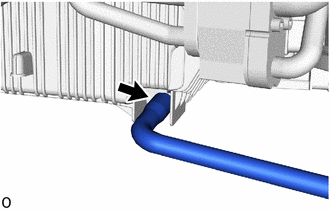
Remove the No. 2 cooler unit drain hose from the rear cooling unit.
-
- Click here
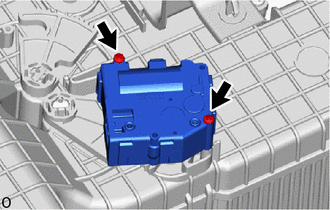
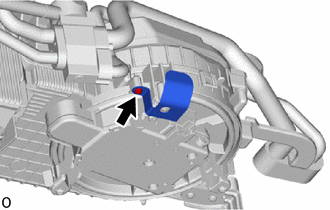
REMOVE NO. 1 REAR COOLING UNIT DAMPER SERVO SUB-ASSEMBLY
-
for RH:
-
Remove the 2 screws and No. 1 rear cooling unit damper servo sub-assembly.
-
-
for LH:
-
Remove the 2 screws and No. 1 rear cooling unit damper servo sub-assembly.
-
-
- Click here
REMOVE REAR BLOWER WITH FAN MOTOR SUB-ASSEMBLY
-
Remove the screw and cooler bracket.
-
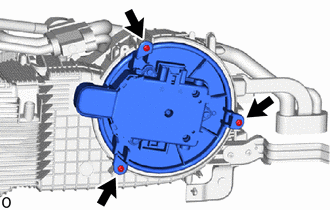
Remove the 3 screws and rear blower motor with fan sub-assembly.
-
- Click here
REMOVE COOLER BRACKET
-
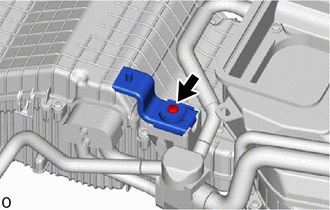
Remove the screw and cooler bracket.
-
Remove the screw and cooler bracket.
-

Bolt 
Screw Remove the 2 screws, bolt and cooler bracket.
-
Remove the 3 screws and 3 cooler brackets.
-
- Click here
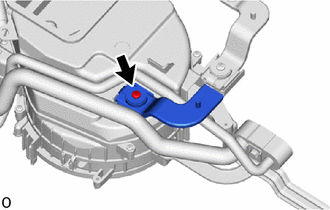
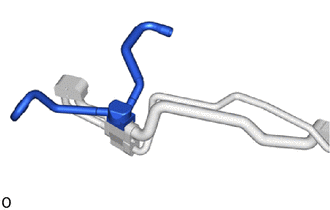
REMOVE AIR CONDITIONING TUBE AND ACCESSORY SUB-ASSEMBLY
-
Hexagon bolt Air conditioning tube Disconnect the hose.
-
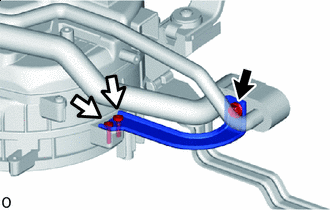
Remove the butyl tape of the tube openings, and then using a hexagon wrench (4 mm), remove the 2 hexagon bolts and the air conditioning tube and accessory sub-assembly.
-
Remove the 2 O-rings from the air conditioning tube and accessory sub-assembly.
Note:Seal the openings of the disconnected parts using vinyl tape to prevent entry of moisture and foreign matter.
-
- Click here
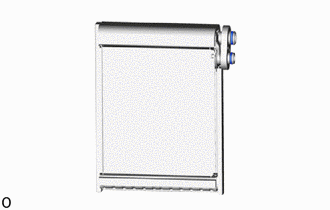
REMOVE REAR EVAPORATOR SUB-ASSEMBLY
-

Remove the 4 screws and intake case.
-
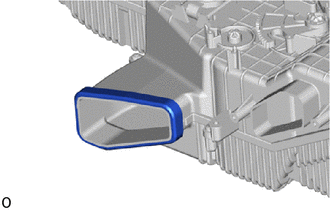
Remove the packing from the discharge area.
-
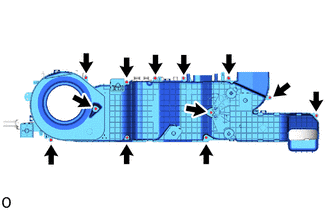
Remove the 12 screws.
-
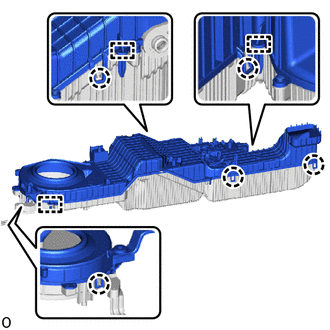
Detach the claw and guide and remove the upper case.
-
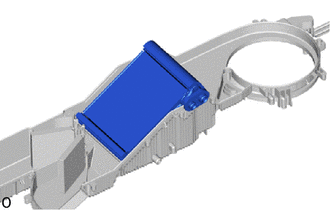
Remove the rear evaporator from the lower unit case.
-
Remove the 2 O-rings from the rear evaporator.
-
- Click here
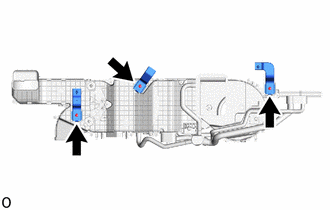
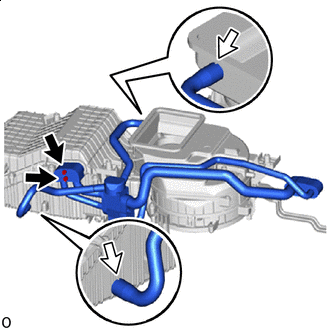
REMOVE NO. 2 AIR CONDITIONING TUBE AND ACCESSORY ASSEMBLY
-
Remove the packing from the joint of the No. 2 air conditioning tube and accessory assembly.
-
Remove the expansion cover.
-
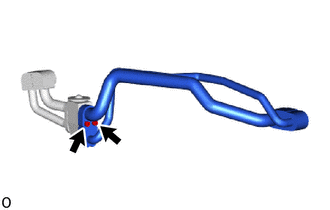
Underfloor piping side:
-
Using a hexagon wrench (4 mm), remove the 2 hexagon bolts and the No. 2 air conditioning tube and accessory assembly.
-
Remove the 2 O-rings from the No. 2 air conditioning tube and accessory assembly.
Note:Seal the openings of the disconnected parts using vinyl tape to prevent entry of moisture and foreign matter.
-
-
Evaporator side:
-
Remove the No. 2 air conditioning tube and accessory assembly.
-
Remove the 2 O-rings from the No. 2 air conditioning tube and accessory assembly.
Note:Seal the openings of the disconnected parts using vinyl tape to prevent entry of moisture and foreign matter.
-
-
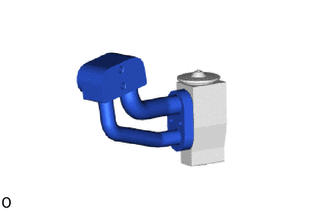
- Click here
REMOVE REAR COOLING UNIT EXPANSION VALVE