EXHAUST PIPE REMOVAL
CAUTION / NOTICE / HINT
The necessary procedures (adjustment, calibration, initialization, or registration) that must be performed after parts are removed and installed, or replaced during the exhaust pipe removal/installation are shown below.
| Replaced Part or Performed Procedure | Necessary Procedure | Effect/Inoperative Function when Necessary Procedure not Performed | Link |
|---|---|---|---|
| Gas leak from exhaust system is repaired | Inspection after repairs |
|
|
CAUTION:
To prevent burns, do not touch the engine, exhaust pipe or other high temperature components while the engine is hot.

PROCEDURE
-
REMOVE REAR FLOOR SIDE MEMBER COVER LH
-
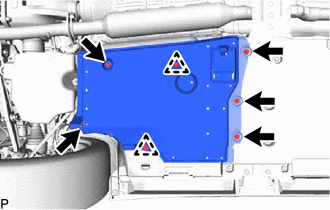
Remove the 2 clips, 3 bolts, screw, nut and the rear floor side member cover LH.
-
-
REMOVE REAR FLOOR SIDE MEMBER COVER RH
-
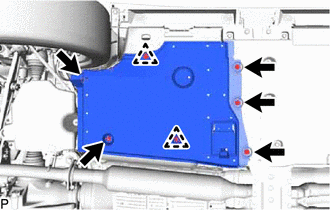
Remove the 2 clips, 3 bolts, screw, nut and the rear floor side member cover RH.
-
-
REMOVE NO. 2 FLOOR BOARD SUB-ASSEMBLY
-
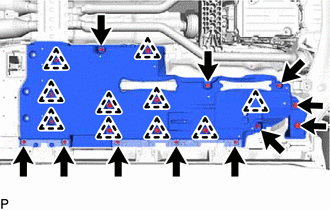
Remove the 10 clips, 7 grommets, 2 nuts, 2 bolts and the No. 2 floor board sub-assembly.
-
-
REMOVE FLOOR BOARD SUB-ASSEMBLY
-
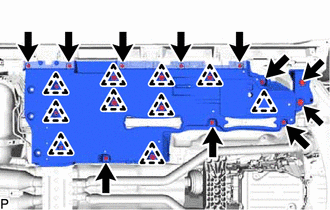
Remove the 10 clips, 7 grommets, 2 nuts, 2 bolts and the floor board sub-assembly.
-
-
REMOVE FRONT CENTER FLOOR BRACE SUB-ASSEMBLY
-
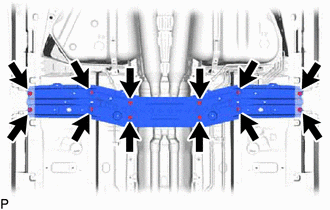
Remove the 12 bolts and the front center floor brace sub-assembly.
-
-
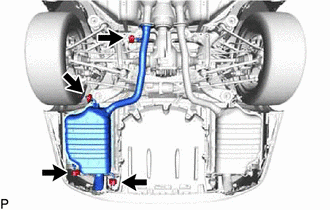
REMOVE FRONT EXHAUST PIPE ASSEMBLY
-
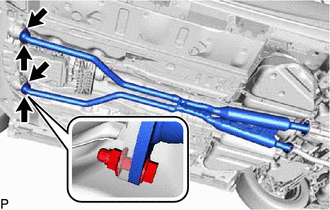
Remove the 4 bolts and 4 nuts to disconnect the front exhaust pipe assembly from the exhaust manifold assembly LH and exhaust manifold assembly RH.
-
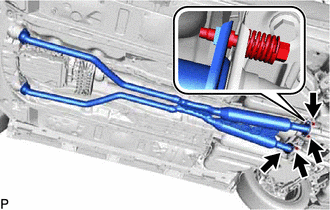
Remove the 4 bolts, 4 compression springs and front exhaust pipe assembly from the exhaust tailpipe assembly.
-
Remove the 4 gaskets.
-
-
REMOVE EXHAUST TAILPIPE LH
-
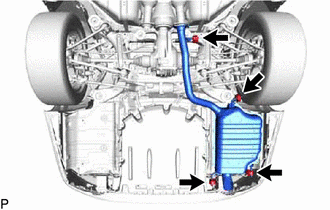
Remove the 4 exhaust pipe supports and exhaust tailpipe LH.
-
-
REMOVE EXHAUST TAILPIPE ASSEMBLY
-
Remove the 4 exhaust pipe supports and exhaust tailpipe assembly.
-