SHIFT LEVER INSTALLATION
PROCEDURE
-
INSTALL TRANSMISSION FLOOR SHIFT ASSEMBLY
-
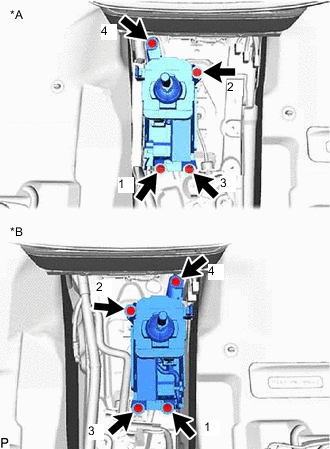
*A for LHD *B for RHD Install the transmission floor shift assembly to the body with the 4 bolts.
- Torque:
- 8.3 N*m { 85 kgf*cm, 73 in.*lbf }
Tech Tips
Tighten the bolts in the tightening order shown in the illustration.
-

*A for LHD *B for RHD Connect the transmission floor shift assembly connector.
-
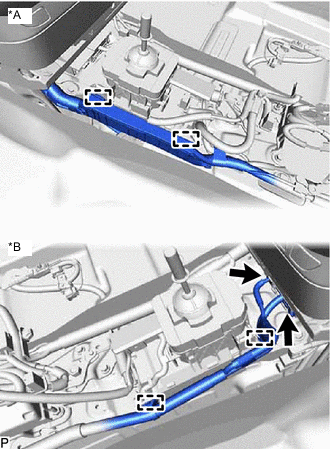
*A for LHD *B for RHD for LHD:
-
Connect the 2 clamps.
-
-
for RHD:
-
Connect the 2 clamps and 2 connectors.
-
-
-
INSTALL SHIFT POSITION INDICATOR
Tech Tips
Perform this procedure only when replacing the shift position indicator.
-
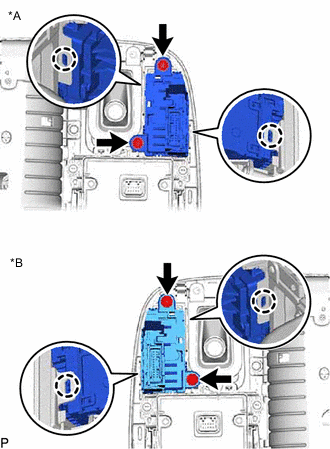
*A for LHD *B for RHD Install the shift position indicator to the console upper panel assembly with the 2 screws and 2 claws.
-
-
INSTALL NO. 1 CONSOLE BOX DUCT
-
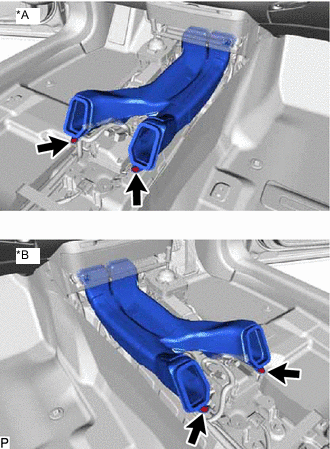
*A for LHD *B for RHD Install the No. 1 console box duct with the 2 clips.
-
-
INSTALL CONSOLE BOX ASSEMBLY
-
CHECK SHIFT LEVER OPERATION
-
Apply the parking brake and use wheel chocks to secure the vehicle.
-
Depress and hold the brake pedal.
-
Turn the power switch on (READY).
-
Move the shift lever and check that the shift position indicator display matches the indicator display in the combination meter.
-
-
CHECK PARKING SWITCH OPERATION
-
Apply the parking brake and use wheel chocks to secure the vehicle.
-
Depress and hold the brake pedal.
-
Turn the power switch on (READY).
-
Operate the parking switch and check that the illumination condition of the parking switch indicator light matches the indicator display in the combination meter.
-