ACTIVE REAR WING DISASSEMBLY
PROCEDURE
-
REMOVE REAR SPOILER SUB-ASSEMBLY
-
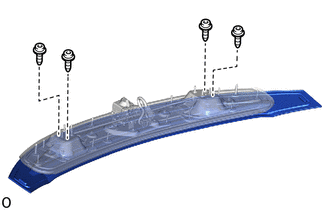
Using a T30 "TORX" socket wrench, remove the 4 "TORX" screws and rear spoiler sub-assembly.
-
-
REMOVE REAR SPOILER COVER LH
-
Detach the claws and remove the rear spoiler cover LH.
-
-
REMOVE REAR SPOILER COVER RH
Tech Tips
Use the same procedure described for the LH side.
-
REMOVE REAR SPOILER INSERT
-
Detach the clips and double-sided tape and remove the rear spoiler insert.
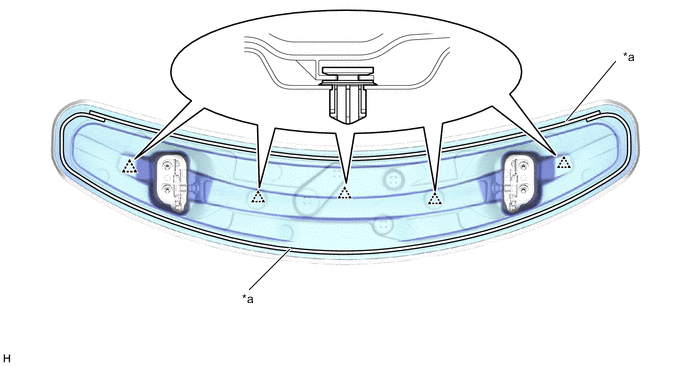
*a Double-sided Tape - -
-
-
REMOVE CONNECTOR WIRE
-
Disconnect the connector and remove the connector wire.
-
-
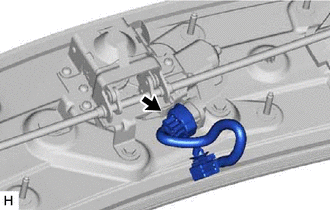
REMOVE TOP COVER LOCK CONTROL LINK SUB-ASSEMBLY LH
-
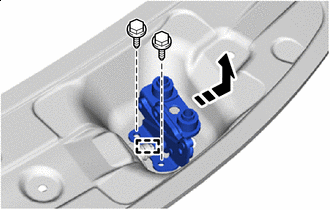

Remove in this Direction Remove the 2 bolts.
-
Detach the guide and remove the top cover lock control link sub-assembly LH.
-
-
REMOVE TOP COVER LOCK CONTROL LINK SUB-ASSEMBLY RH
Tech Tips
Use the same procedure described for the LH side.
-
REMOVE REAR SPOILER DRIVE GEAR SUB-ASSEMBLY
-
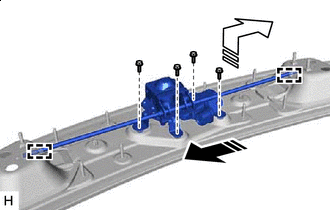
Remove in this Direction (1) 
Remove in this Direction (2) Remove the 4 bolts.
-
Detach the guide as shown in the illustration and remove the rear spoiler drive gear sub-assembly from the rear spoiler insert.
-
-
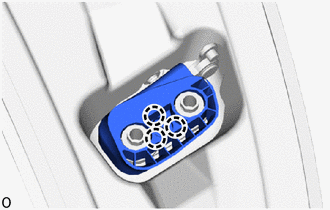
REMOVE REAR SPOILER DRIVE GEAR
-
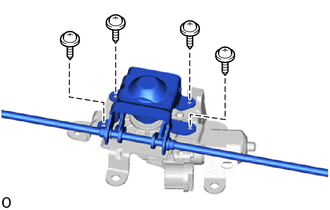
Remove the 4 screws and rear spoiler drive gear from the rear spoiler drive gear sub-assembly.
-
-
REMOVE REAR SPOILER MOTOR ASSEMBLY
-

Using a T25 "TORX" socket wrench, remove the 3 "TORX" screws and rear spoiler motor assembly.
-