HEADLIGHT ECU REMOVAL

CAUTION / NOTICE / HINT
The necessary procedures (adjustment, calibration, initialization or registration) that must be performed after parts are installed, removed or replaced during the No. 1 headlight ECU sub-assembly LH removal/installation are shown below.
| Replacement Part or Procedure | Necessary Procedures | Effects/Inoperative Functions when not Performed | Link |
|---|---|---|---|
| Replacement of No. 1 headlight ECU sub-assembly LH | Vehicle information registration for the No. 1 headlight ECU sub-assembly LH | Automatic headlight beam level control system |
Note
Even if the No. 1 headlight ECU sub-assembly RH is replaced with a new one, vehicle information registration is not necessary.
Tech Tips
-
Use the same procedure for the RH and LH sides.
-
The procedure listed below is for the LH side.
PROCEDURE
-
REMOVE HEADLIGHT ASSEMBLY LH
-
REMOVE NO. 1 HEADLIGHT ECU SUB-ASSEMBLY LH
Note
-
If the No. 1 headlight ECU sub-assembly LH has been dropped, replace it with a new one.
-
If the No. 1 headlight ECU sub-assembly LH has been removed, replace the headlight gasket with a new one.
-
When removing the No. 1 headlight ECU sub-assembly LH, use static electricity countermeasures SST (desktop anti-static mat set) and observe all precautions to prevent damage to the system by electrostatic discharge (ESD).
- SST
- 09890-47010 ( 09891-04020, 09891-04010, 09891-04030, 09891-04040 )
-
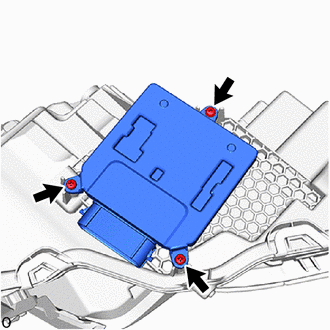
Remove the 3 screws and No. 1 headlight ECU sub-assembly LH.
-
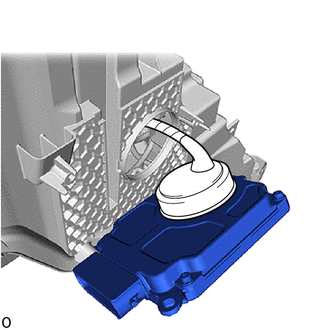
Disconnect the connector cover.
-
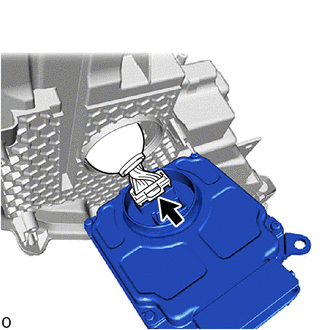
Disconnect the connector.
Note
Do not drop the connector in the headlight assembly LH.
-
-
REMOVE HEADLIGHT GASKET
Note
-
If the headlight gasket has been removed, replace it with a new one.
-
When removing the headlight gasket, use static electricity countermeasures SST (desktop anti-static mat set) and observe all precautions to prevent damage to the system by electrostatic discharge (ESD).
- SST
- 09890-47010 ( 09891-04020, 09891-04010, 09891-04030, 09891-04040 )
-
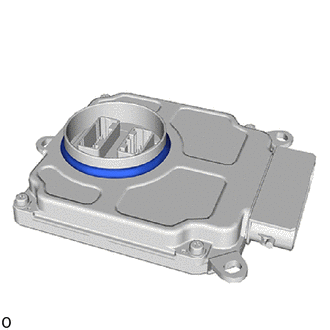
Remove the headlight gasket.
-