WASHER MOTOR INSTALLATION
PROCEDURE
-
INSTALL HEADLIGHT CLEANER CONTROL RELAY
-
INSTALL HEADLIGHT CLEANER MOTOR AND PUMP ASSEMBLY
-
INSTALL LEVEL WARNING SWITCH ASSEMBLY
-
INSTALL WINDSHIELD WASHER JAR ASSEMBLY
-
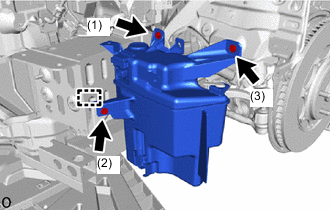
Attach the guide and temporarily place the windshield washer jar assembly.
-
Install the windshield washer jar assembly with the 3 bolts in the order shown in the illustration.
-
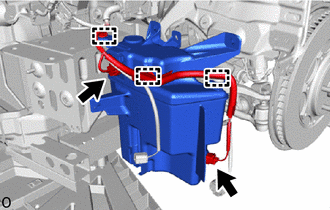
Connect the 2 connectors and the clamps.
-
*a Main Nozzle Side *b Sub Nozzle Side Connect the washer hose and clamp at the position shown in the illustration.
-
-
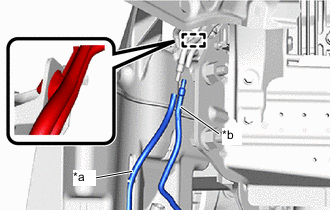
INSTALL WASHER INLET SUB-ASSEMBLY
-
Attach the claw to install the washer inlet sub-assembly.
-
-
INSTALL FRONT BUMPER REINFORCEMENT SUB-ASSEMBLY
-
INSTALL LOWER ARM BRACKET BRACE SUB-ASSEMBLY LH
-
INSTALL LOWER ARM BRACKET BRACE SUB-ASSEMBLY RH
Tech Tips
Use the same procedure described for the LH side
-
INSTALL HEADLIGHT ASSEMBLY LH
-
INSTALL FRONT BUMPER ENERGY ABSORBER
-
INSTALL PEDESTRIAN DETECTION CHAMBER ASSEMBLY
-
INSTALL NO. 2 FRONT BUMPER MOUNTING BRACKET
-
INSTALL HEADLIGHT CLEANER HOSE
-
INSTALL FRONT BUMPER COVER
-
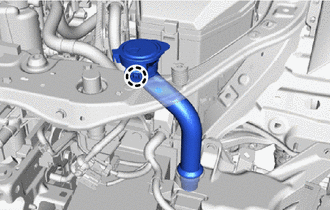
INSTALL WINDSHIELD WASHER MOTOR AND PUMP ASSEMBLY
-
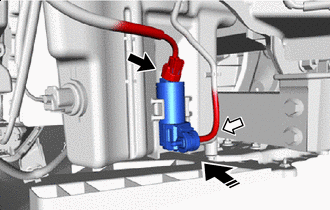

Install in this Direction Install the grommet.
-
Push in the direction of the arrow shown in the illustration and install the windshield washer motor and pump assembly.
-
Connect the connector.
-
Connect the washer hose.
-
-
ADD WINDSHIELD WASHER FLUID
-
Connect the washer hose and add the windshield washer fluid.
-
-
INSTALL FRONT FENDER LINER LH
-
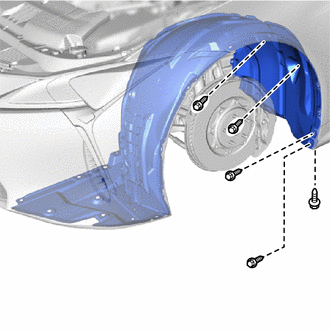
Temporarily install the front fender liner LH to the vehicle.
-
Install the 5 screws.
-
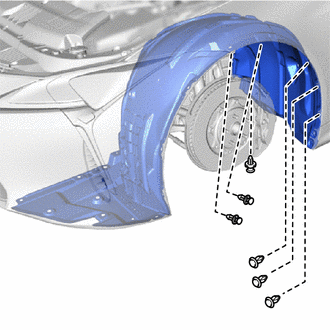
Install the 6 clips.
-
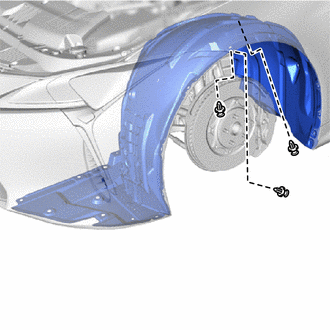
Install the 3 clips.
-
Install the 2 screws and clip.
-
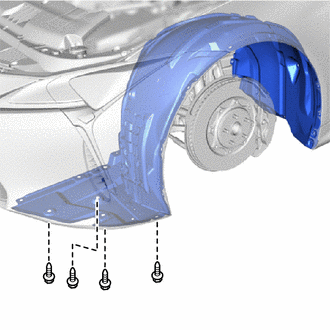
Install the 4 screws.
-
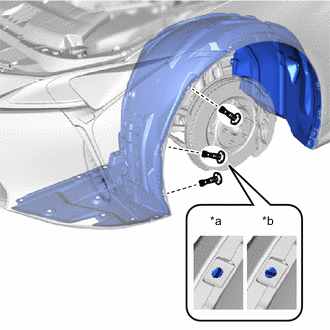
*a Correct *b Incorrect Install the front fender liner LH with the 3 pin hold clips as shown in the illustration.
-
-
INSTALL ENGINE SIDE COVER LH
-
Attach the claw.
-
Install the engine side cover LH with the 4 clips.
-
-
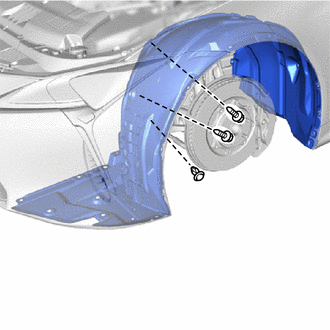
INSTALL FRONT WHEEL OPENING EXTENSION PAD LH
-
Install the front wheel opening extension pad LH with the 4 screws.
-
-
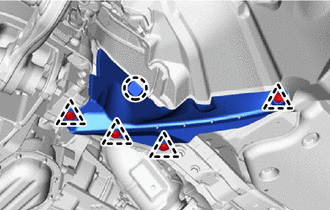
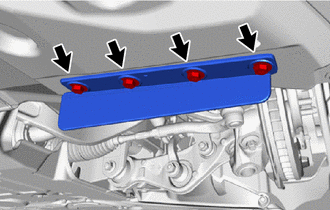
INSTALL NO. 2 ENGINE UNDER COVER ASSEMBLY
-
INSTALL NO. 1 ENGINE UNDER COVER ASSEMBLY
-
INSTALL FRONT WHEEL LH
-
CONNECT CABLE TO NEGATIVE AUXILIARY BATTERY TERMINAL
Note
When disconnecting the cable, some systems need to be initialized after the cable is reconnected.
-
INSTALL NO. 2 DECK BOARD
-
CHECK SRS WARNING LIGHT
-
PERFORM DIAGNOSTIC SYSTEM CHECK
-
ADJUST HEADLIGHT AIMING