OUTER REAR VIEW MIRROR GLASS REMOVAL
CAUTION / NOTICE / HINT
Tech Tips
-
Use the same procedure for the LH and LH sides.
-
The procedure listed below is for the LH side.
PROCEDURE
-
REMOVE OUTER MIRROR LH
-
Push down the upper part of the mirror surface and tilt it.
-
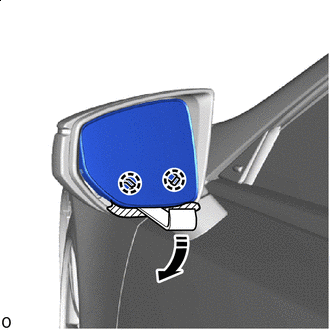

Push Down 
Protective Tape Apply protective tape as shown in the illustration.
-
Using moulding remover D, detach the claw.
Note
Do not forcibly pull on the outer mirror LH as the unit drive may detach, or the mirror surface part may break.
-
Push down the lower part of the mirror surface and tilt it.
Tech Tips
The claw will reattach if excessive force is applied when pushing down the mirror surface.
-
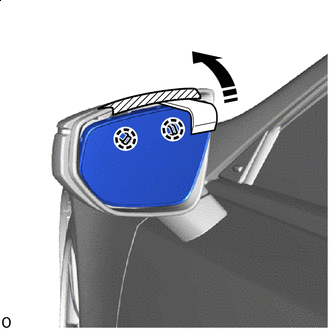
Push Up Protective Tape Apply protective tape as shown in the illustration.
-
Using moulding remover D, detach the claw.
Note
Do not forcibly pull on the outer mirror LH as the unit drive may detach, or the mirror surface part may break.
-
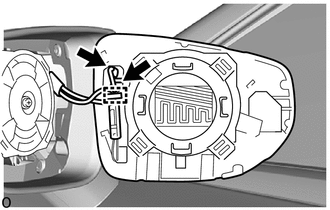
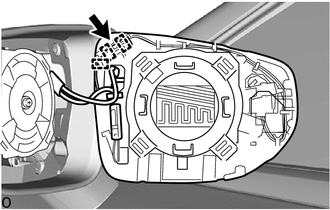
Detach the clamp.
-
Disconnect the 2 mirror heater connectors.
-
Detach the clamp.
-
Disconnect the EC mirror connector.
Note
-
Do not raise the claw higher than is necessary as it will damage the claw of the connector.
-
If the claw of the connector is damaged, replace the outer mirror LH with a new one.
-
If there is damage to the wire harness or an open circuit has occurred, replace the outer mirror actuator assembly LH with a new one.
-
-
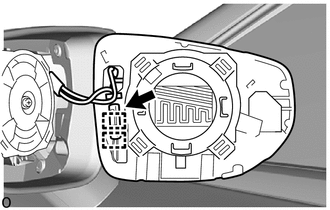
w/ Blind Spot Monitor System:
-
Detach the clamp.
-
Disconnect the blind spot monitor indicator connector to remove the outer mirror LH.
Note
-
Do not raise the claw higher than is necessary as it will damage the claw of the connector.
-
If the claw of the connector is damaged, replace the outer mirror actuator assembly LH with a new one.
-
If there is damage to the wire harness or an open circuit has occurred, replace the outer mirror actuator assembly LH with a new one.
-
-
-